How to Root Fig Cuttings Using the figPop Method
By Danny Gentile
Photos by Dominic Gentile


The road to fig rooting success is long, a little bumpy, but attainable by just about anyone. In this article, we’re going to give you a short primer then jump right into rooting. There should be more than enough material here to get you going with equipment, supplies, and ideas.
What is a figPop? A figPop is a variation of the popular ‘rooting-in-a-bag’ technique. It was developed by Ben B., a Washington state fig grower, and collector. Ben, like most of us, was tired of practicing method after method only to lose more expensive cuttings over and over. So Ben began experimenting with several promising 'rooting-in-a-bag' methods commonly used among horticulturists of several different plant species. After some trial and error, he settled on a combination of variables used by figgers and plumeria growers. He further refined the method into a standardized form so growers could readily acquire the materials needed to complete a full round of rooting in it's simplest form. Ben proved his method and released the results on his blog, Seattle Garden & Fruit Adventures, and several short videos where he introduces and explains how to use the simple figPop method of rooting.
How to root figs 1: The Fig Pop method
How to root figs 2: The Fig Pop method
How to root figs 3: The Fig Pop method
The figPop checks all the boxes:
- figPop’s are simple – Anyone at any skill level can assemble a figPop in no time.
- Fig Pop’s are economical – figPop’s are probably the cheapest method of rooting a fig cutting next to sticking it in the ground.
- Space-friendly – figPop’s take up 60%-70% less space than other traditional methods of rooting fig cuttings. This can really make the difference that adds to your rooting success.
- Portability – Fig Pop’s are small so they're easy to move around and trade. figPop’s are also shipping friendly
- No humidity chamber necessary – The nature of a figPop eliminates the need for a humidity chamber (bin).
- No gnats – That’s right, I said it. No gnats!
- Less mold – We will never completely eliminate mold. When figPop's are assembled correctly, there is a noticeable difference in the number of moldy cuttings vs. other rooting methods.
- No mess – You have the option to fill your figPop baggies before-hand and add fig cuttings later.
figPop’s are not fool-proof. But after killing thousand’s of fig cuttings, history has taught me that over time, figPop’s perform better than pre-rooting, cup methods, or other difficult rooting-in-a-bag-methods.
What supplies do we need to assemble a figPop? The figPop supply list is short and most of the items are probably already in your own home. You’ll need:
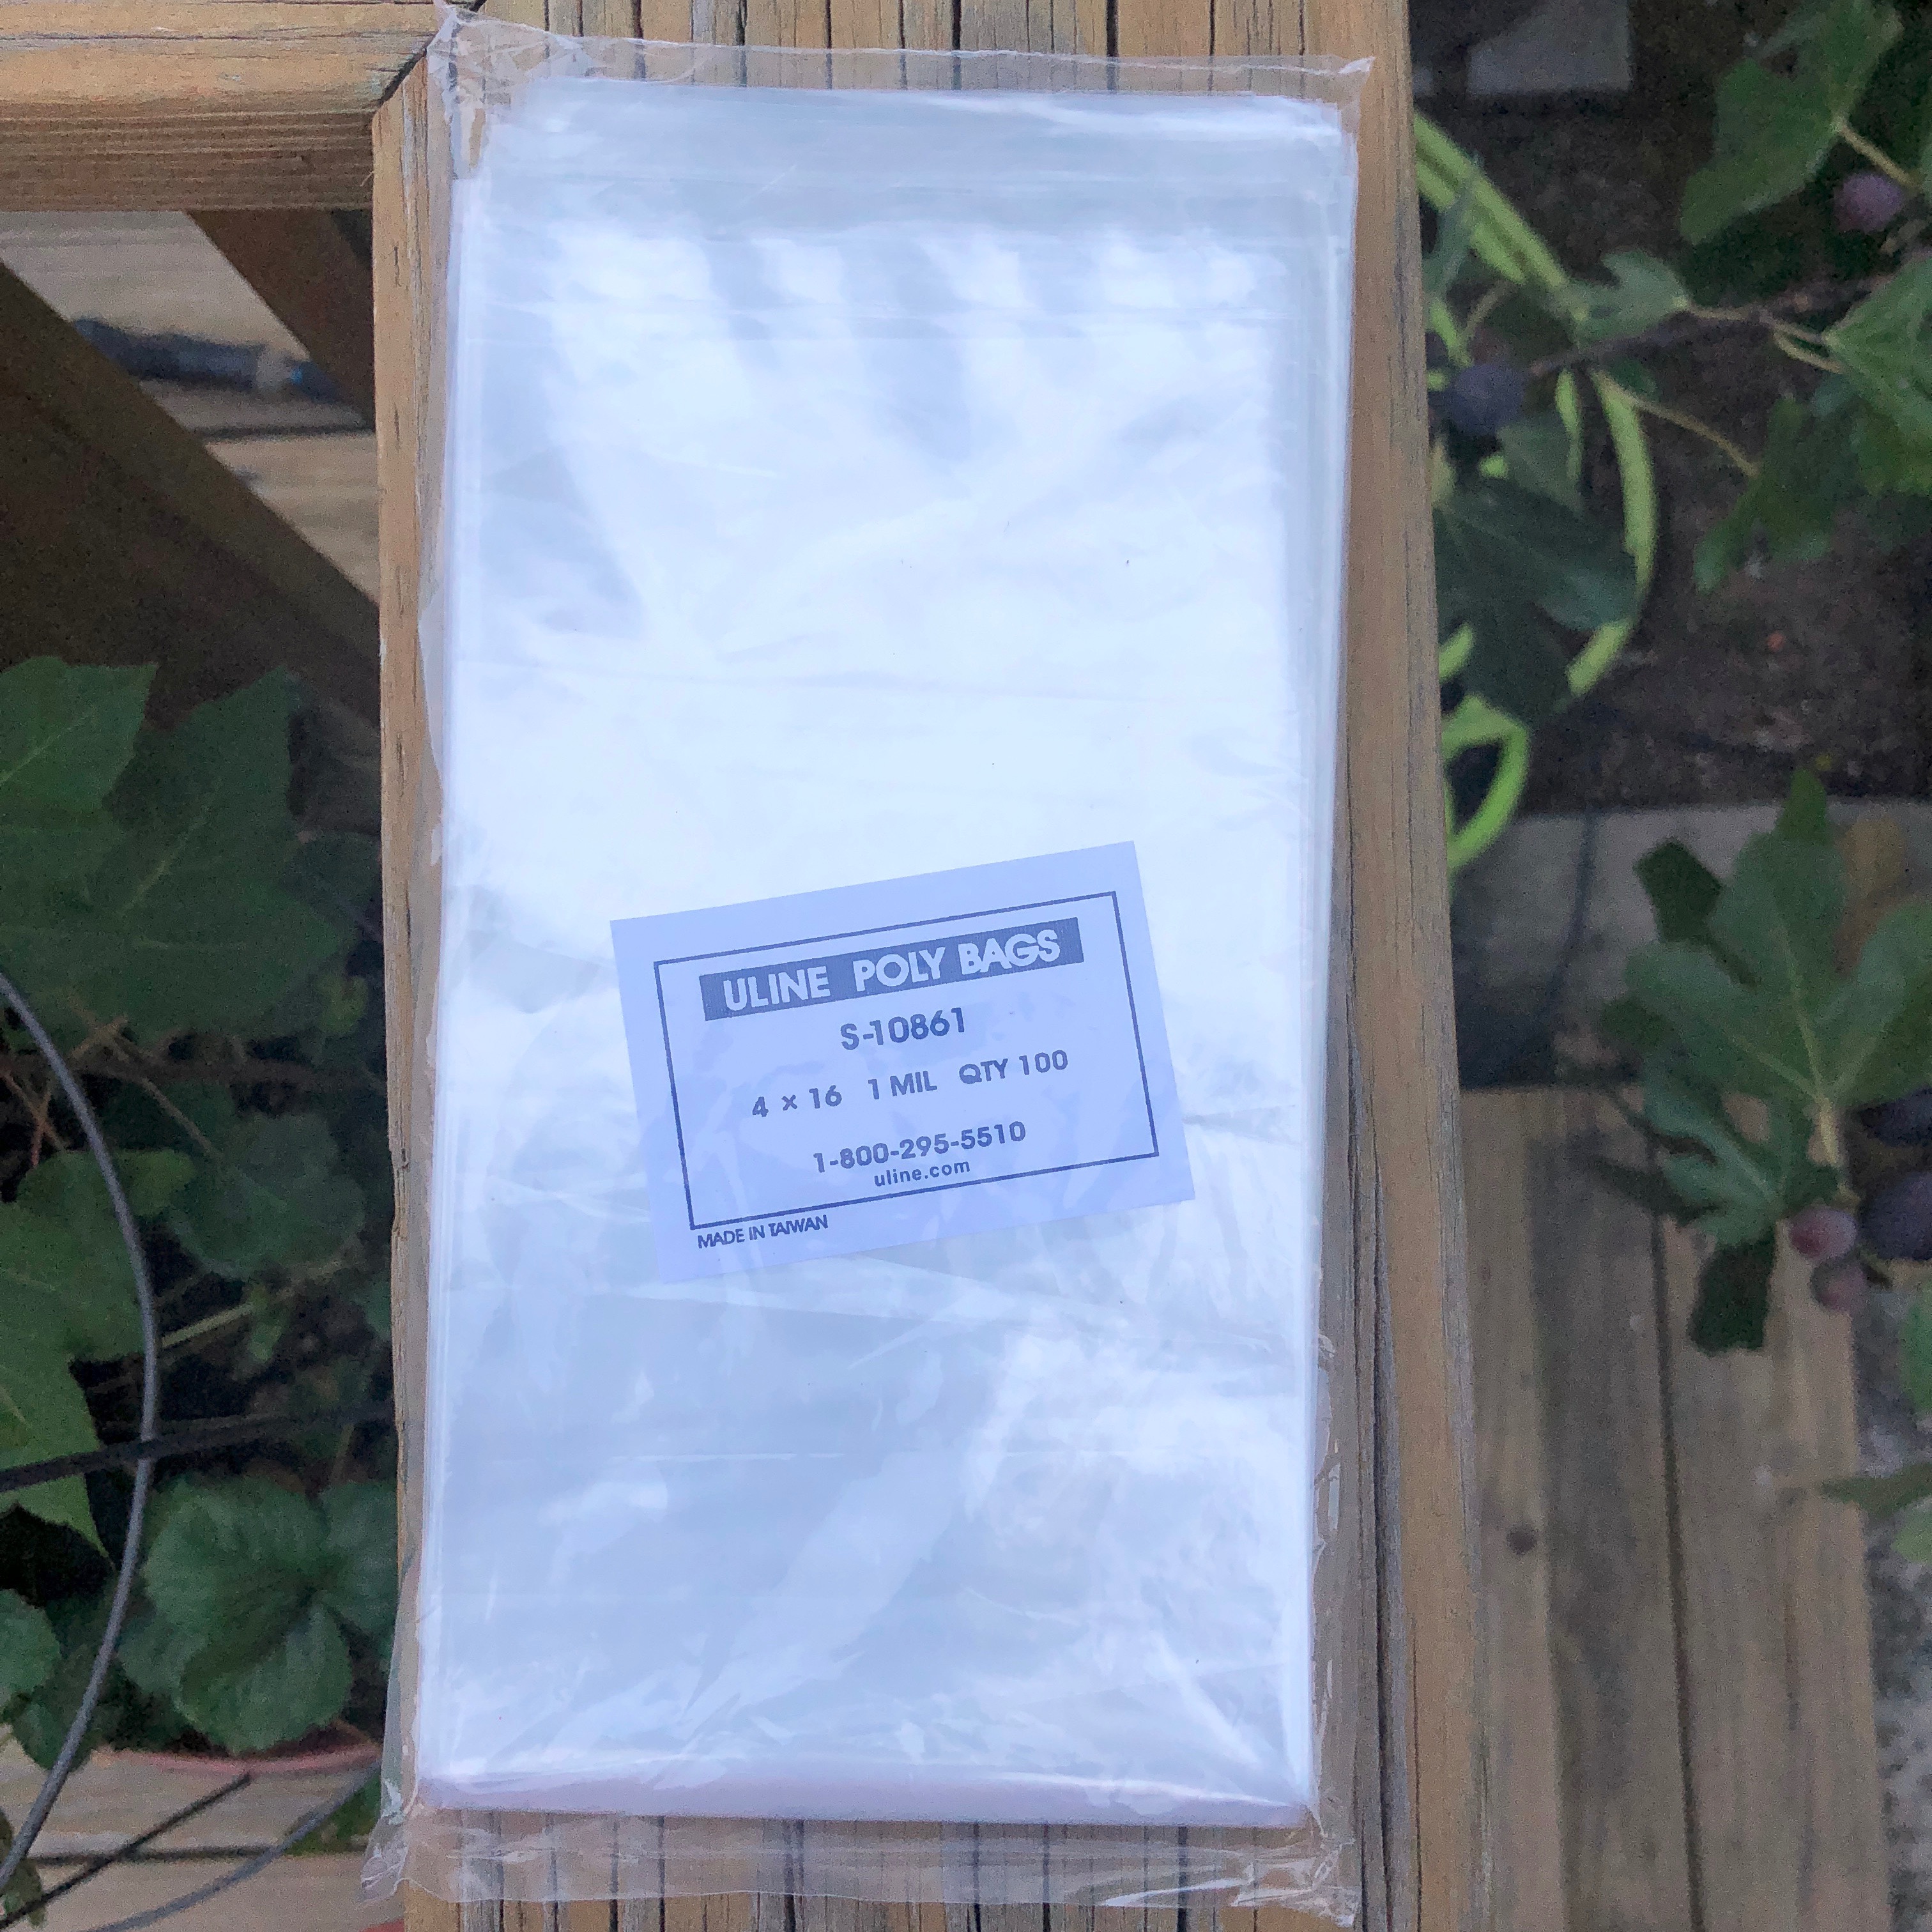
- 4” x 16”, 1 Mil, Poly bags – They’re cheap enough to buy. Buy them on figBid.com or from other online retailers.
- Quality potting mix – I find Pro-Mix HP is the best but any quality potting soil will do.
- Rubber bands – Have enough on hand for the amount of 4” x 16” bags you purchased. #32 rubber bands are good for general use. #18 rubber bands are good for shorter or thinner cuttings.
- A few toothpicks – Nothing special here. Used to make holes in baggies after roots and leaves have developed.
- Fig cuttings – It’s easy to root everything in sight. Please root the amount your comfortable taking care of or trading away.
- Roll of transparent tape – Or similar, to seal the figPop bag.
- Your favorite pruners
- Rubber gloves – not necessary but recommended.
First things first. Always start with the freshest material you can get your hands on. Brown (lignified), pencil-thick material, at least 9" long, with at least 3 nodes is best. Do not use newer green growth. Either purchase your cuttings from trusted seller’s or source fresh fig material locally. If you’re just starting out I would suggest you source fig material locally and assemble your figPop’s right after cutting. Doing it this way will net you the best results. Other than sourcing your own locally grown fig material, I will suggest that you buy cuttings directly from any of the larger sellers as this will afford you the freshest cuttings material possible. Please read my article on Buying Fig Trees and Cuttings Online.
Second, mark your cuttings by variety name. Please do not go any further without completing this step. Either keep them separated with a label or write on the bark with a paint pen or label with colored marking tape and tie around each cutting or… you get the idea. This is where you can make a major boo-boo that will take 3-5 years to clear up.
Next, clean your fig cutting material and your pruners. Put on your rubber gloves. Remove remaining leaves and any remaining figs. Give your fig cuttings a bath in 10% bleach solution (1 part bleach to 10 parts water). You can scrub the cuttings with a light nylon brush (fingernail brush) if you wish but scrubbing is generally not necessary unless there is visible dirt or grime that should be removed. A light massage with rubber gloves usually works just fine. Remove the cuttings from their bleach bath and place on a piece of cardboard to air-dry. Wash your pruners in the bleach bath as well. Save the bleach solution and clean your pruners after every few cuts.
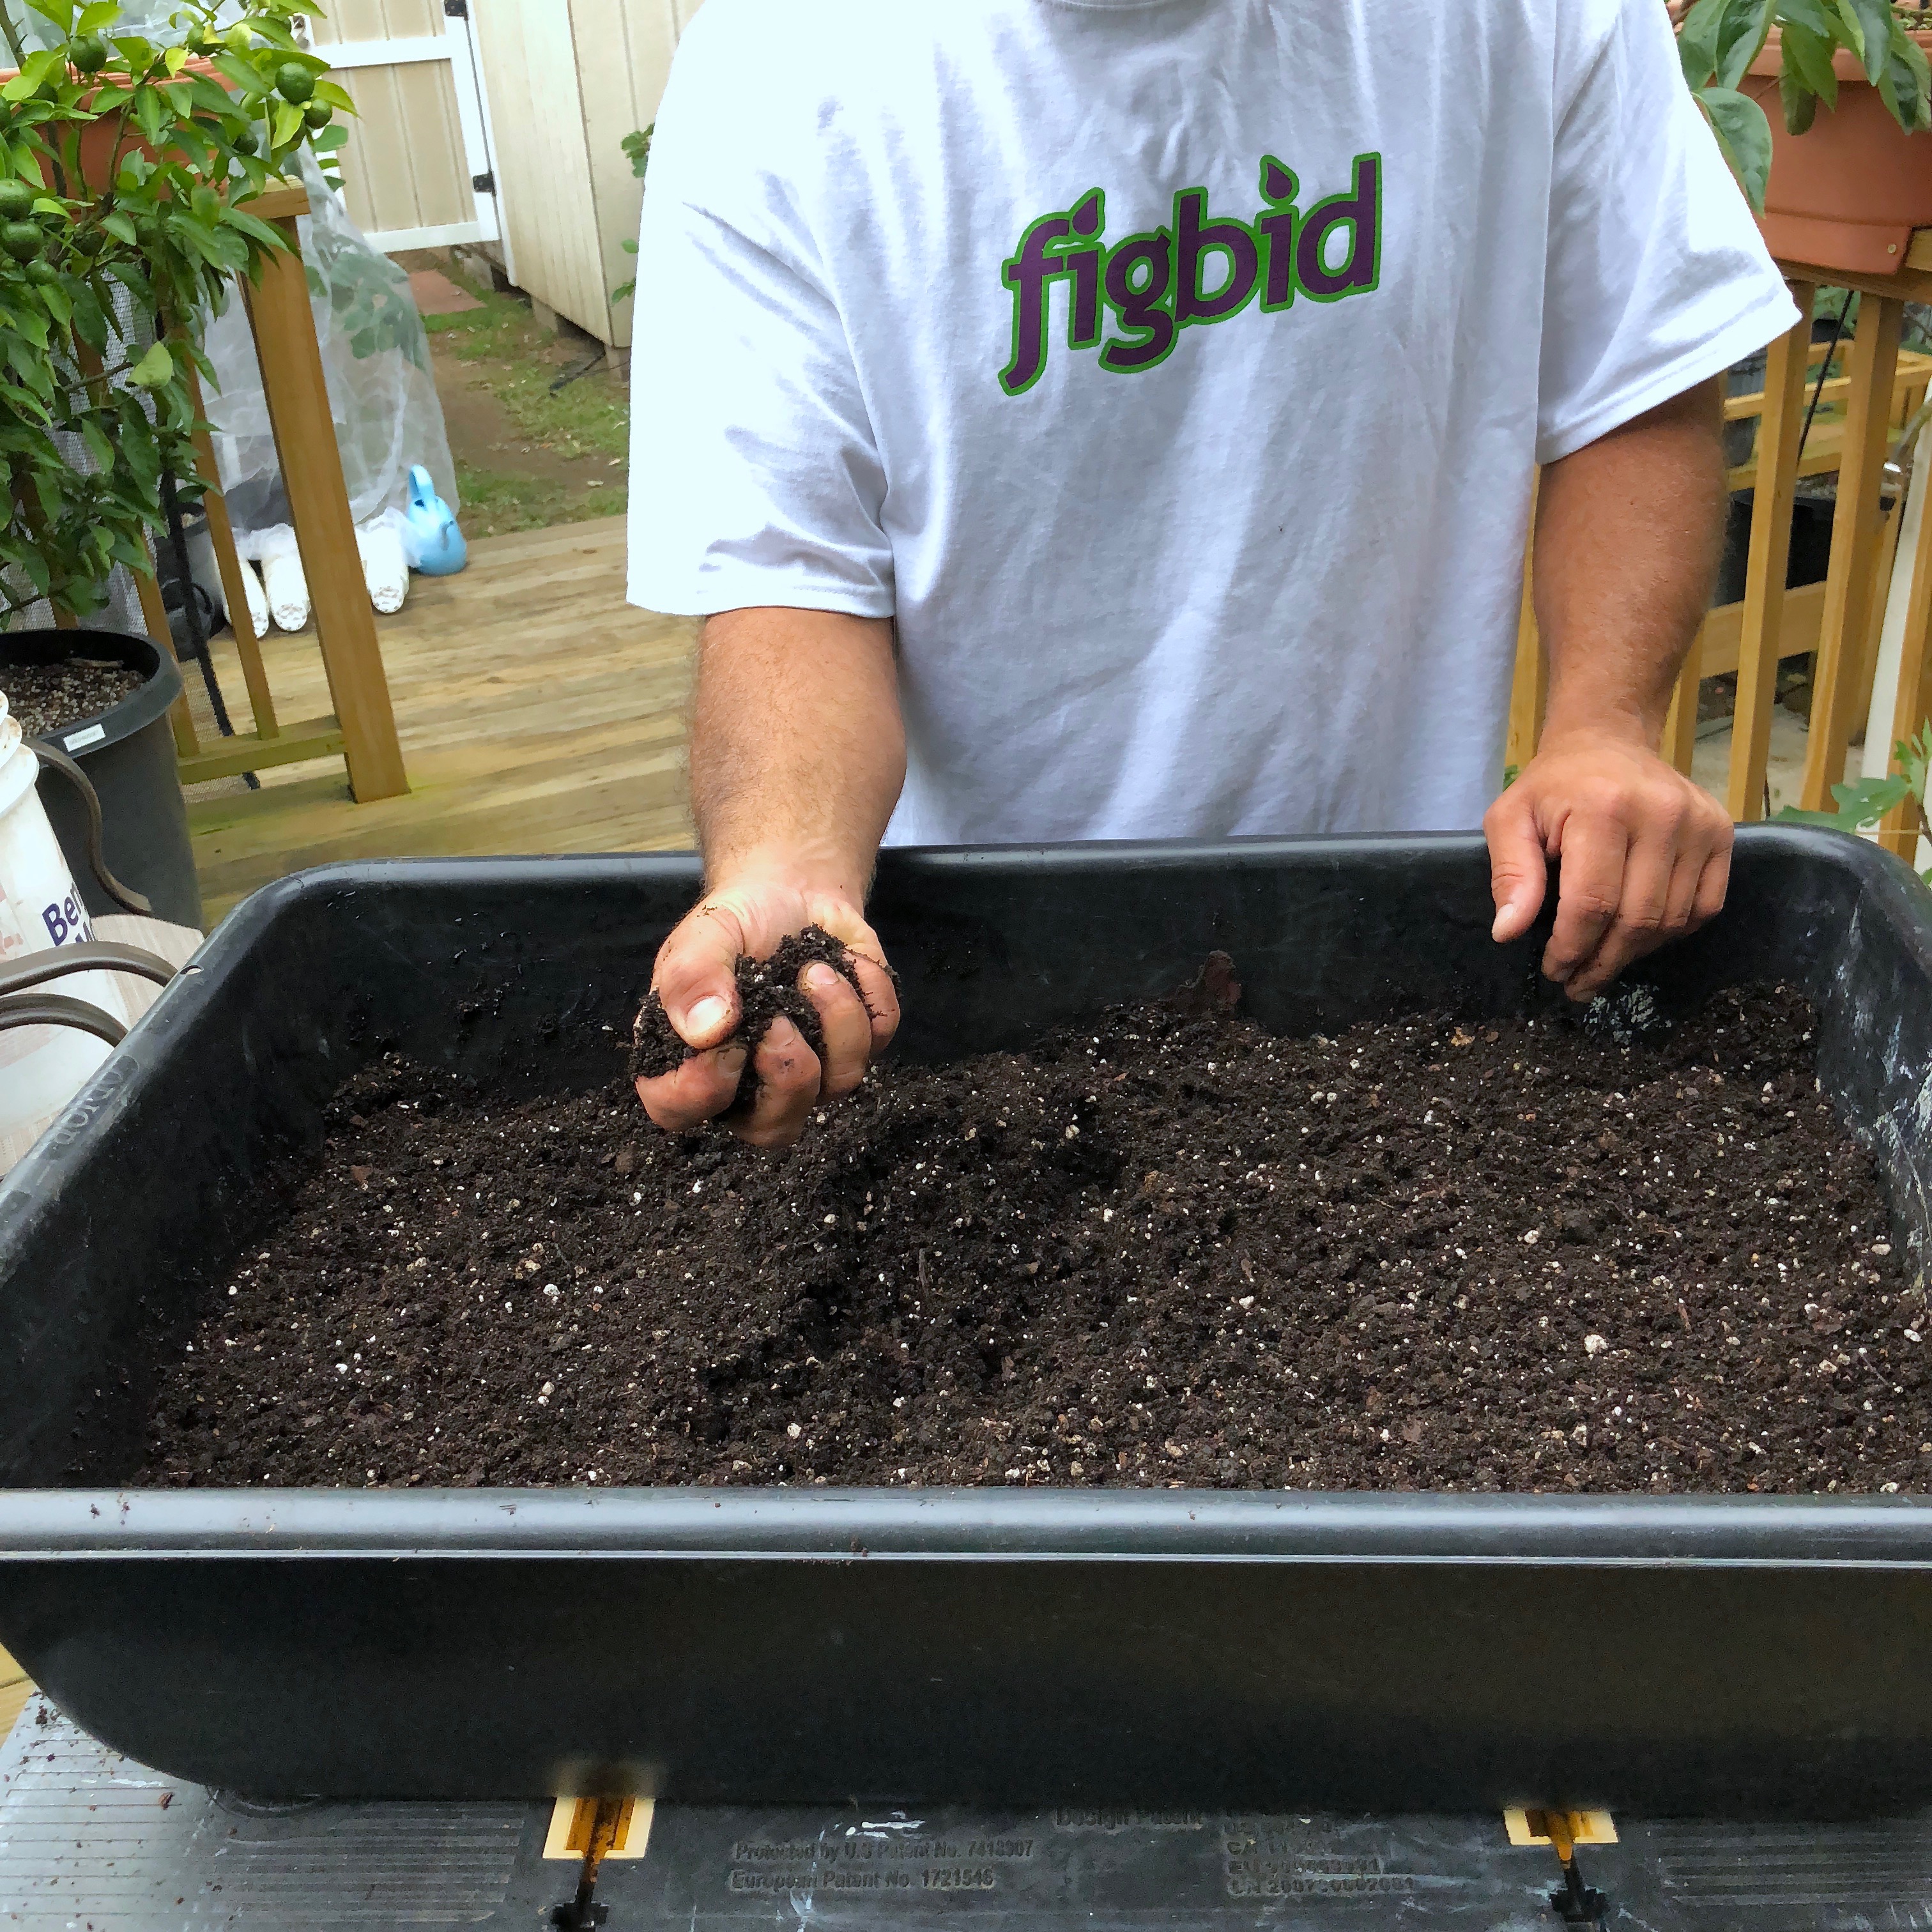
How to assemble a figPop? figPop’s are a true set-it-and-forget-it method of rooting. I assemble our figPop’s in a large-sized concrete mixing tub set on a table. Concrete mixing tubs are cheap and durable. They can be used for any number of horticultural chores and are easily found in any of the larger home improvement stores or your local hardware store. You could also use a short storage container or similar bin to add your potting soil and assemble your figPop’s.
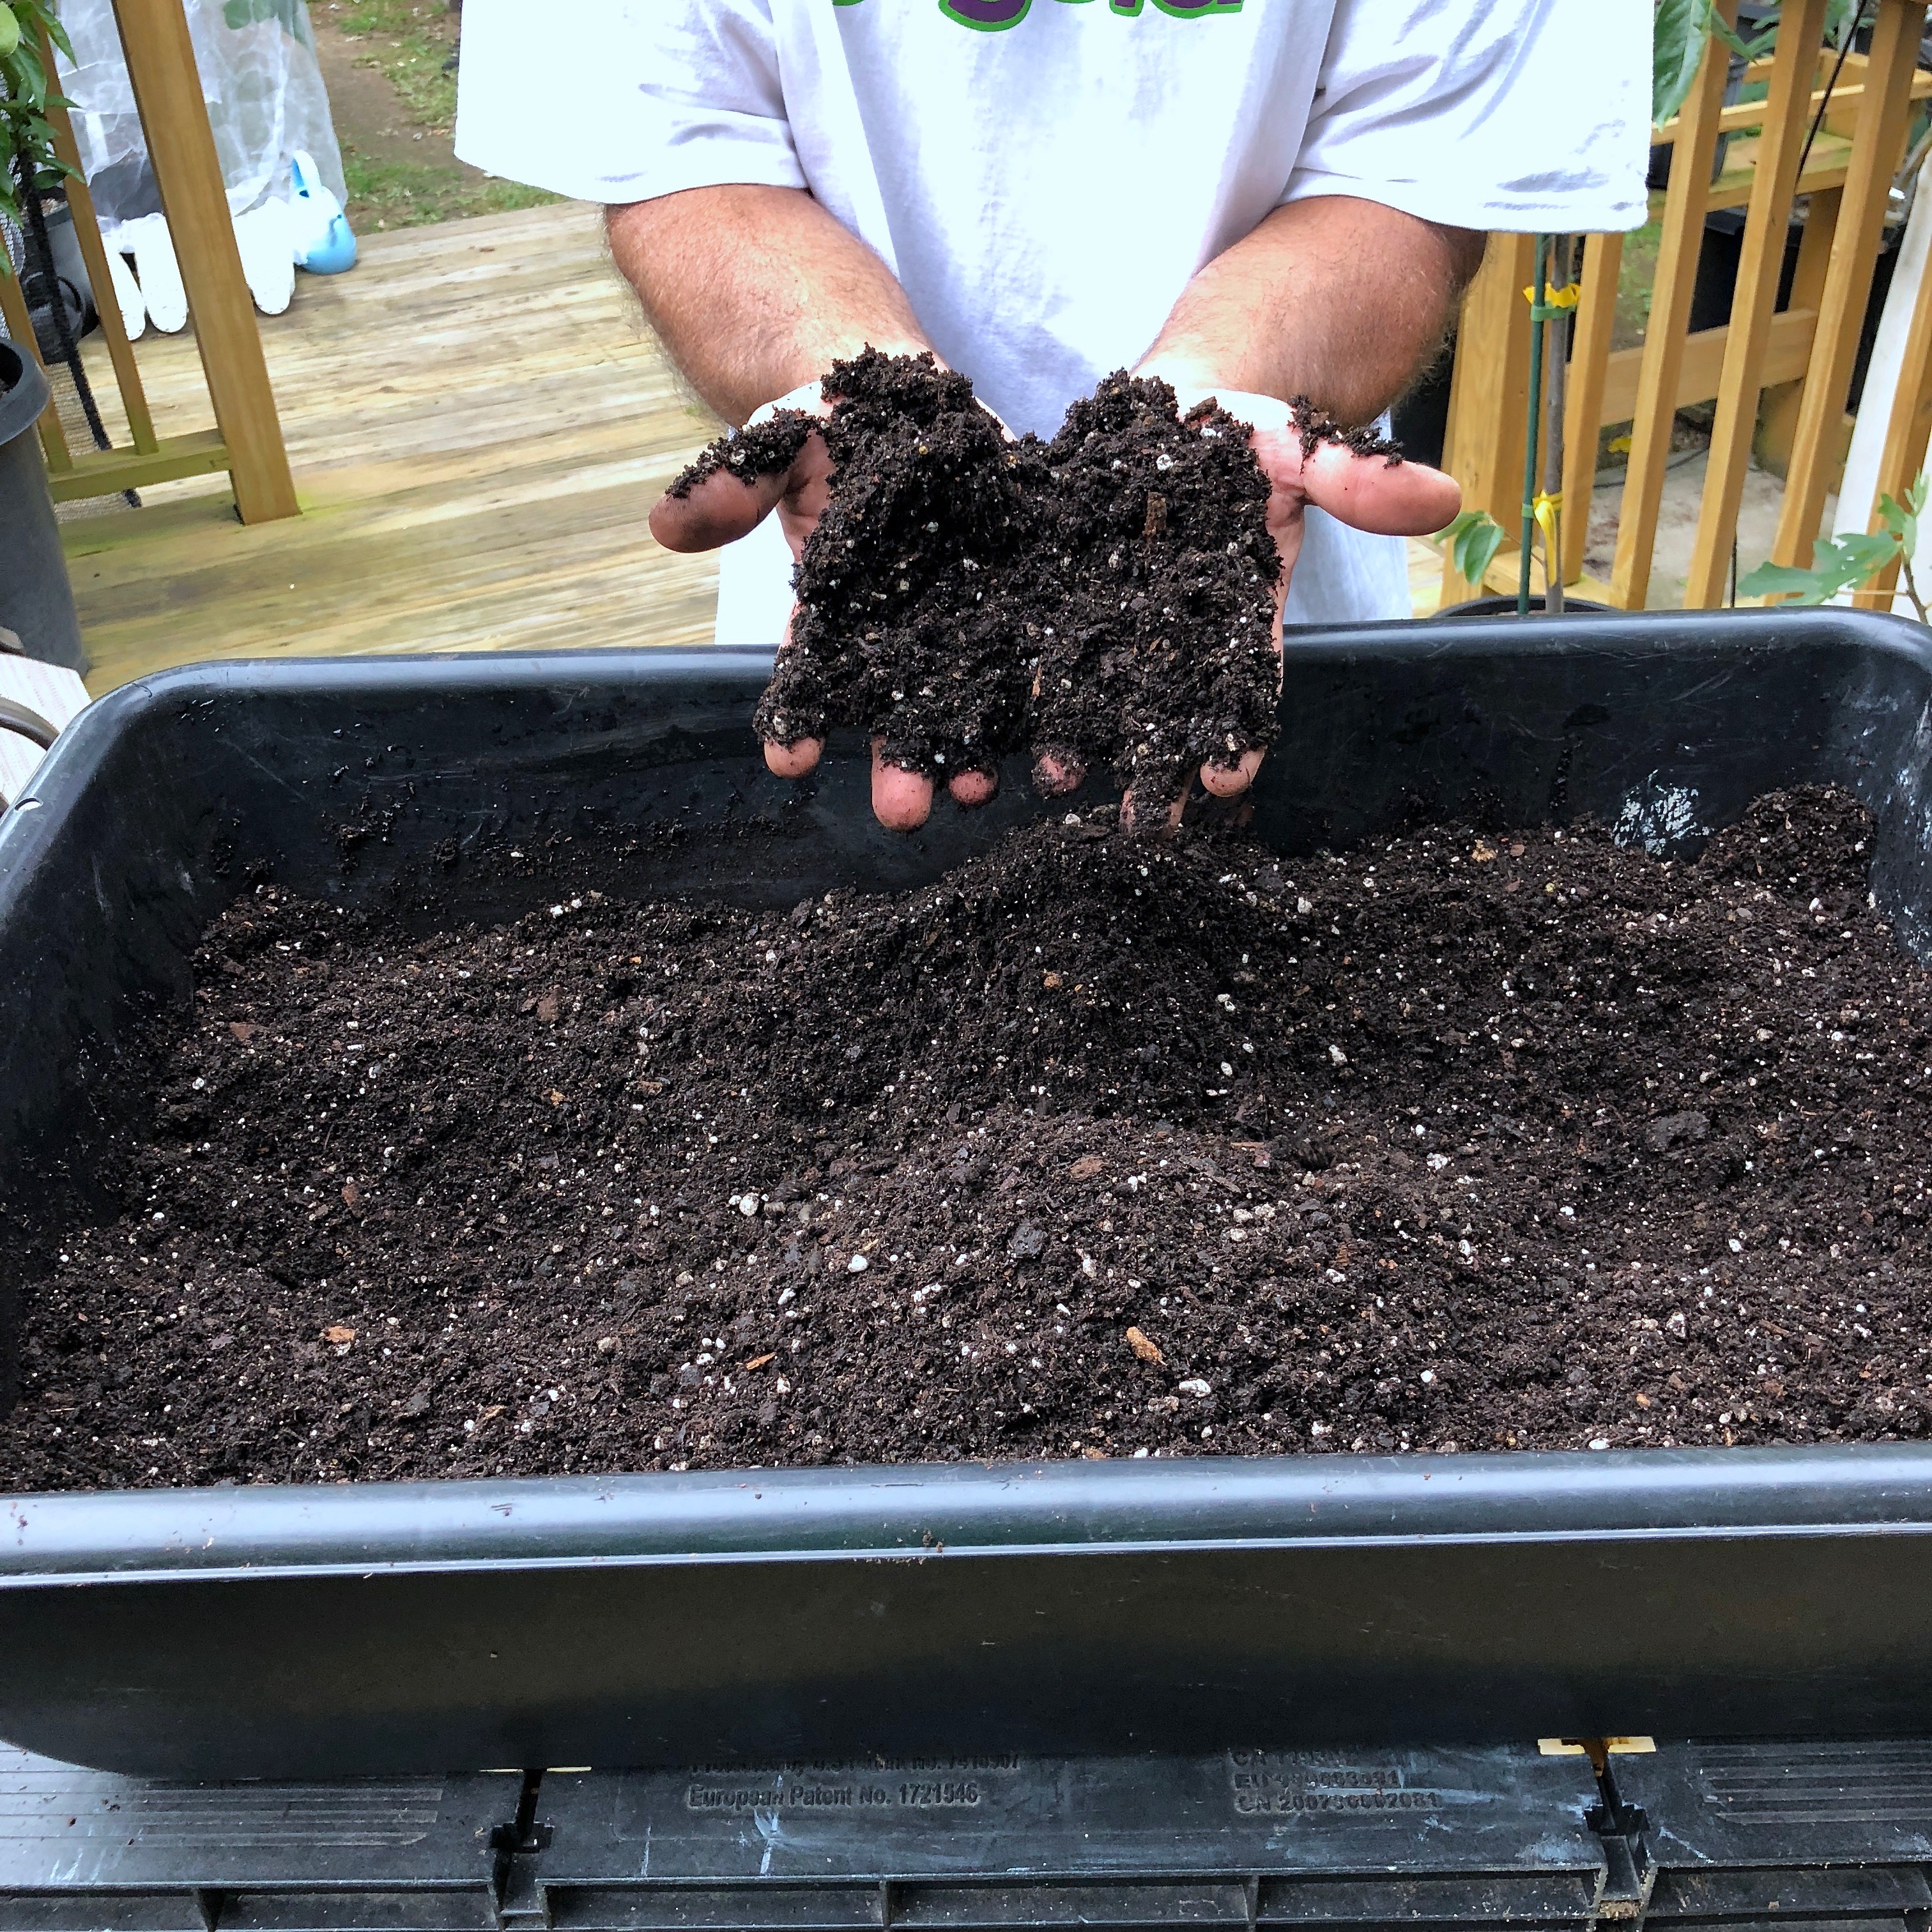
- First, add your potting mix to the tub. Add more than you think you’ll need. The excess potting soil is easier to work with. When you're done, return any extra potting mix to the bag.
- Next, moisten the potting mix with water, mix it well and let stand for 10 minutes so the potting soil becomes uniformly moist. You don’t want the mix to be wet. That is, when you squeeze a handful of potting mix, water should not run from between your fingers. Make the potting mix just moist enough that it will clump when squeezed tightly in your fist, but falls apart easily when touched. The mix should 'fluff' or aerate easily when tossed in the tub with both hands. A bit of trial and error is useful here as there is no magic amount. When you think you have the proper consistency, let the potting mix sit for an additional 10 minutes and check it again. After a few rounds of cuttings, you’ll know the correct moisture level just by touching the potting mix.
-
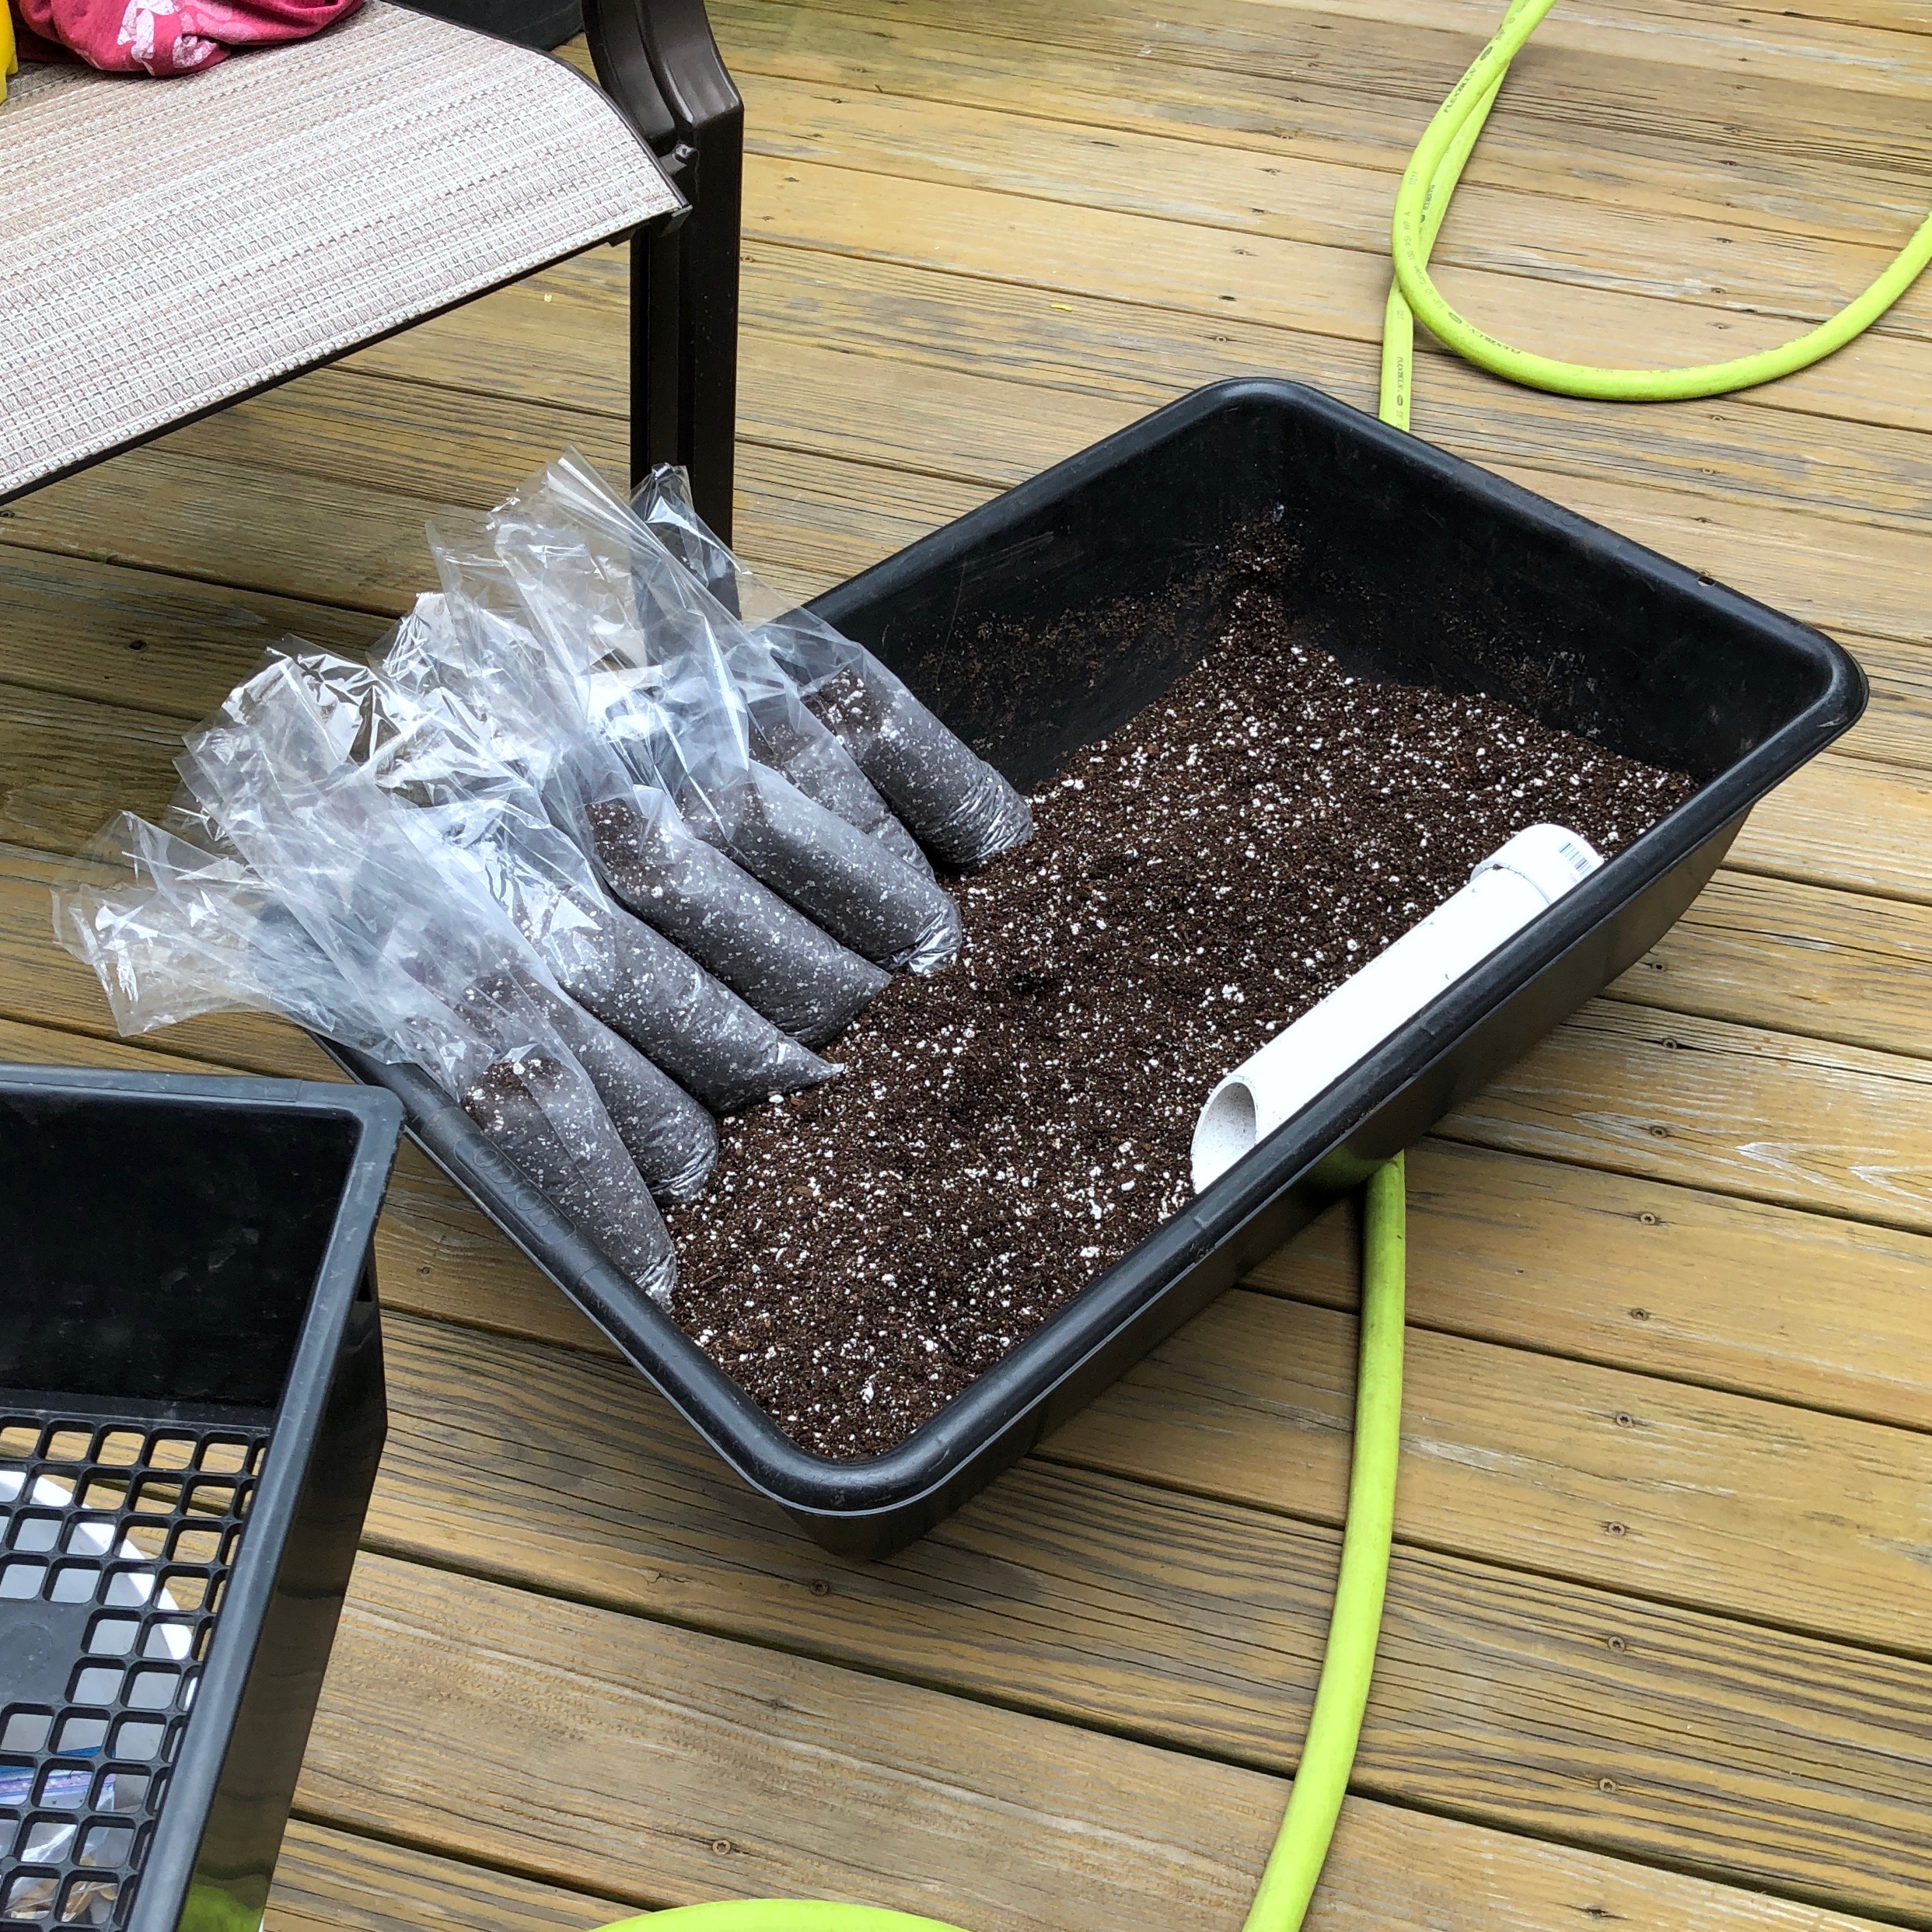

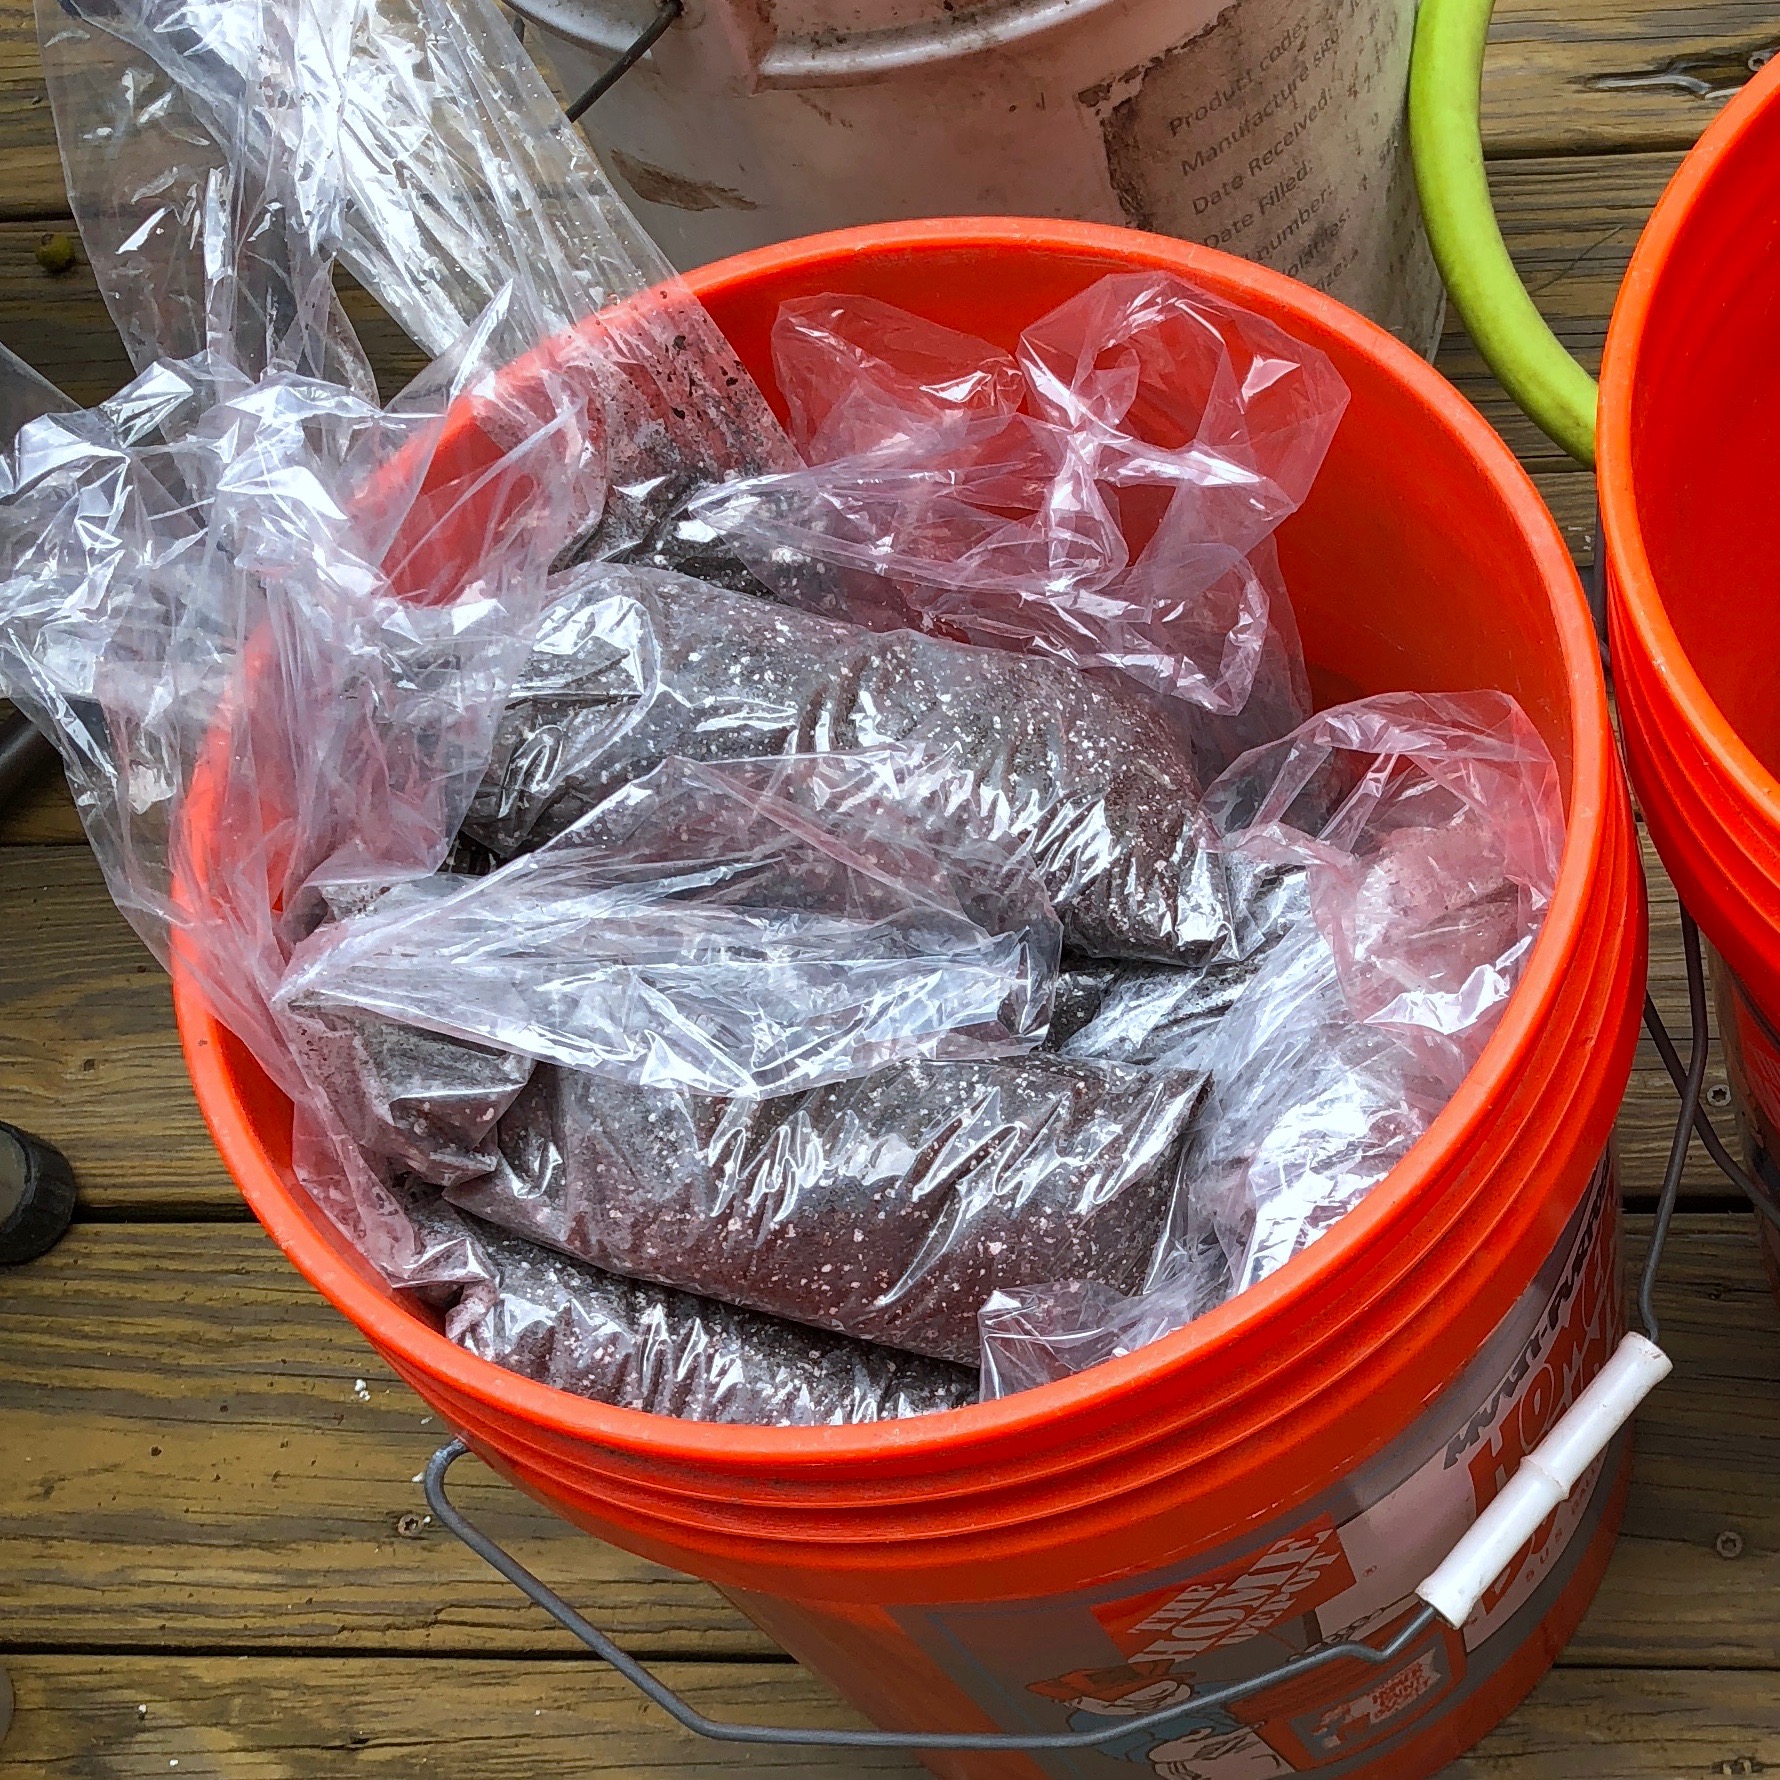
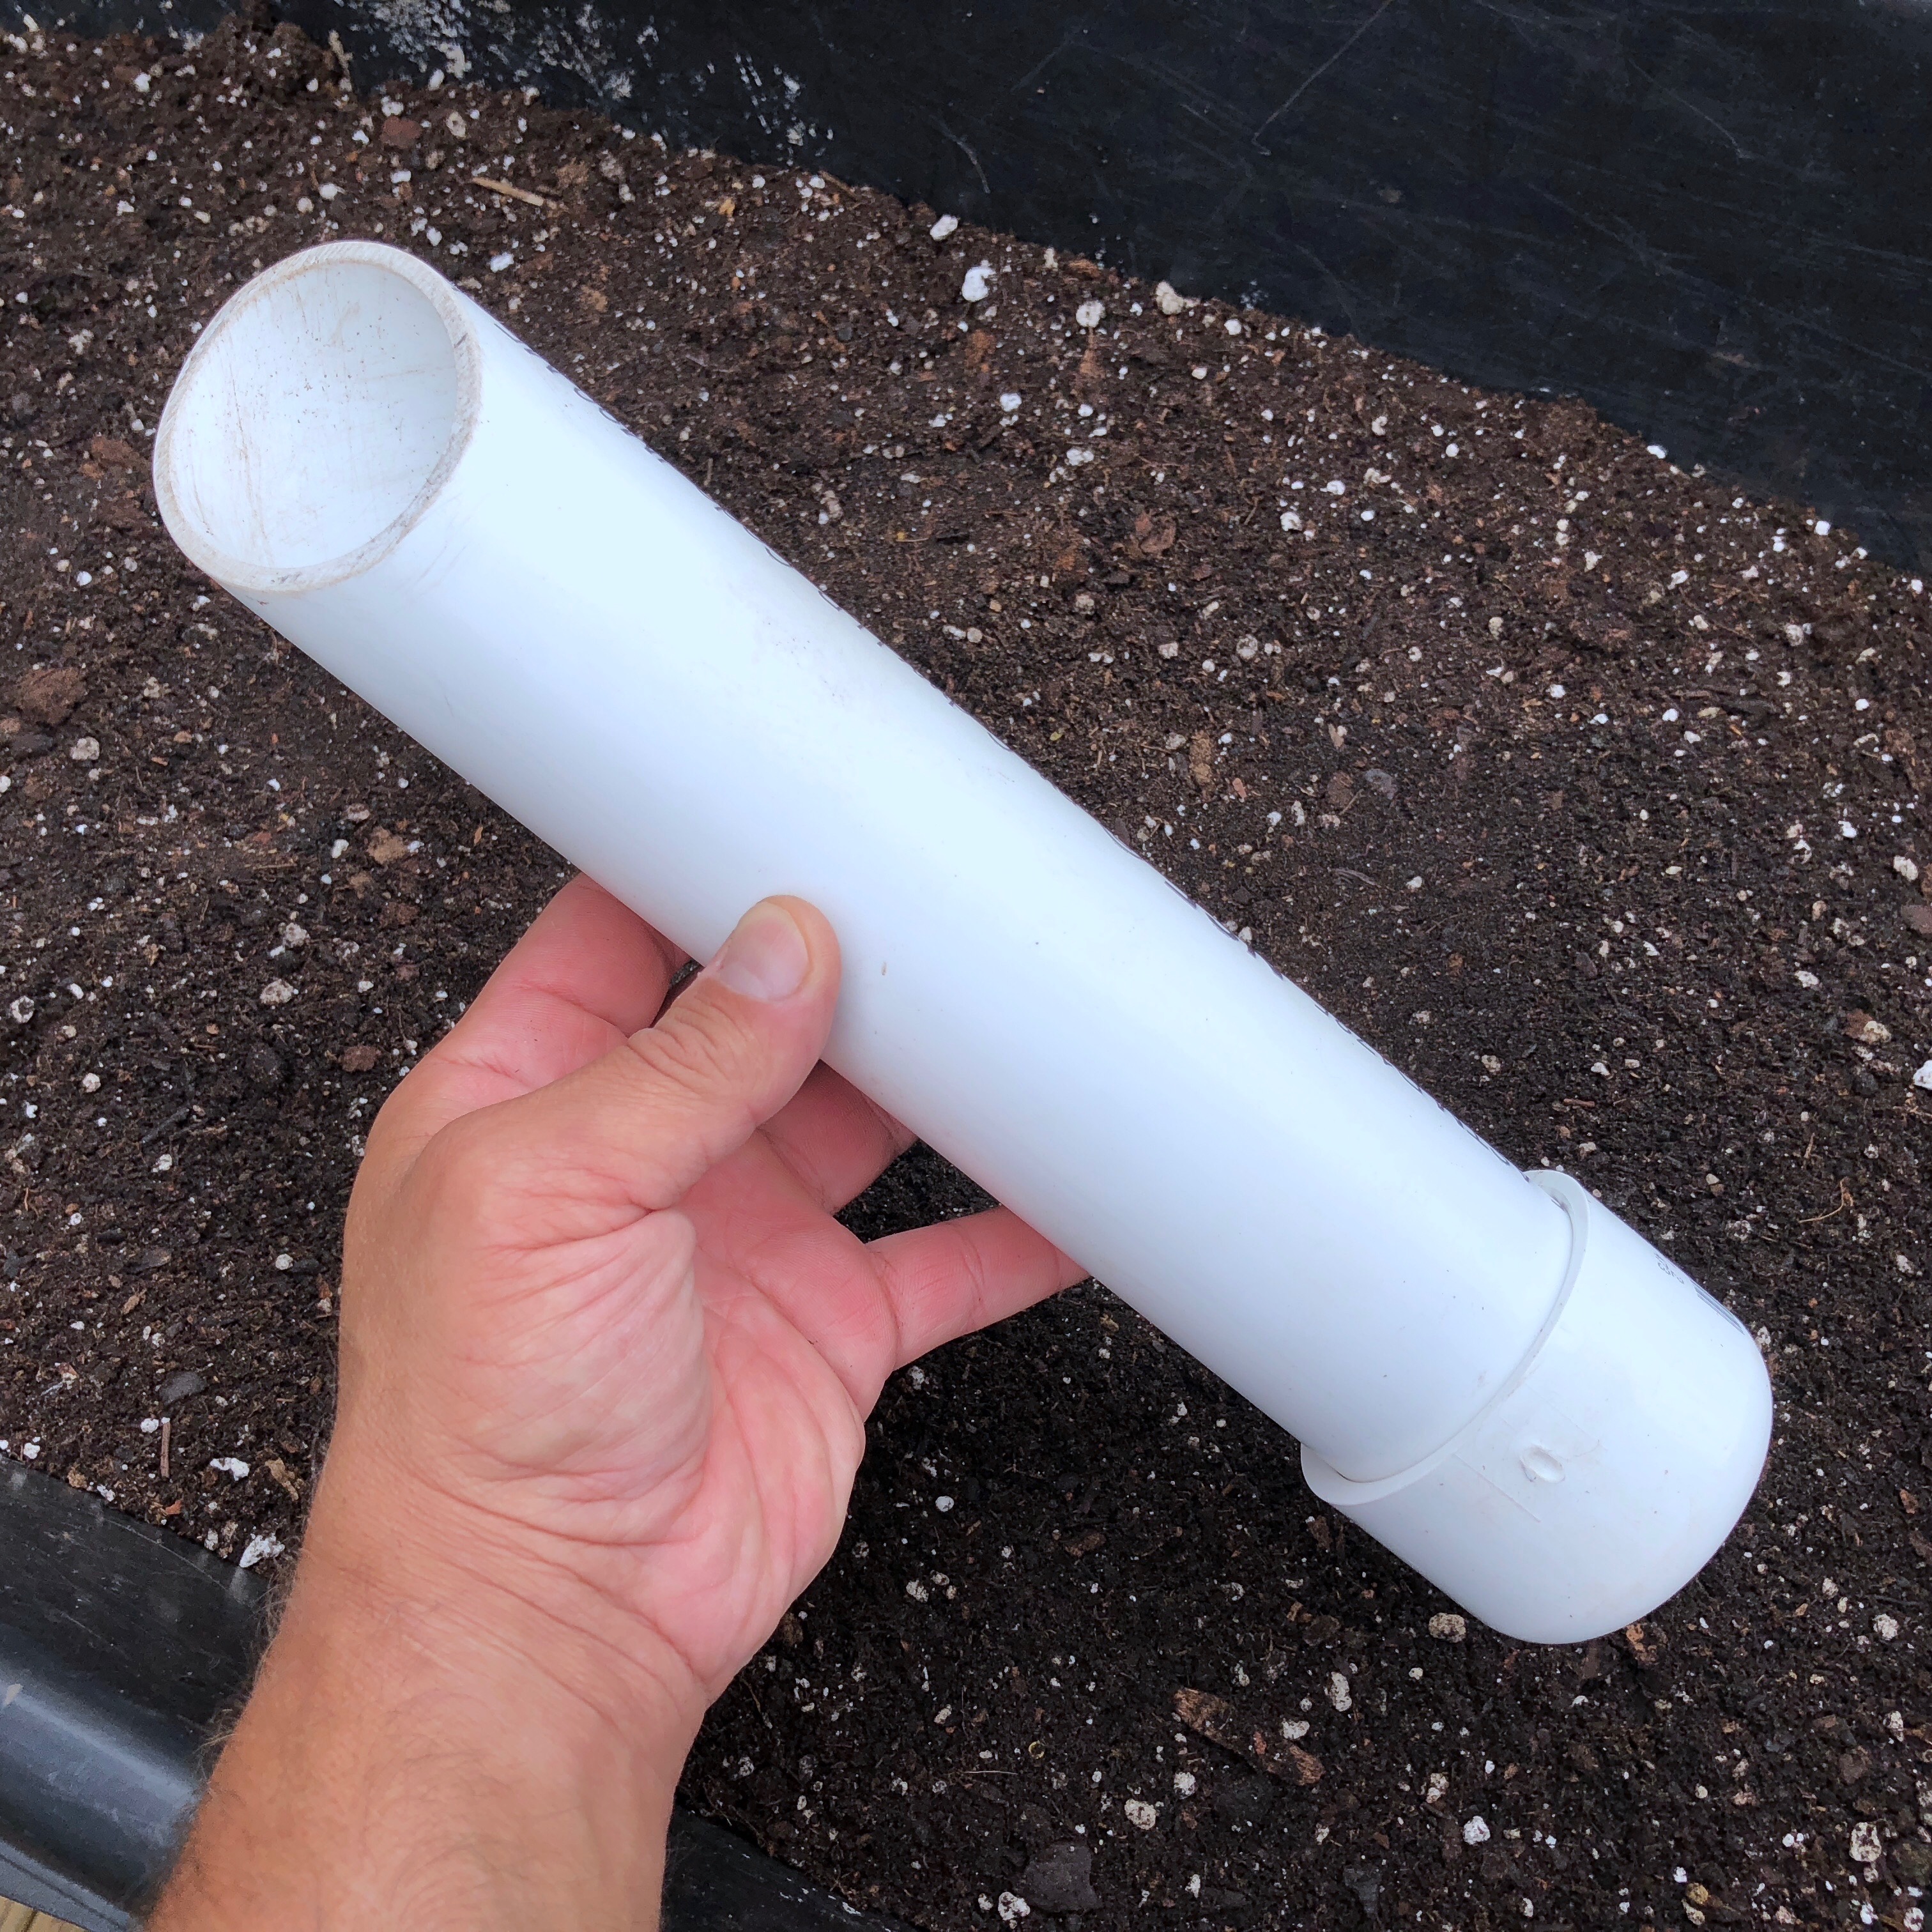
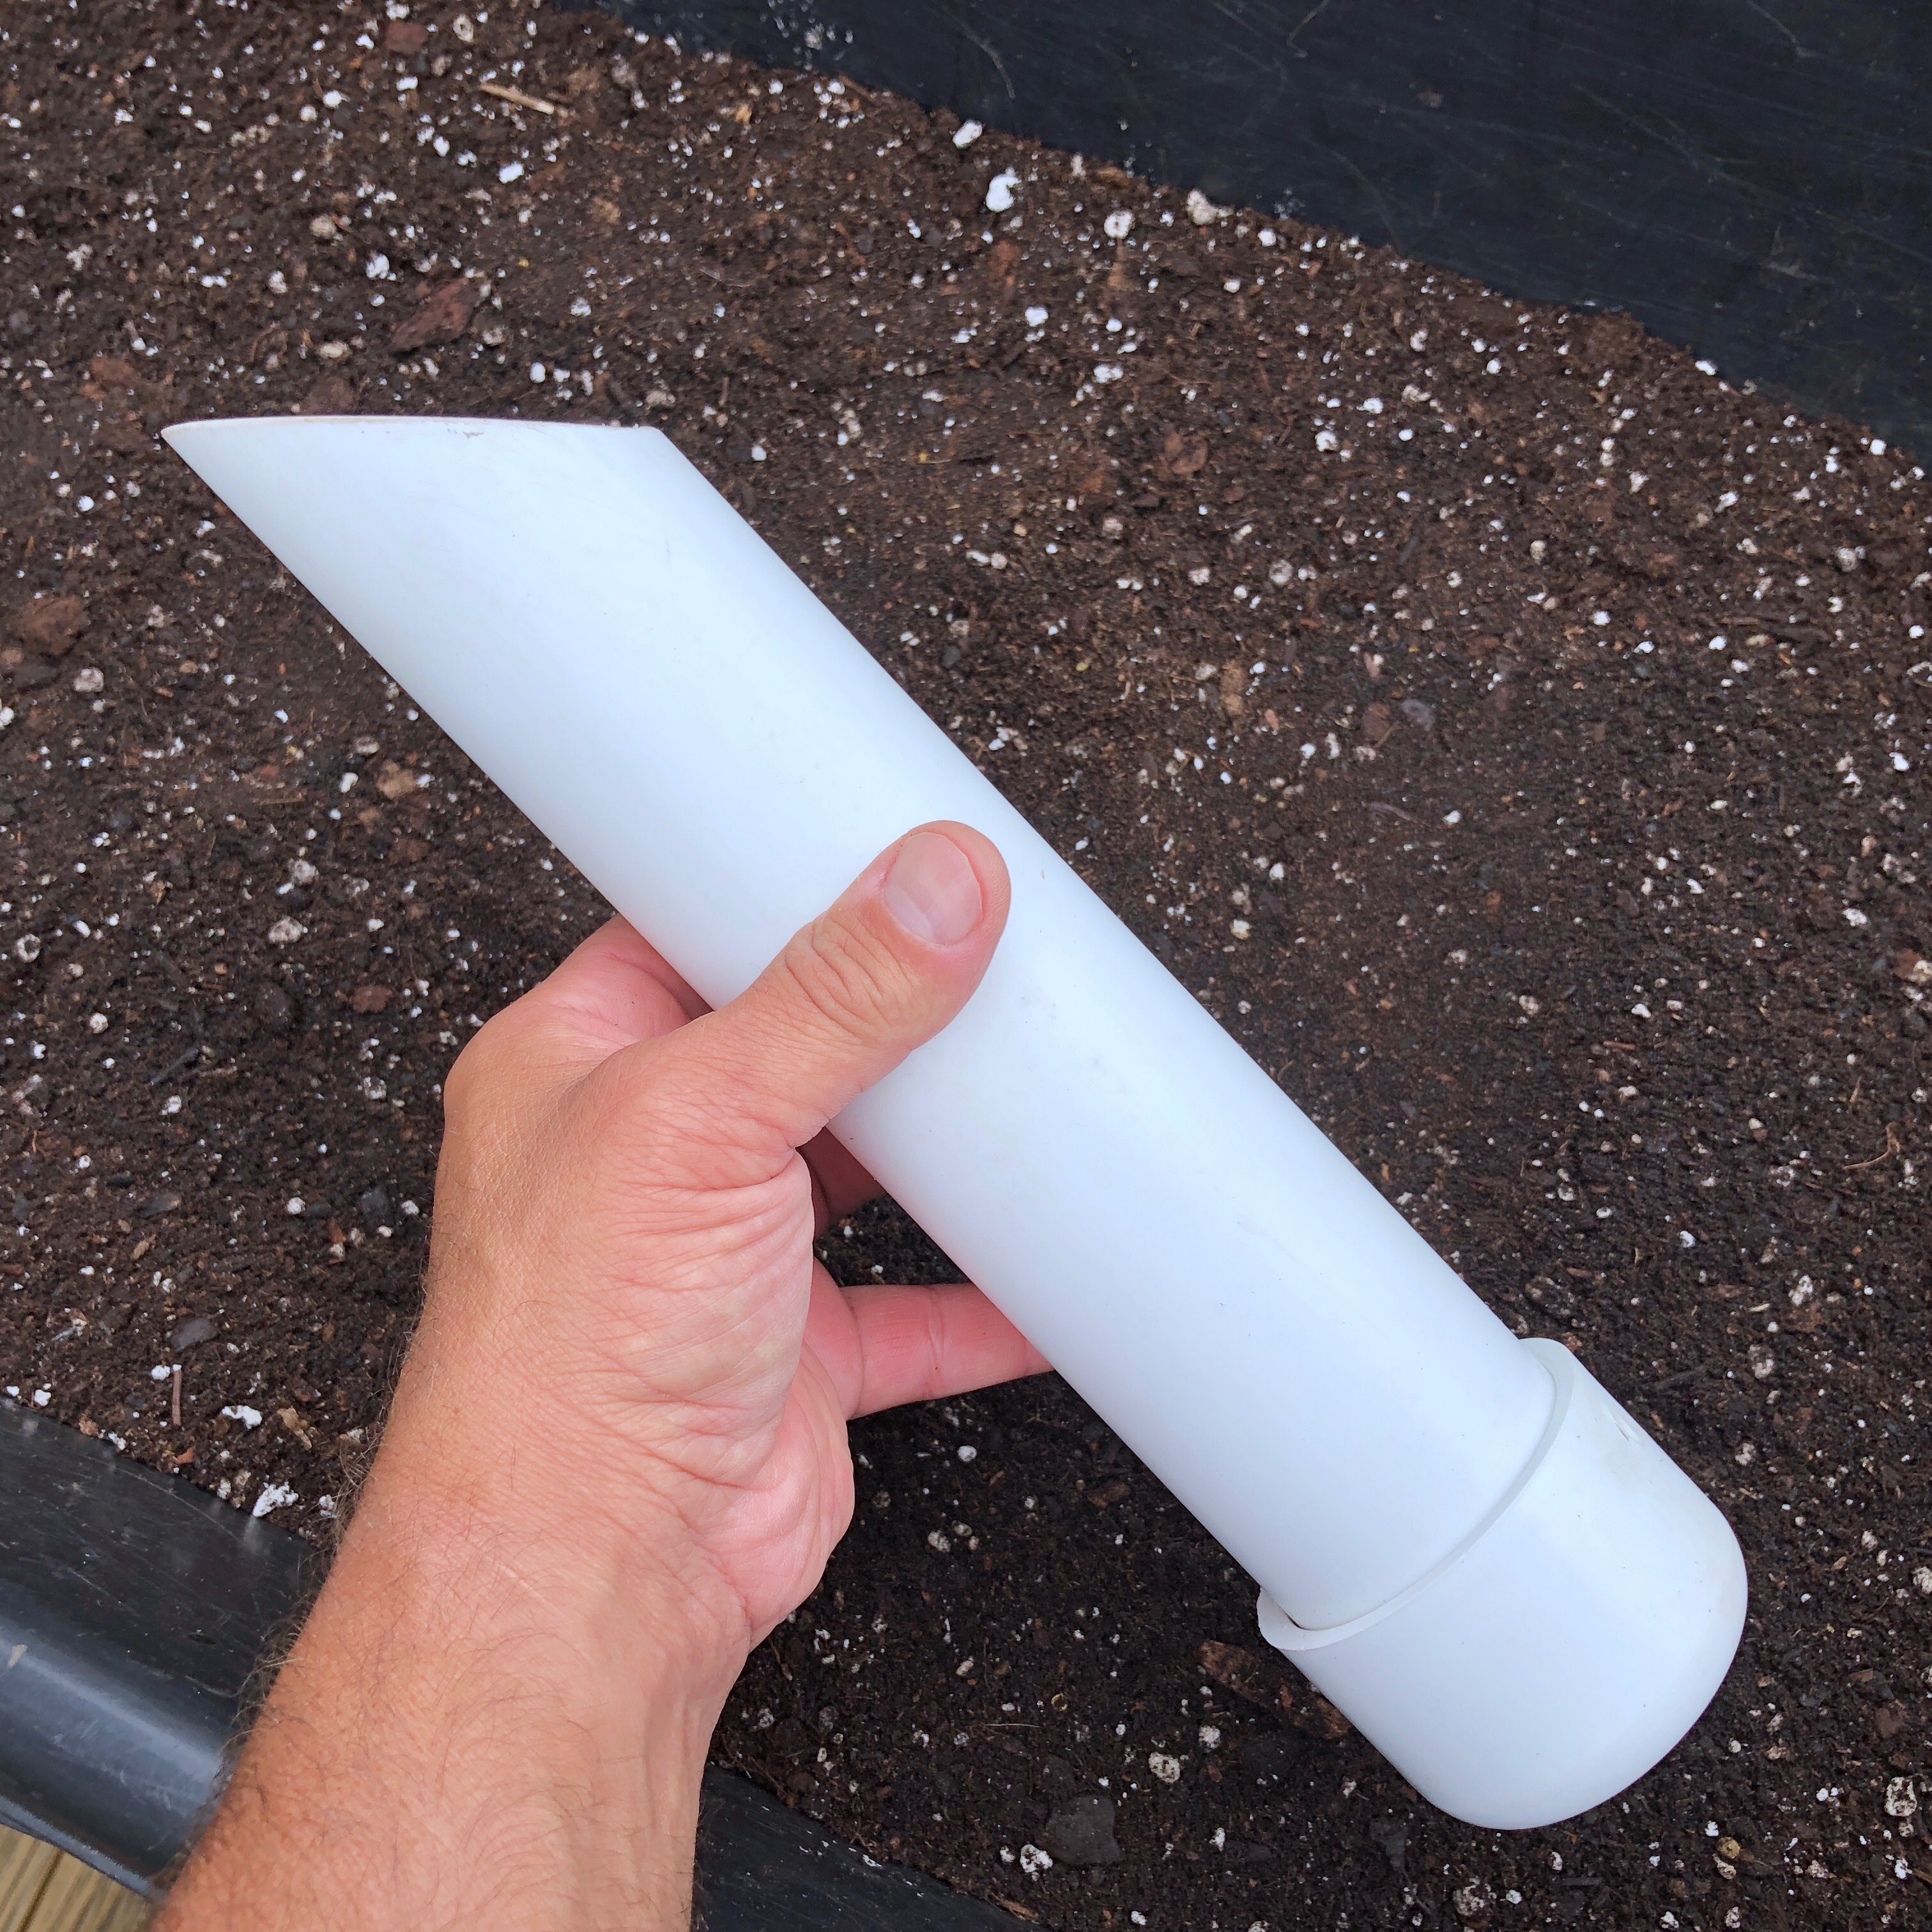
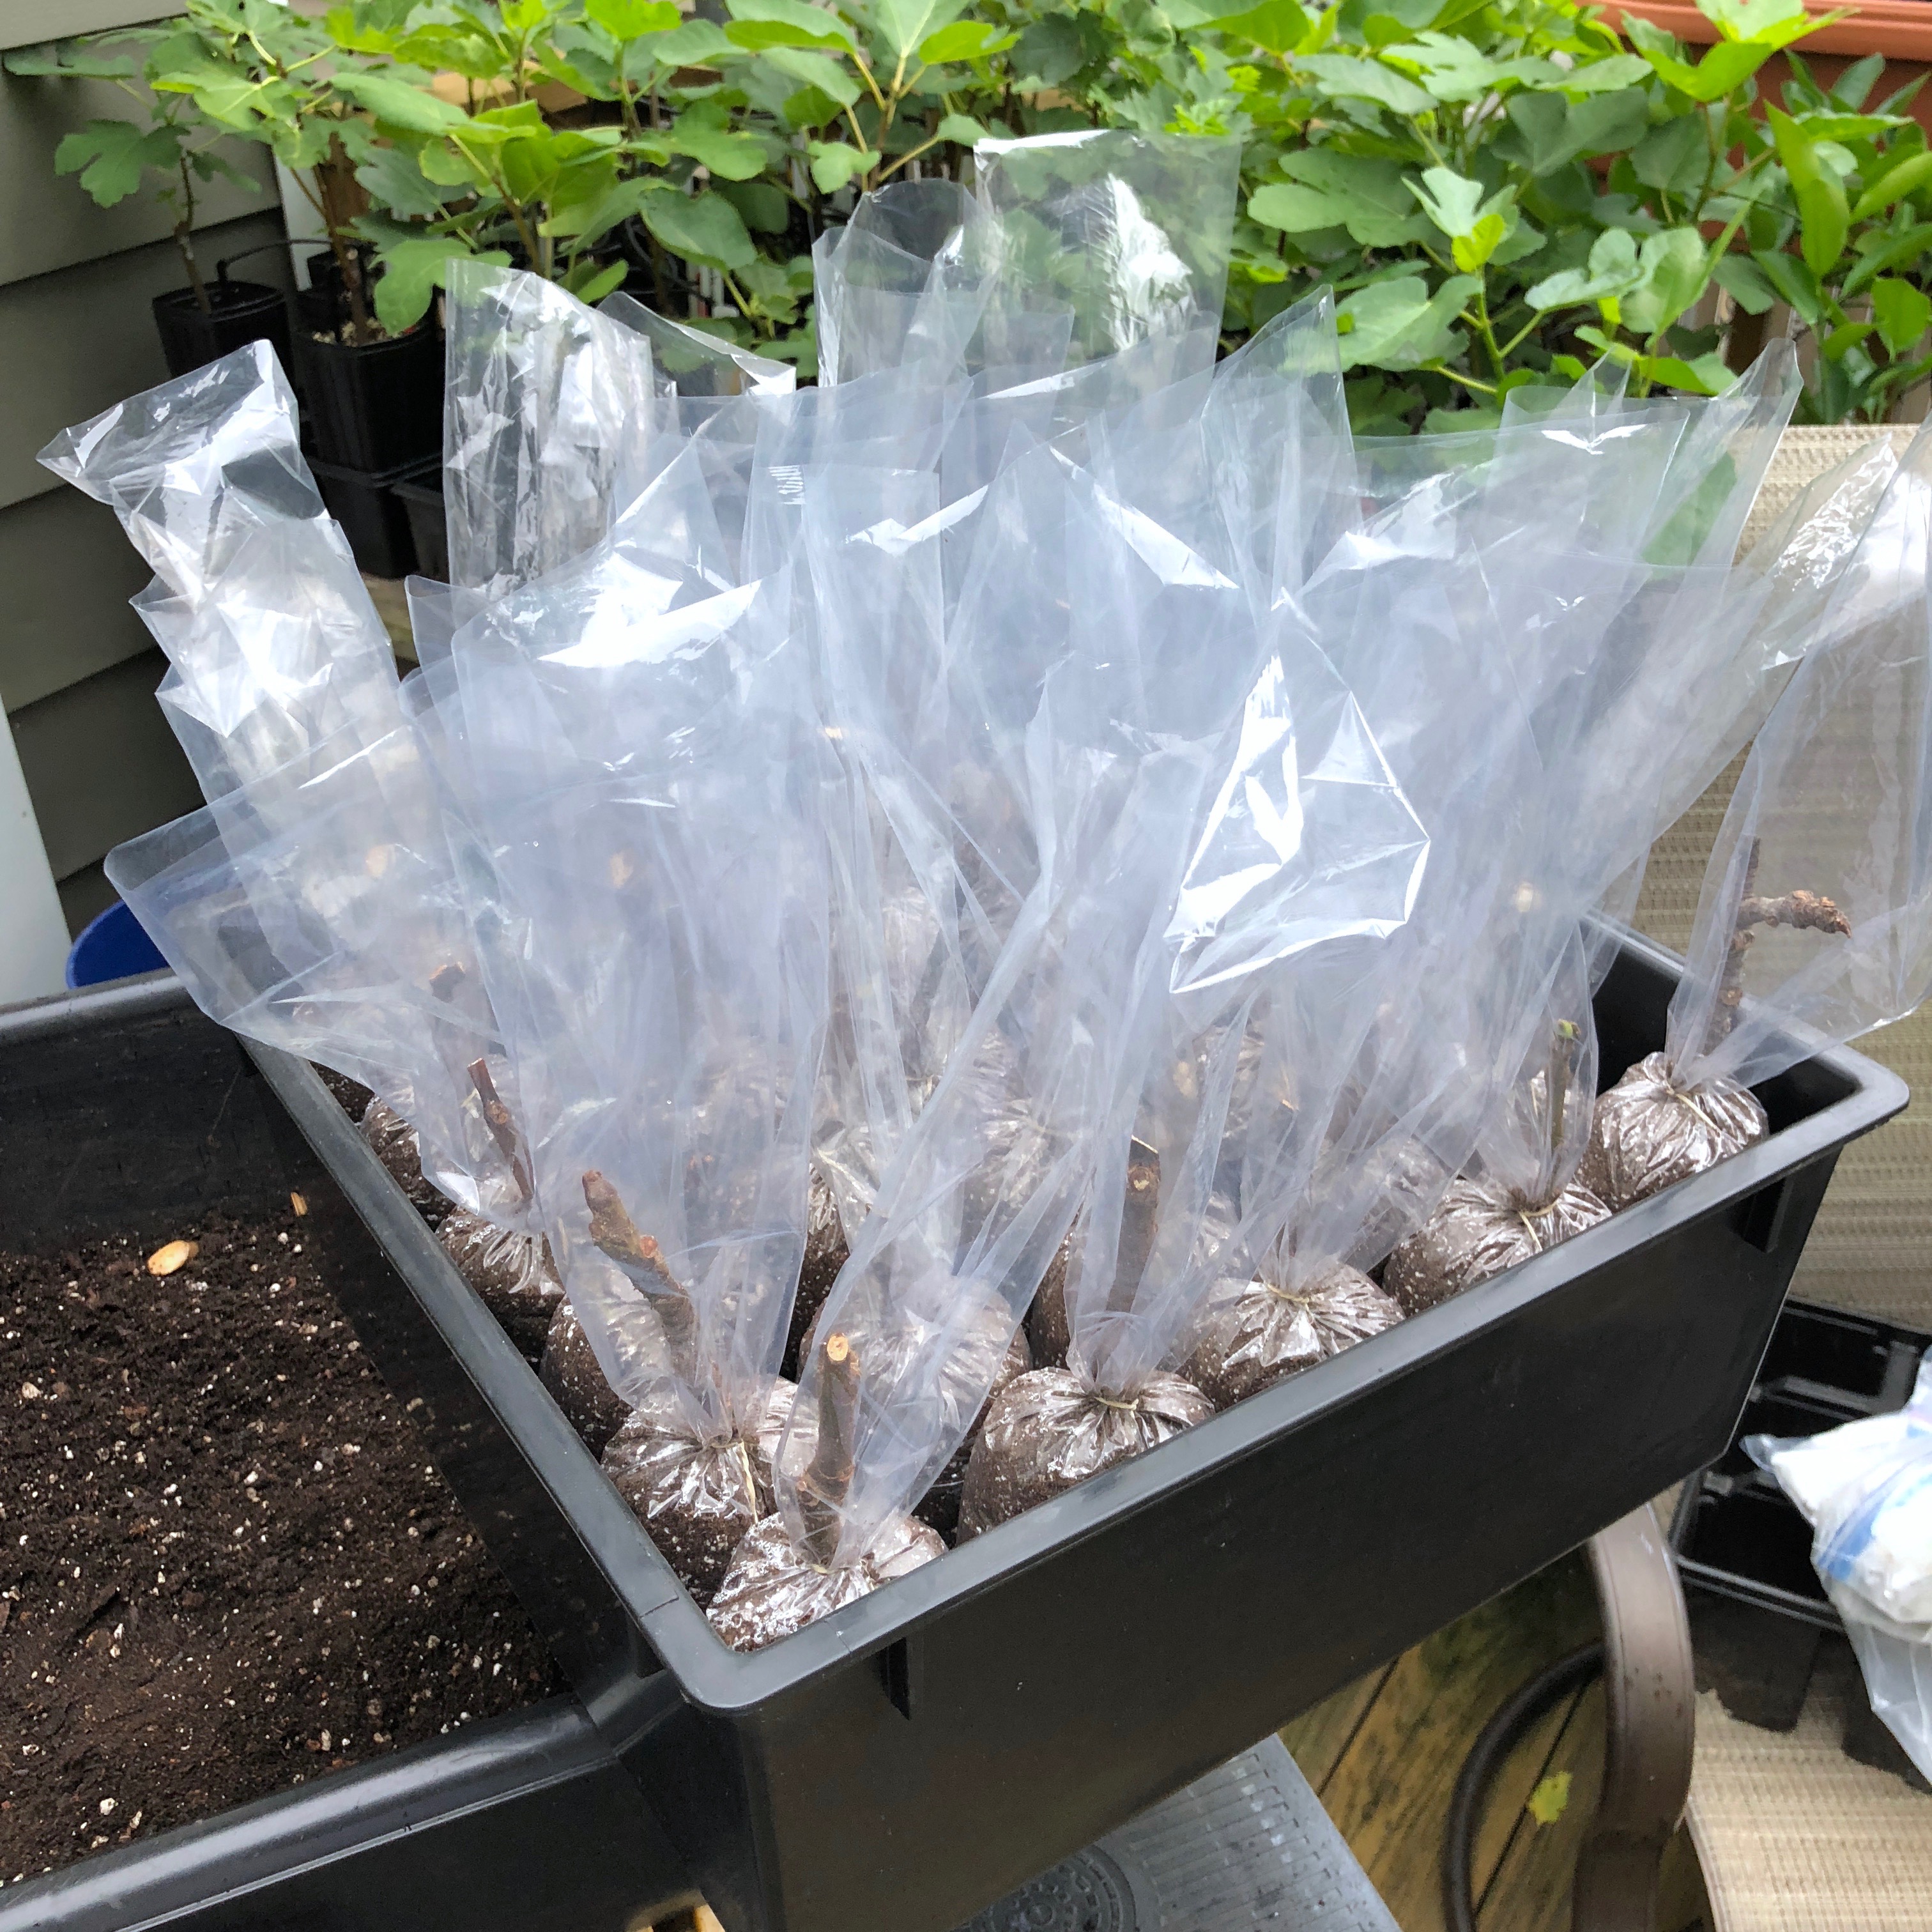
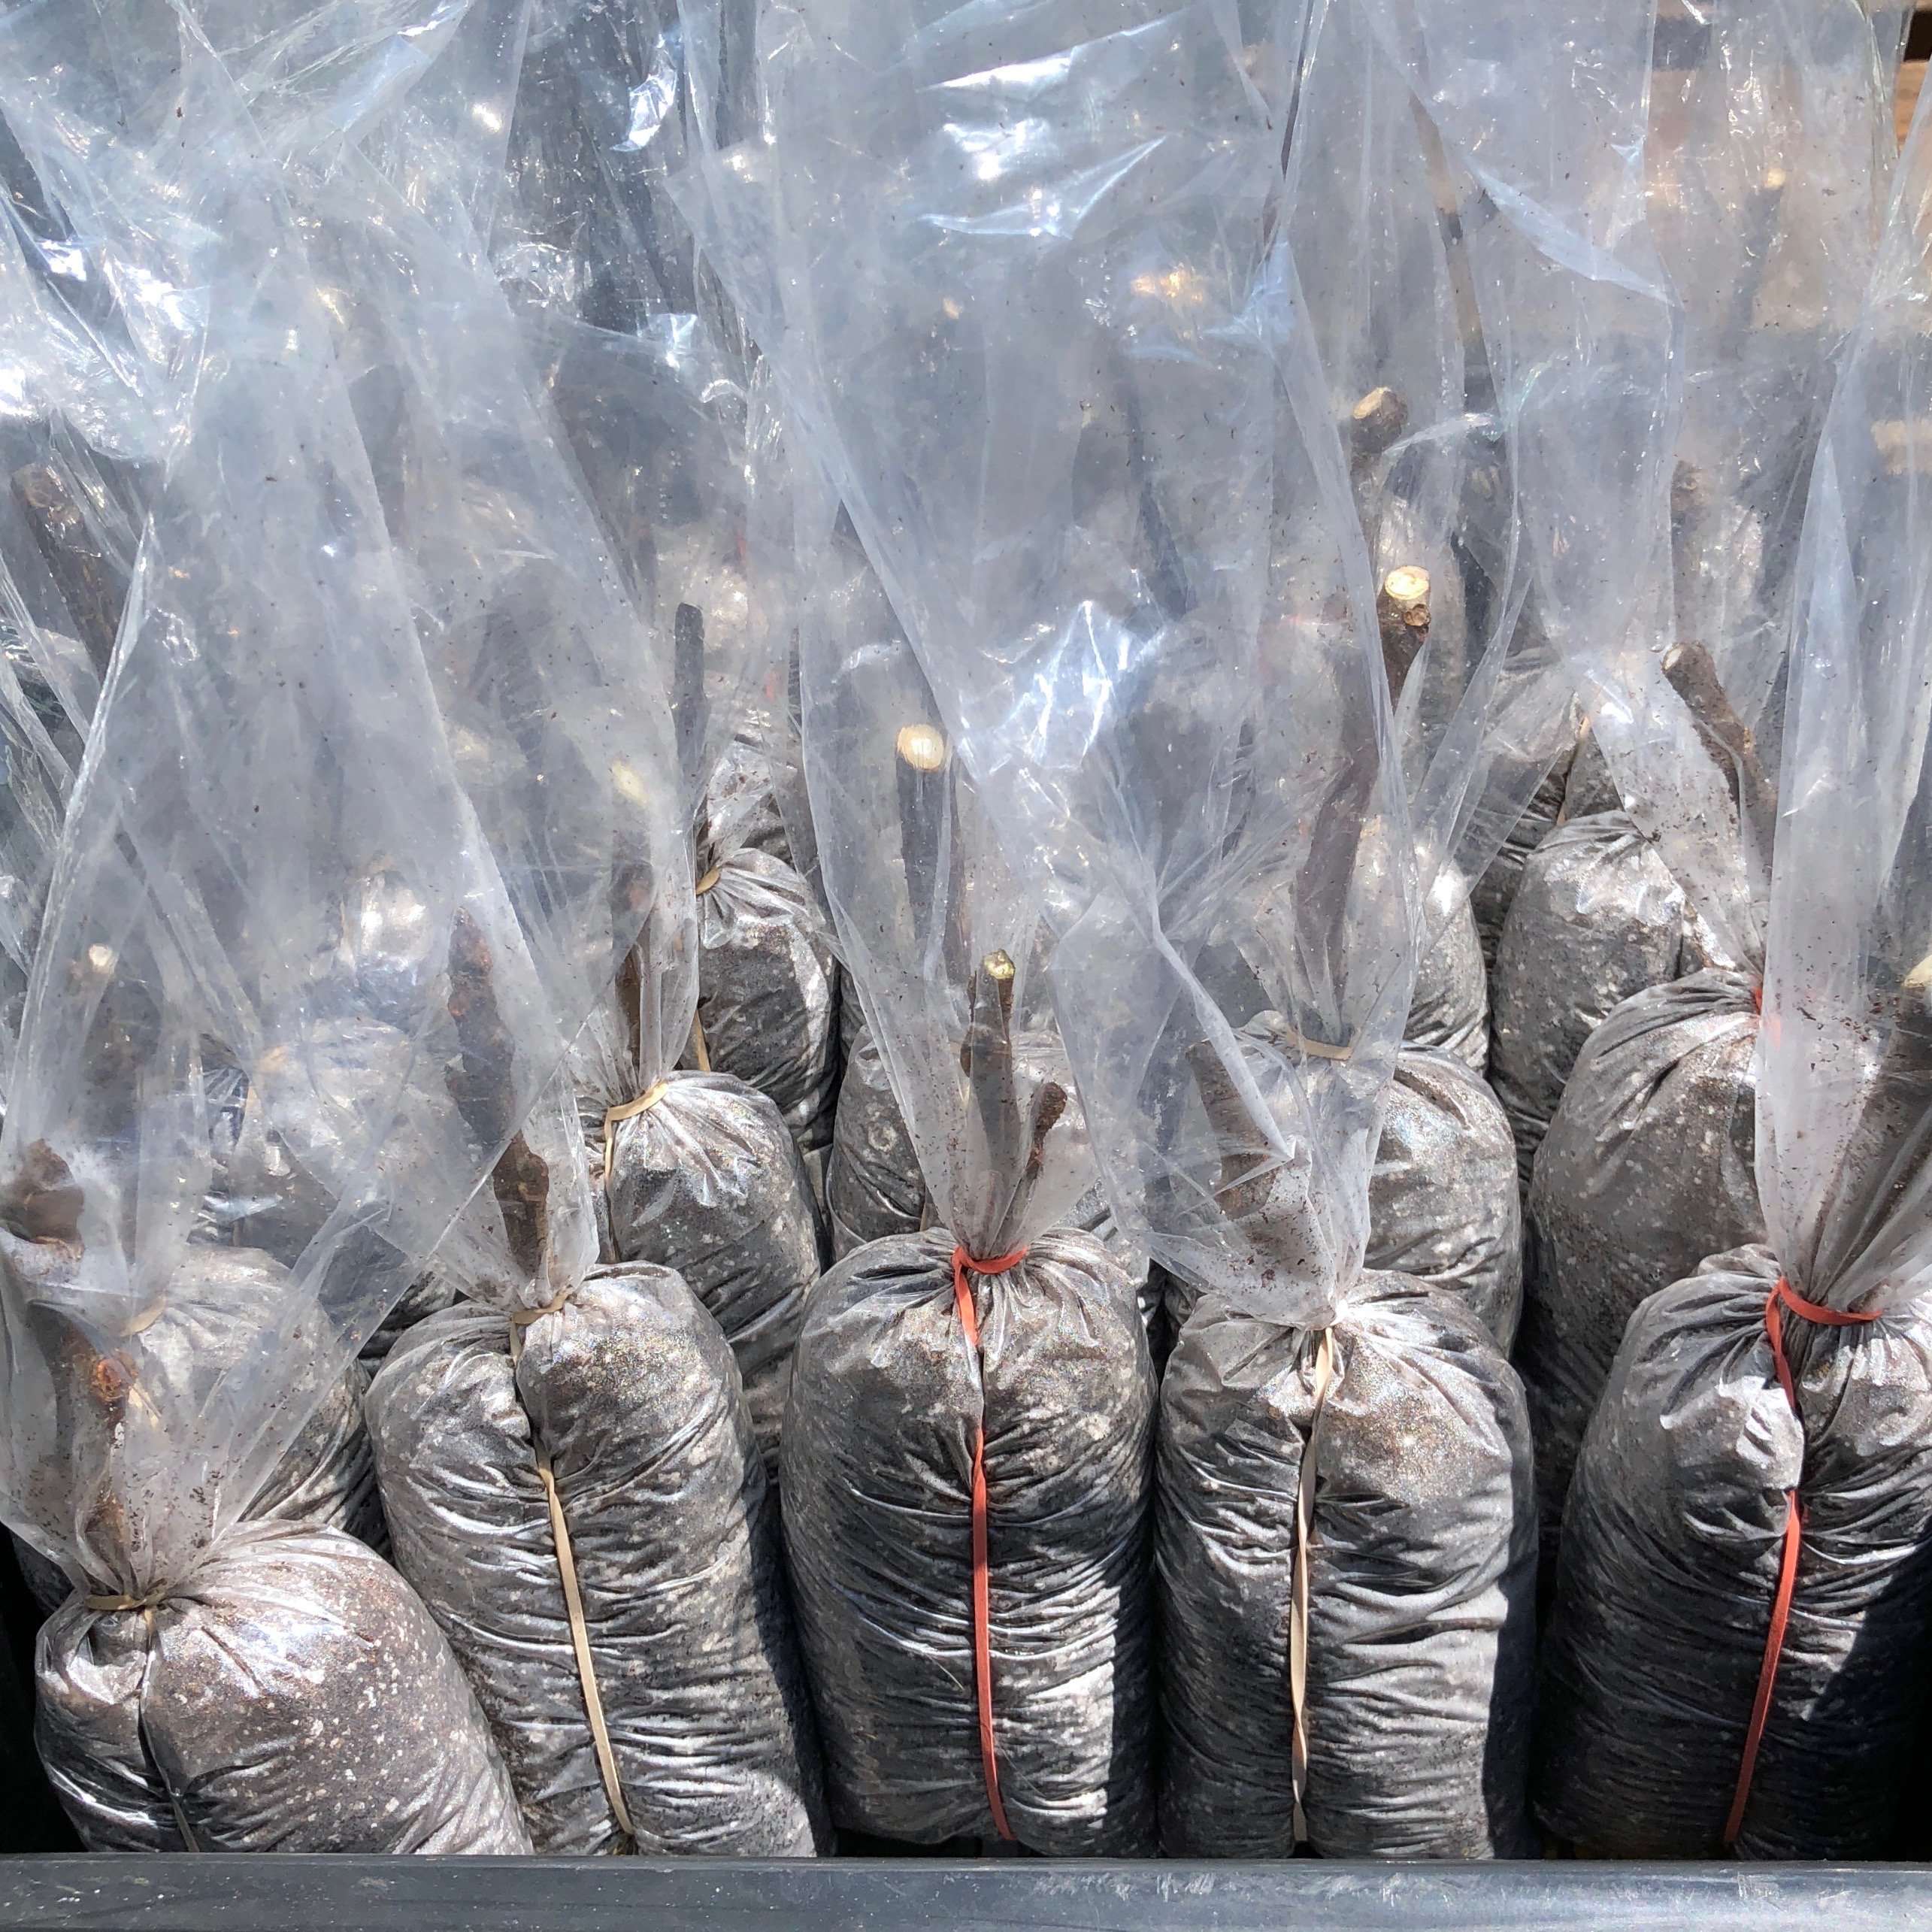
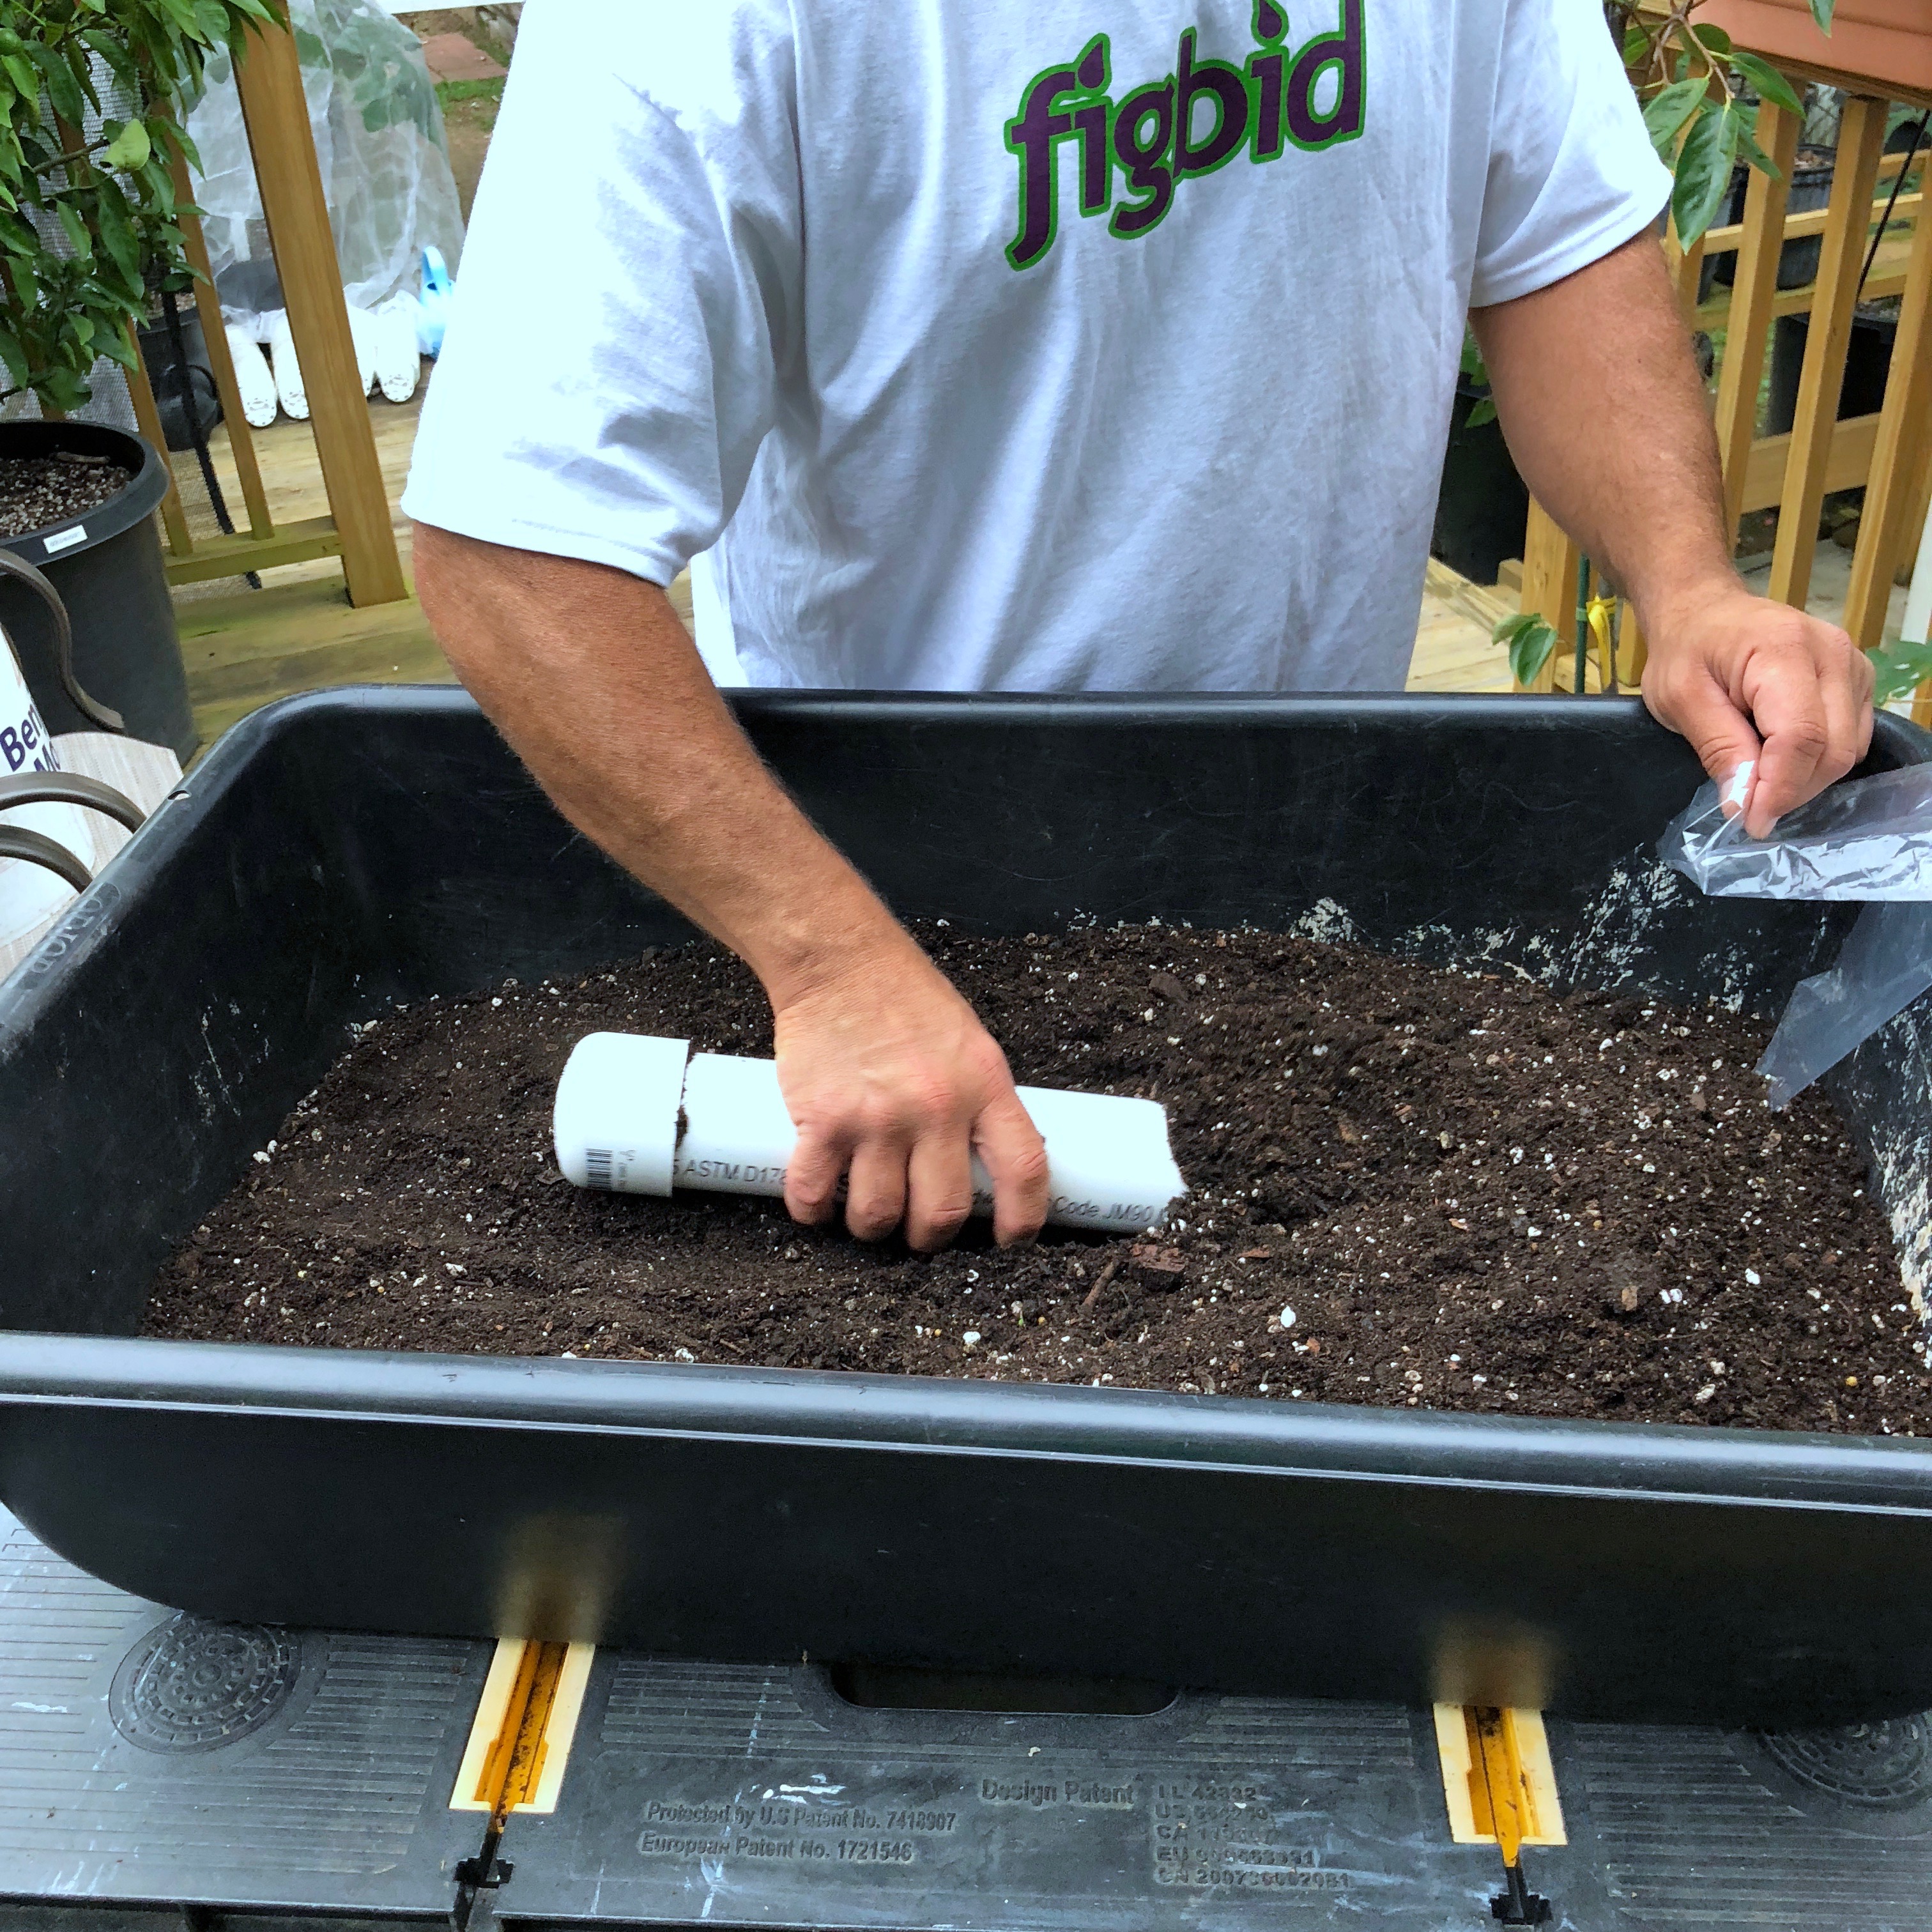
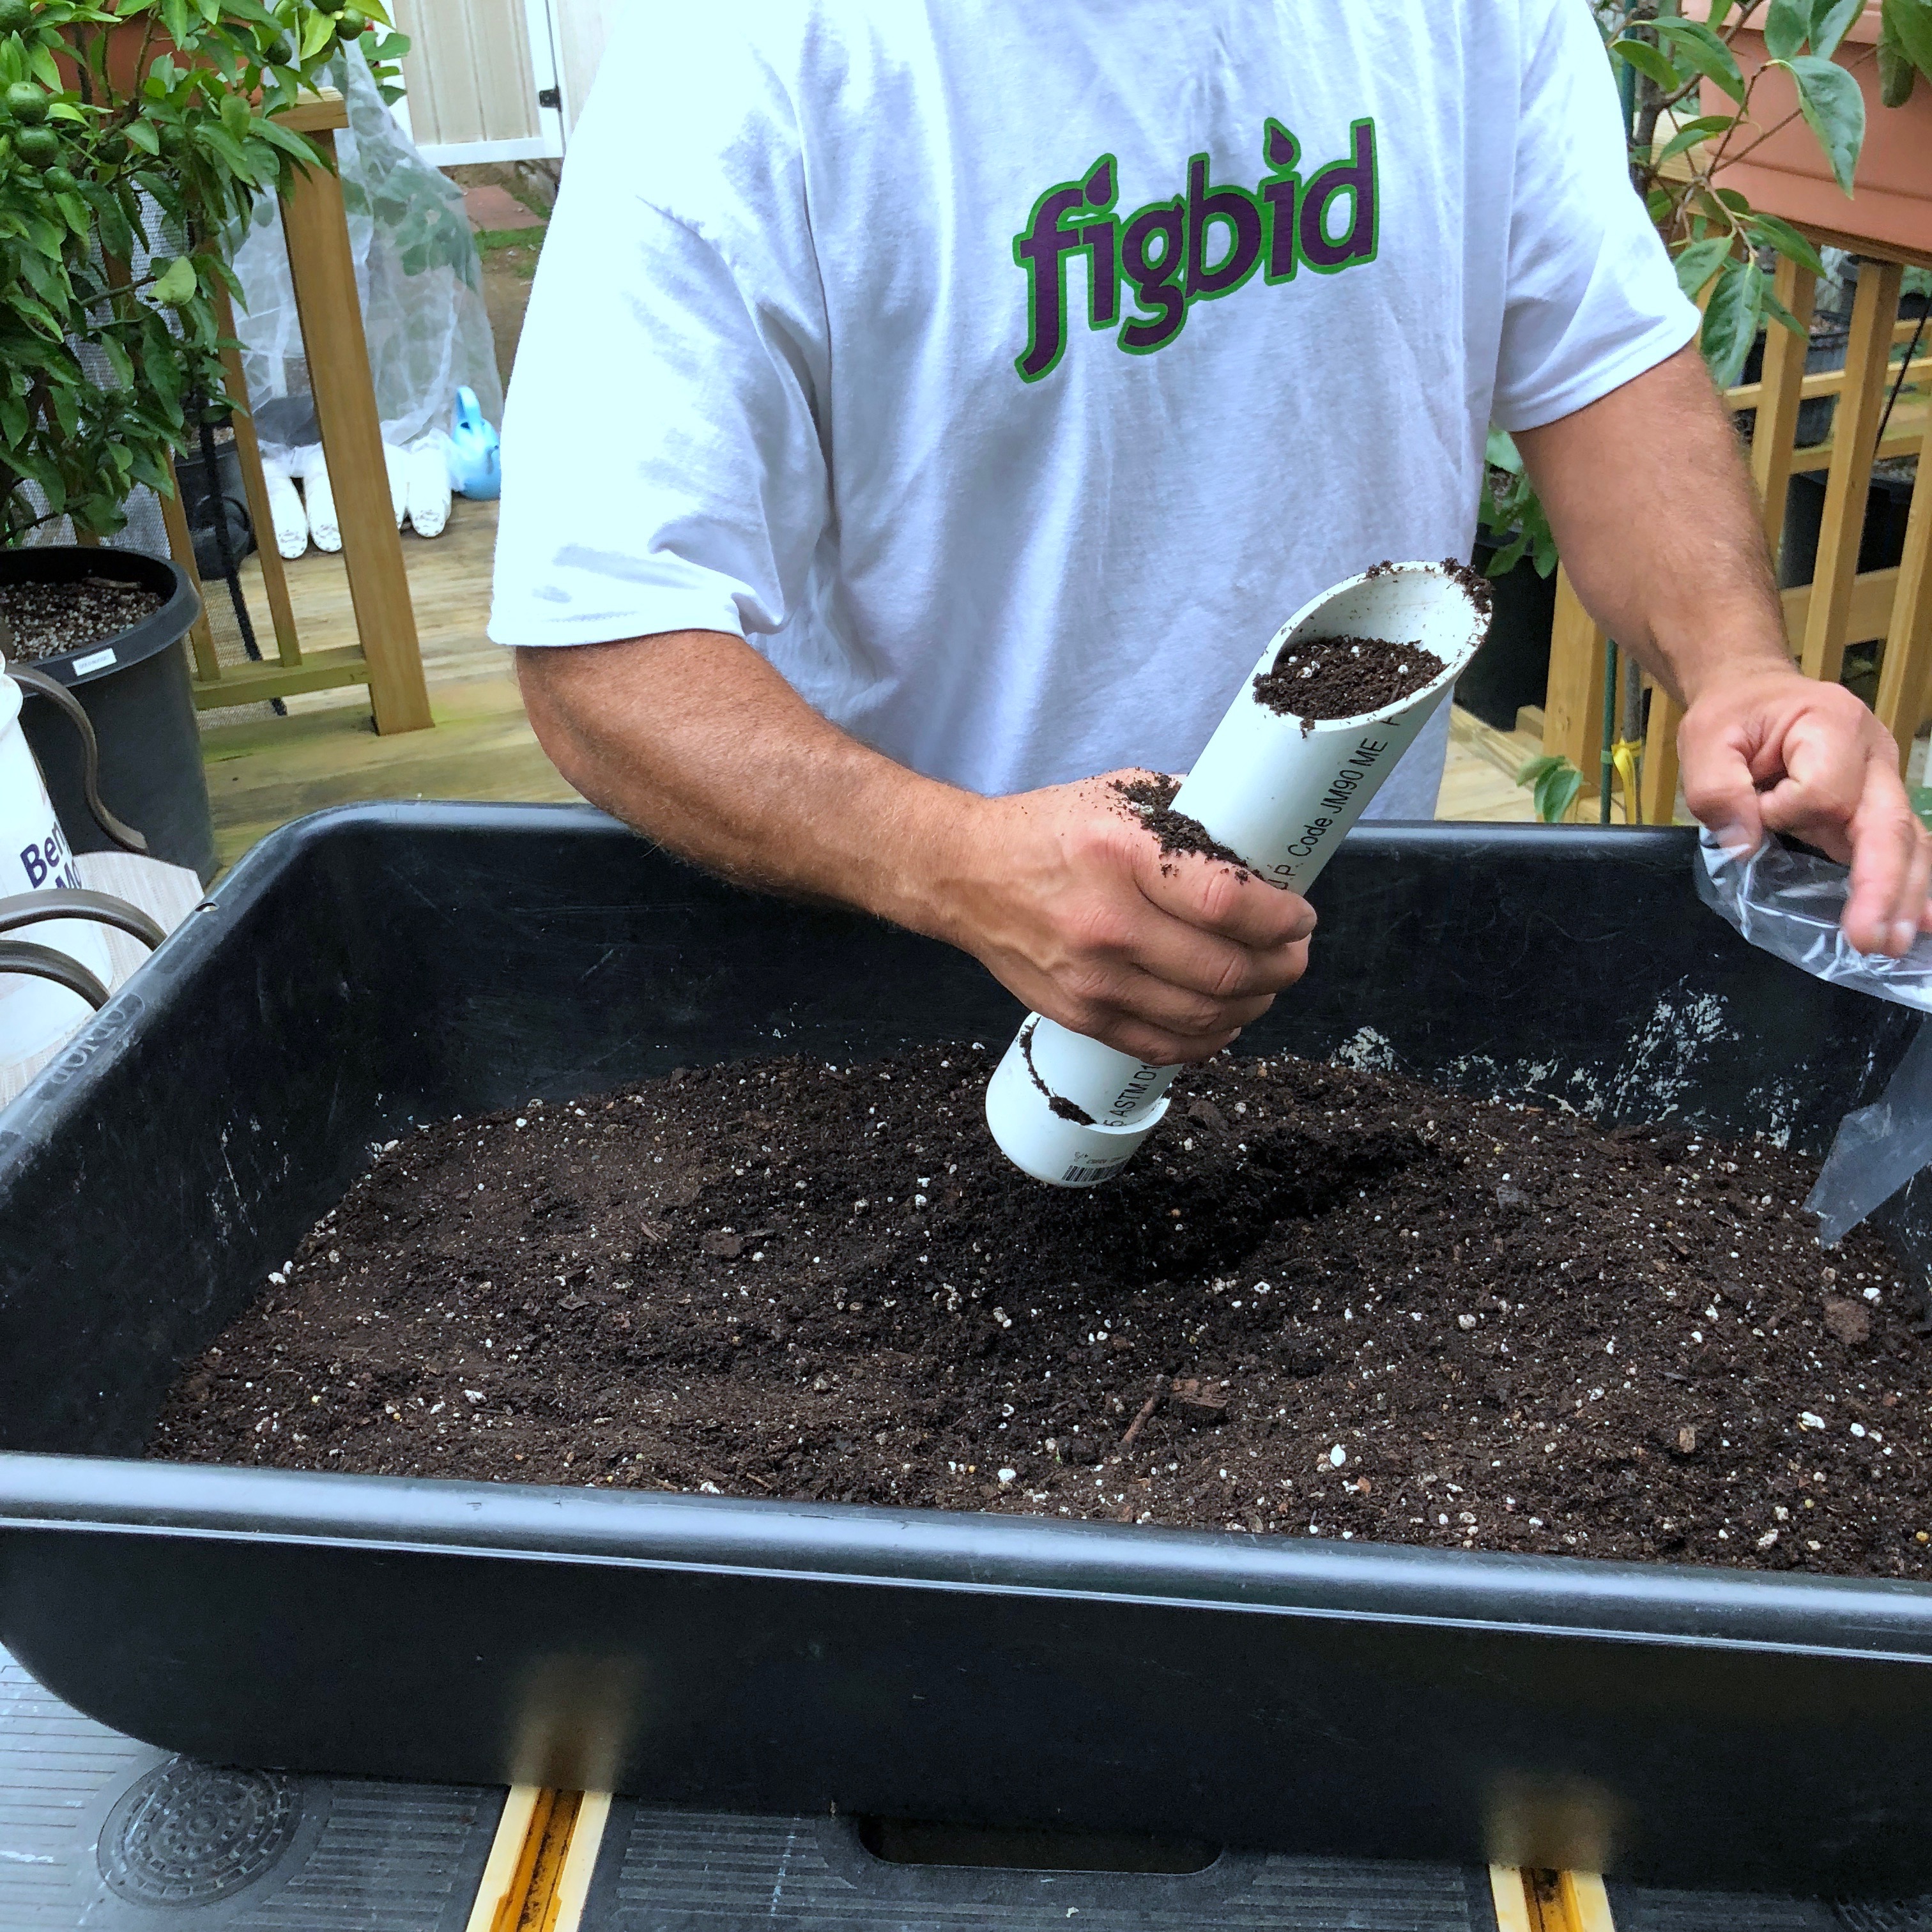
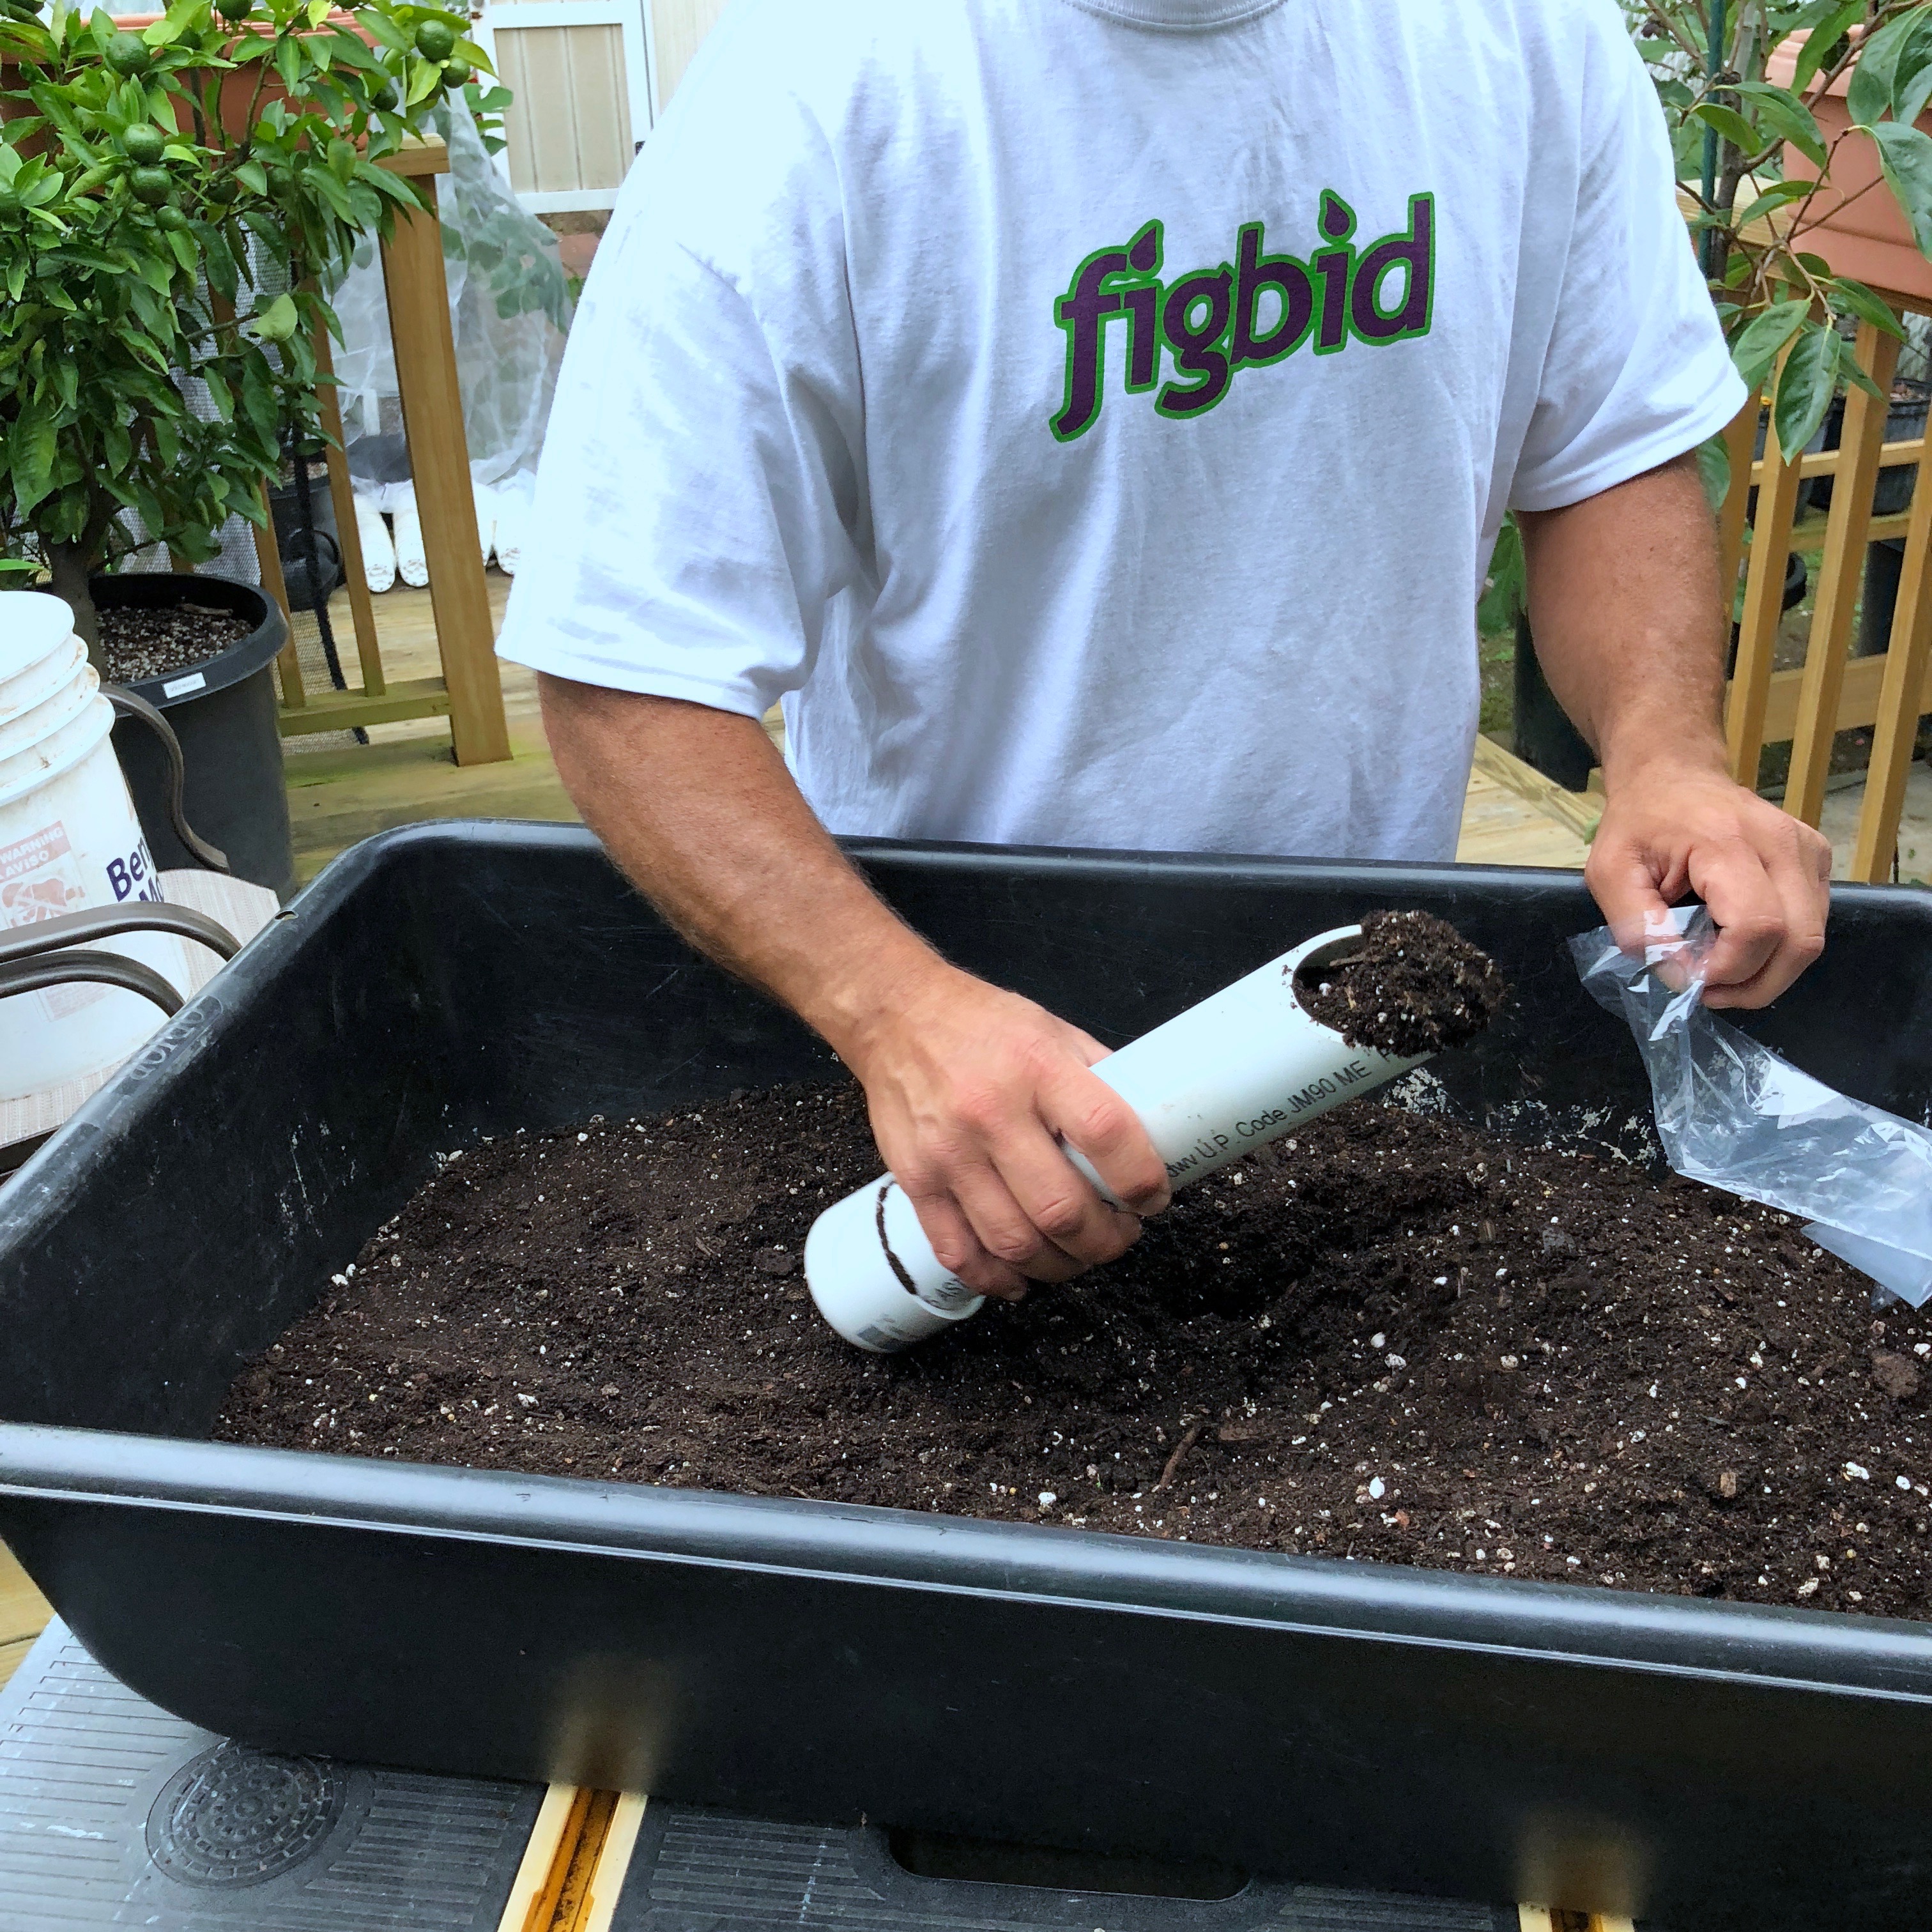
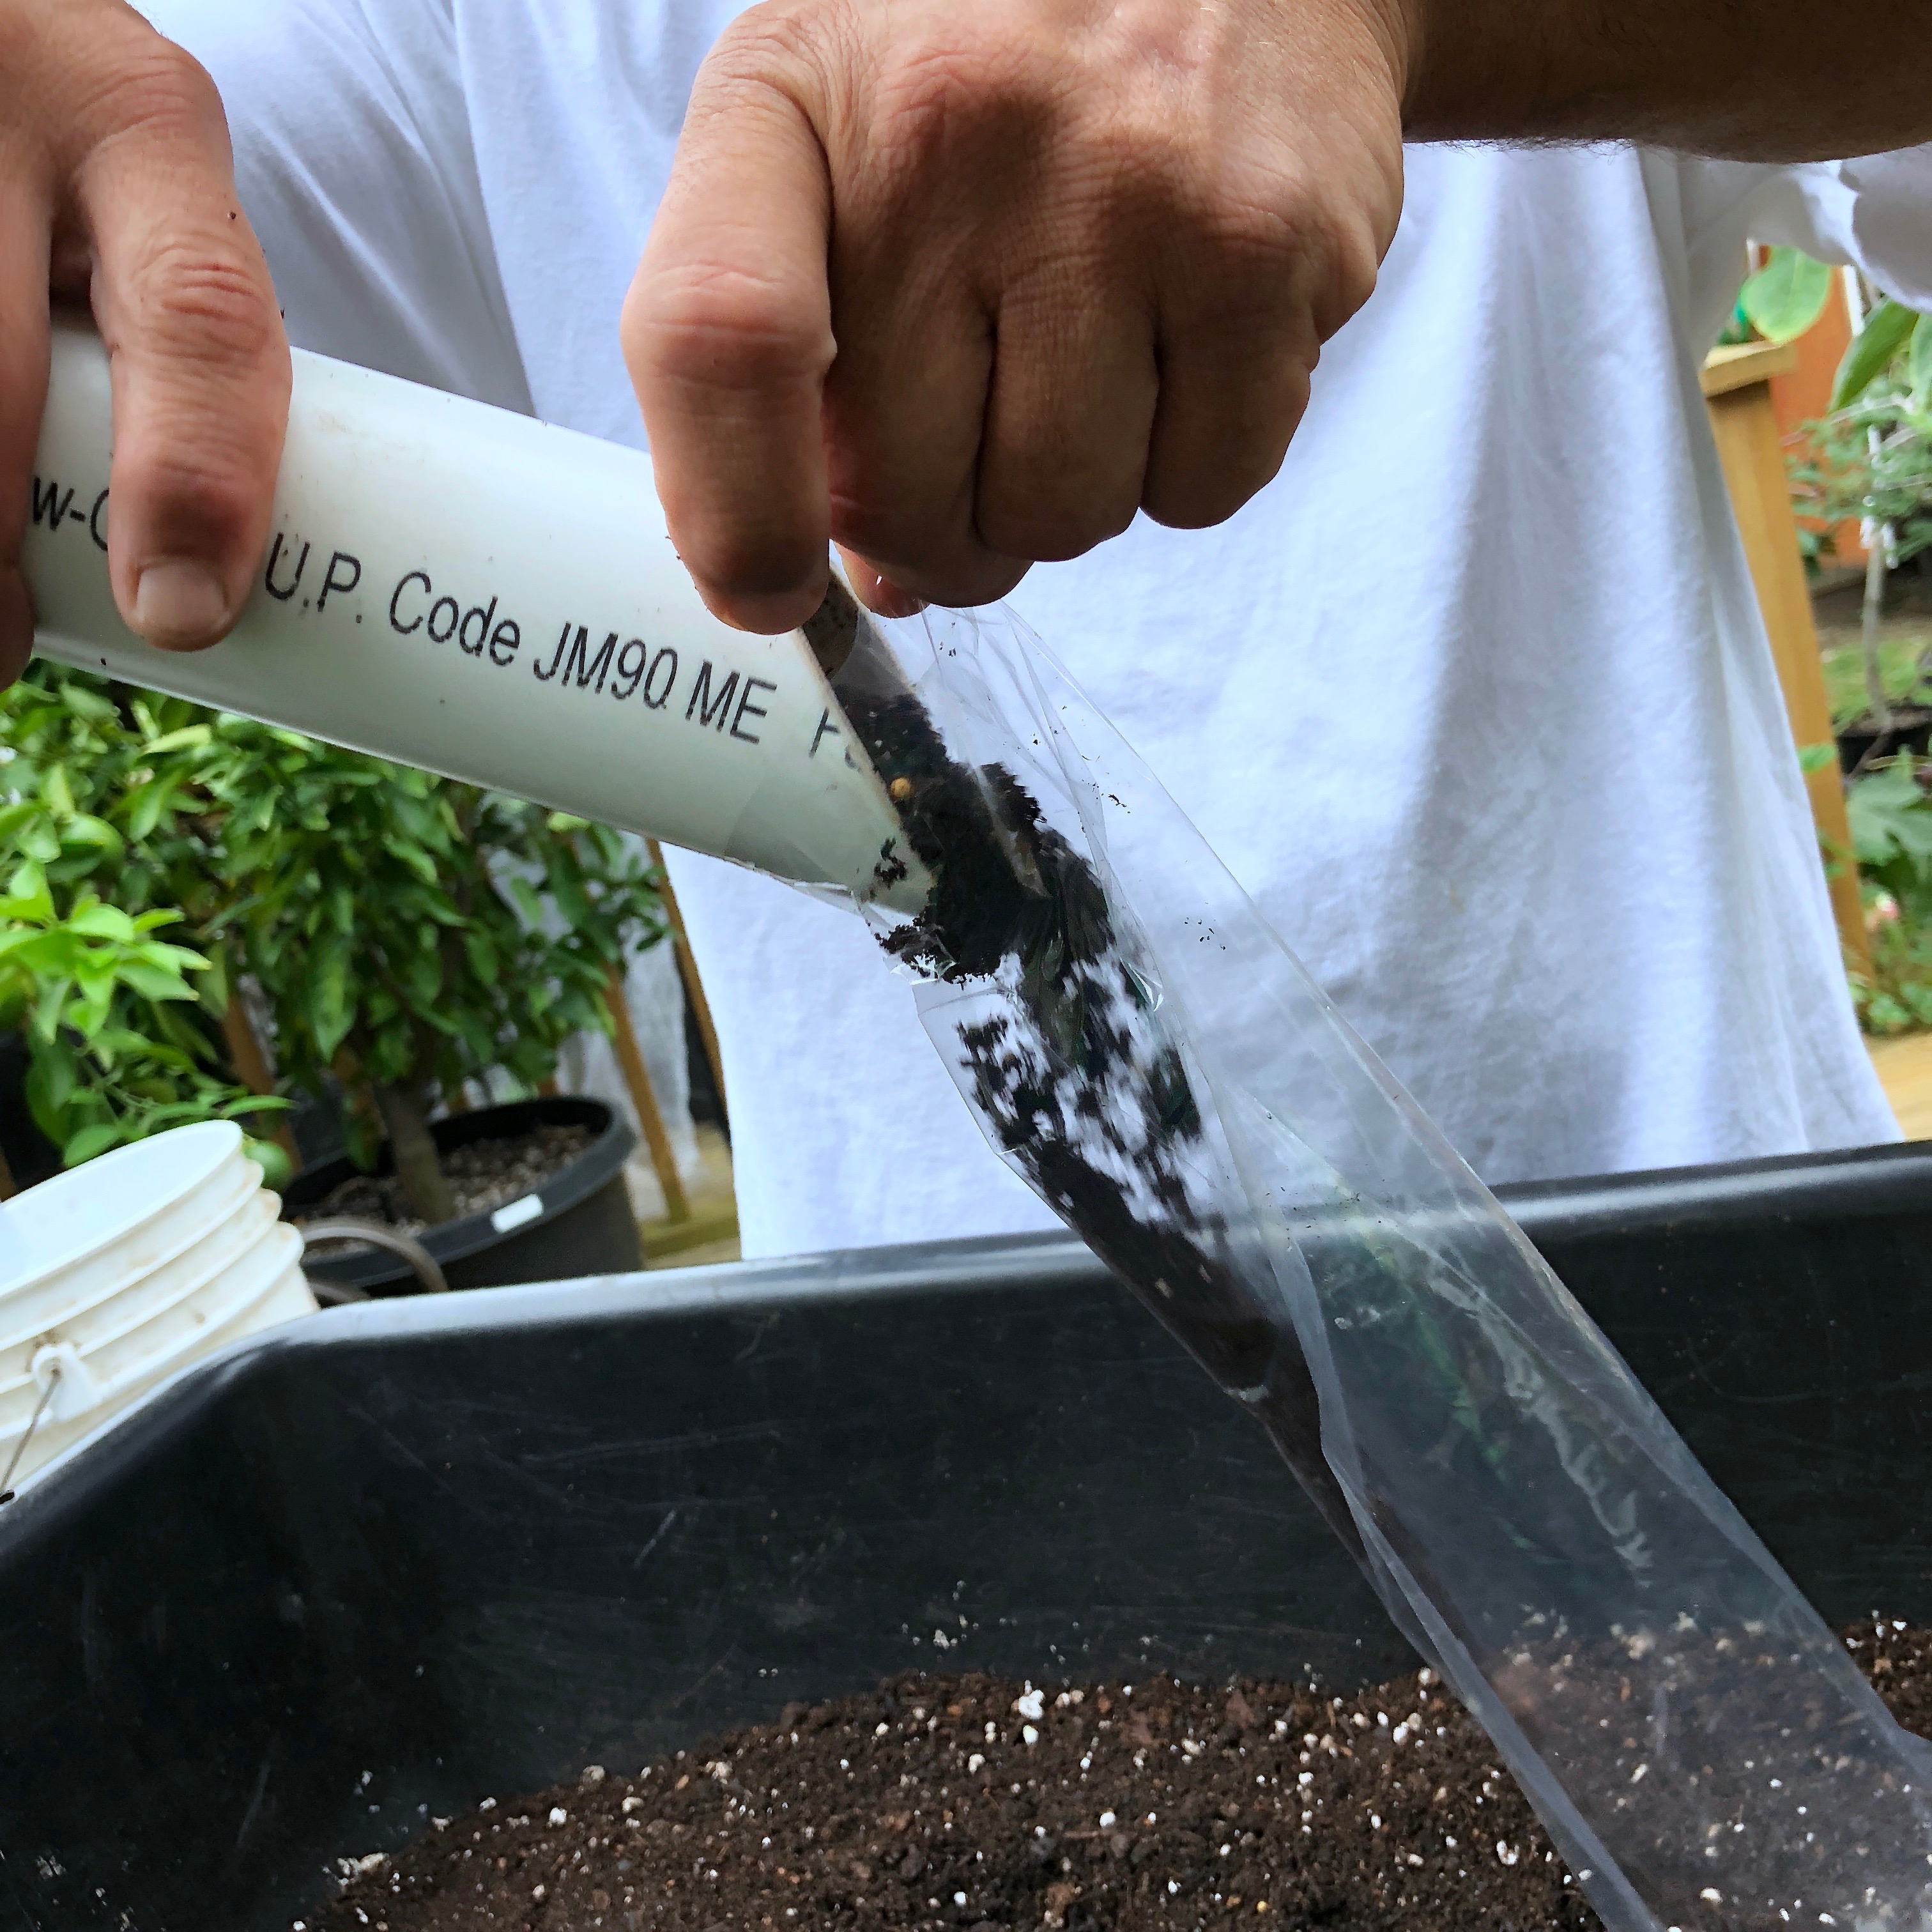
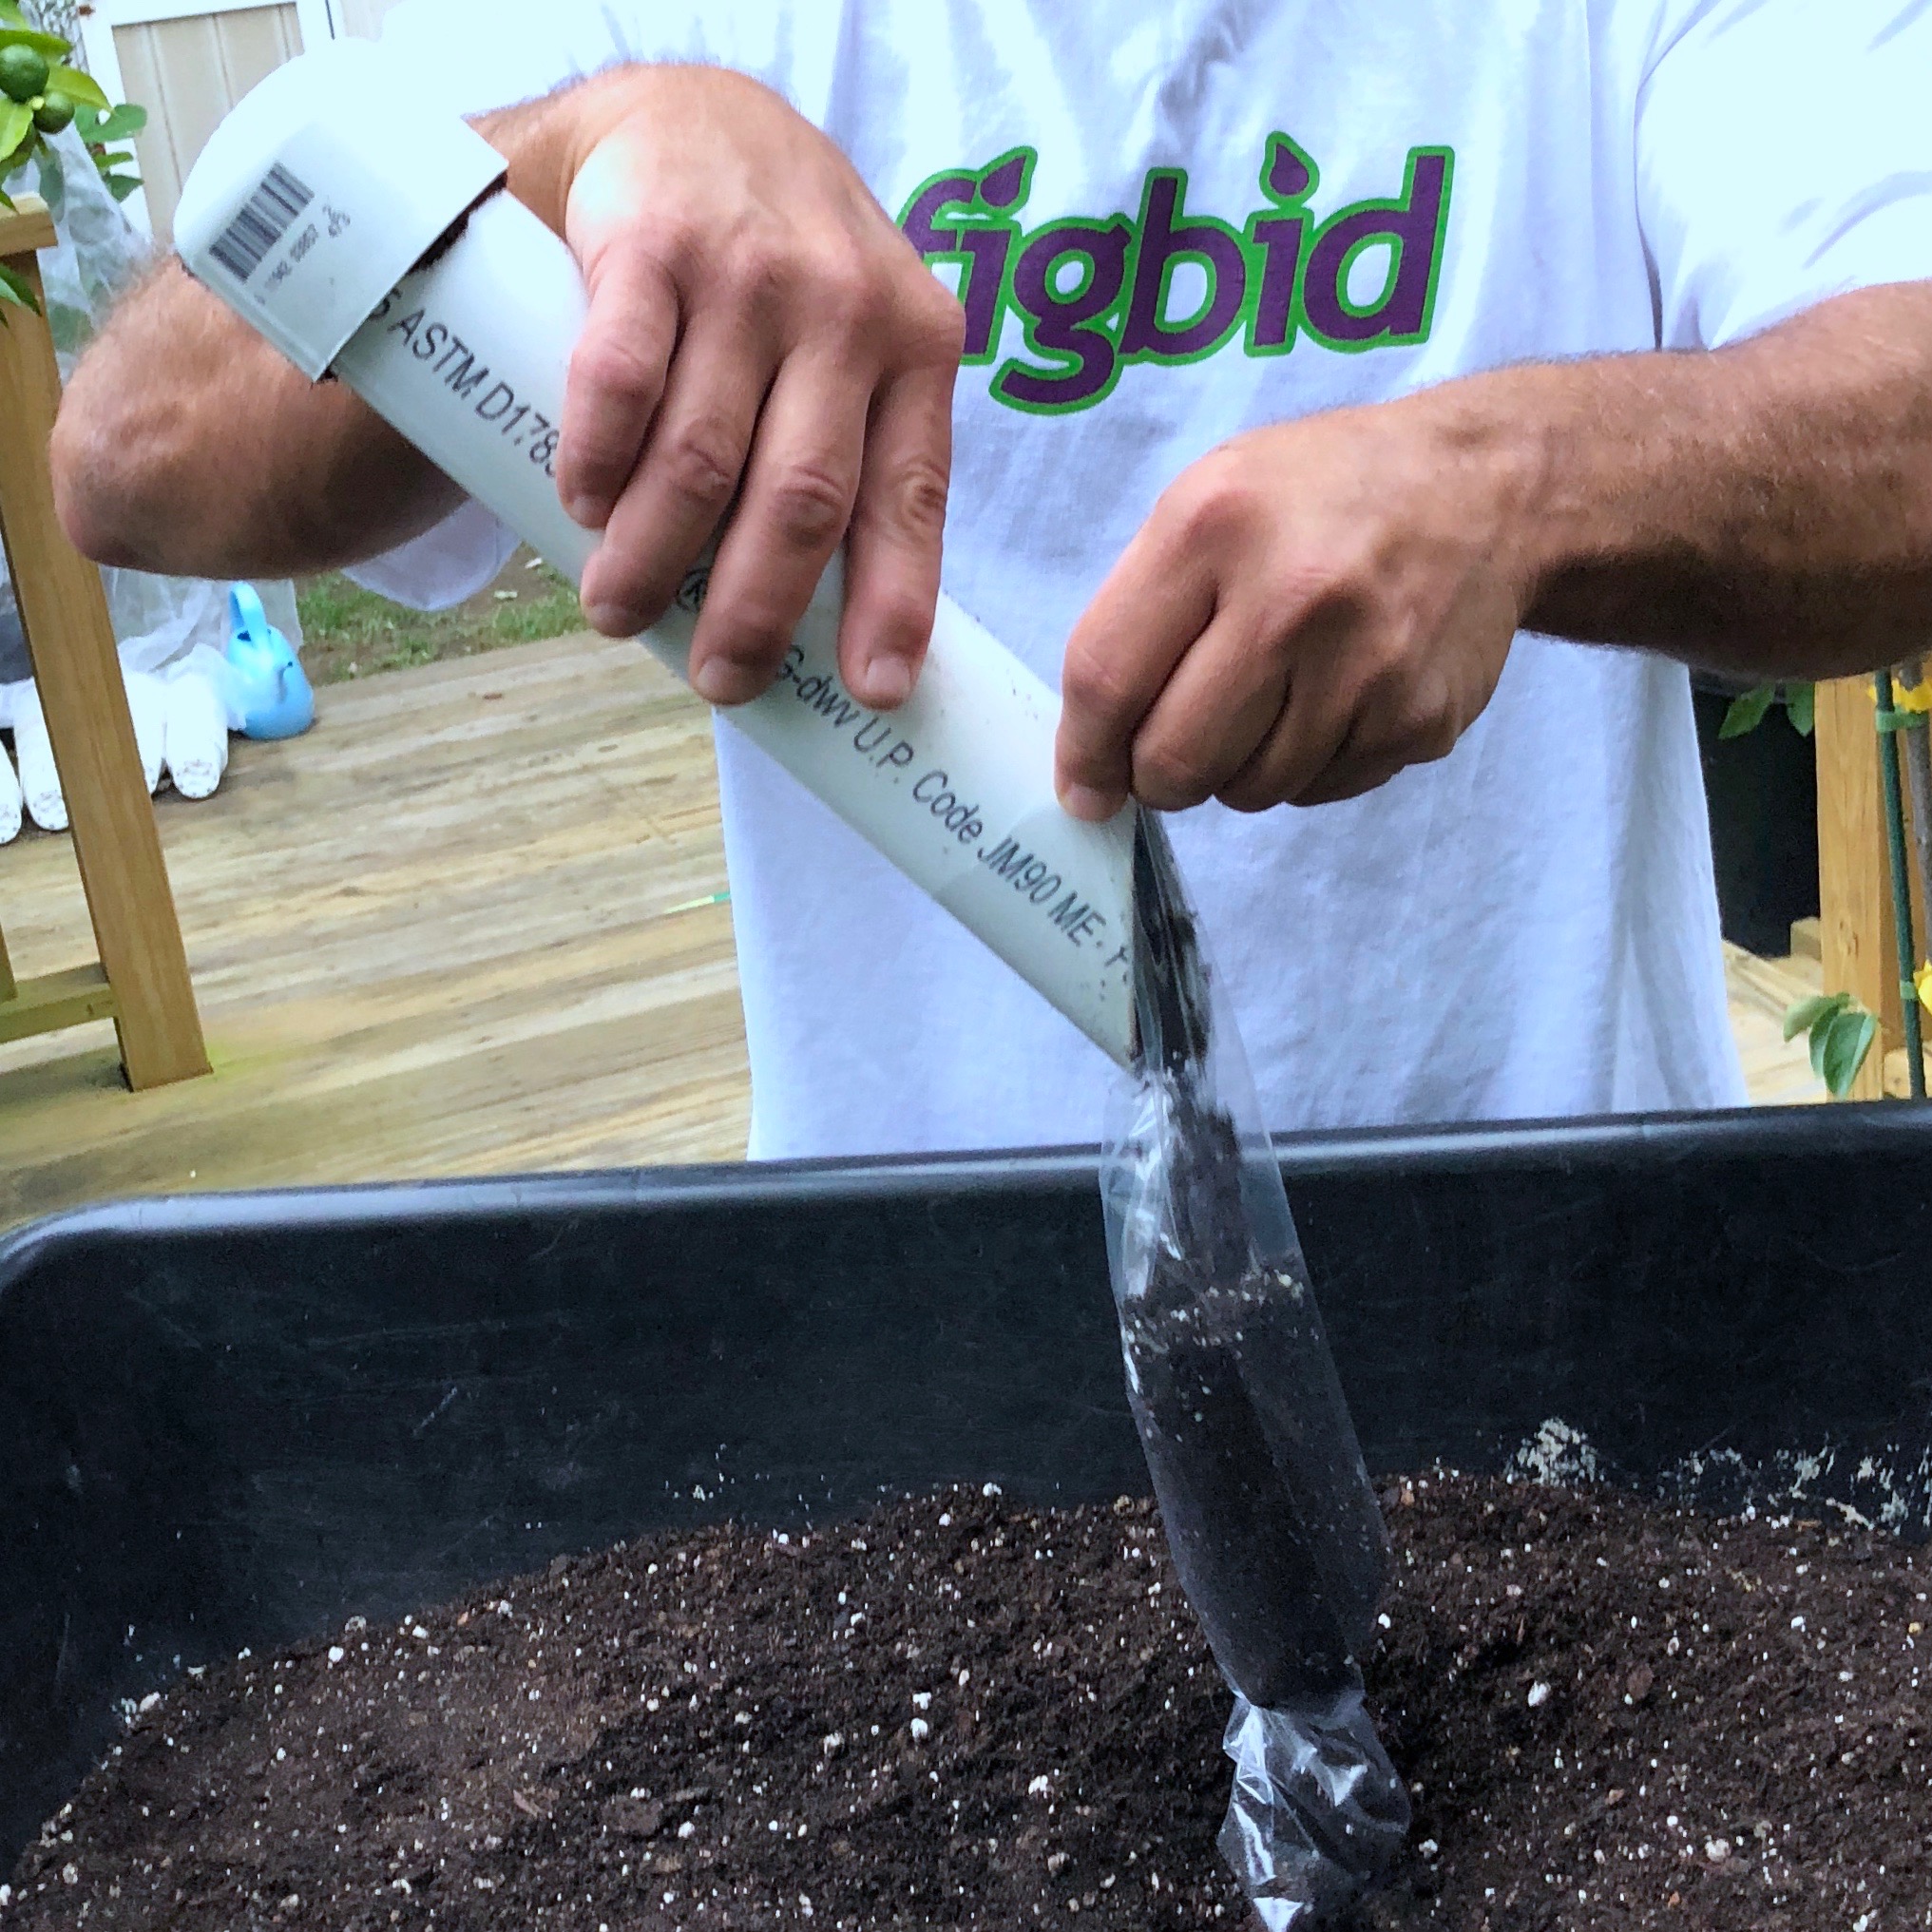
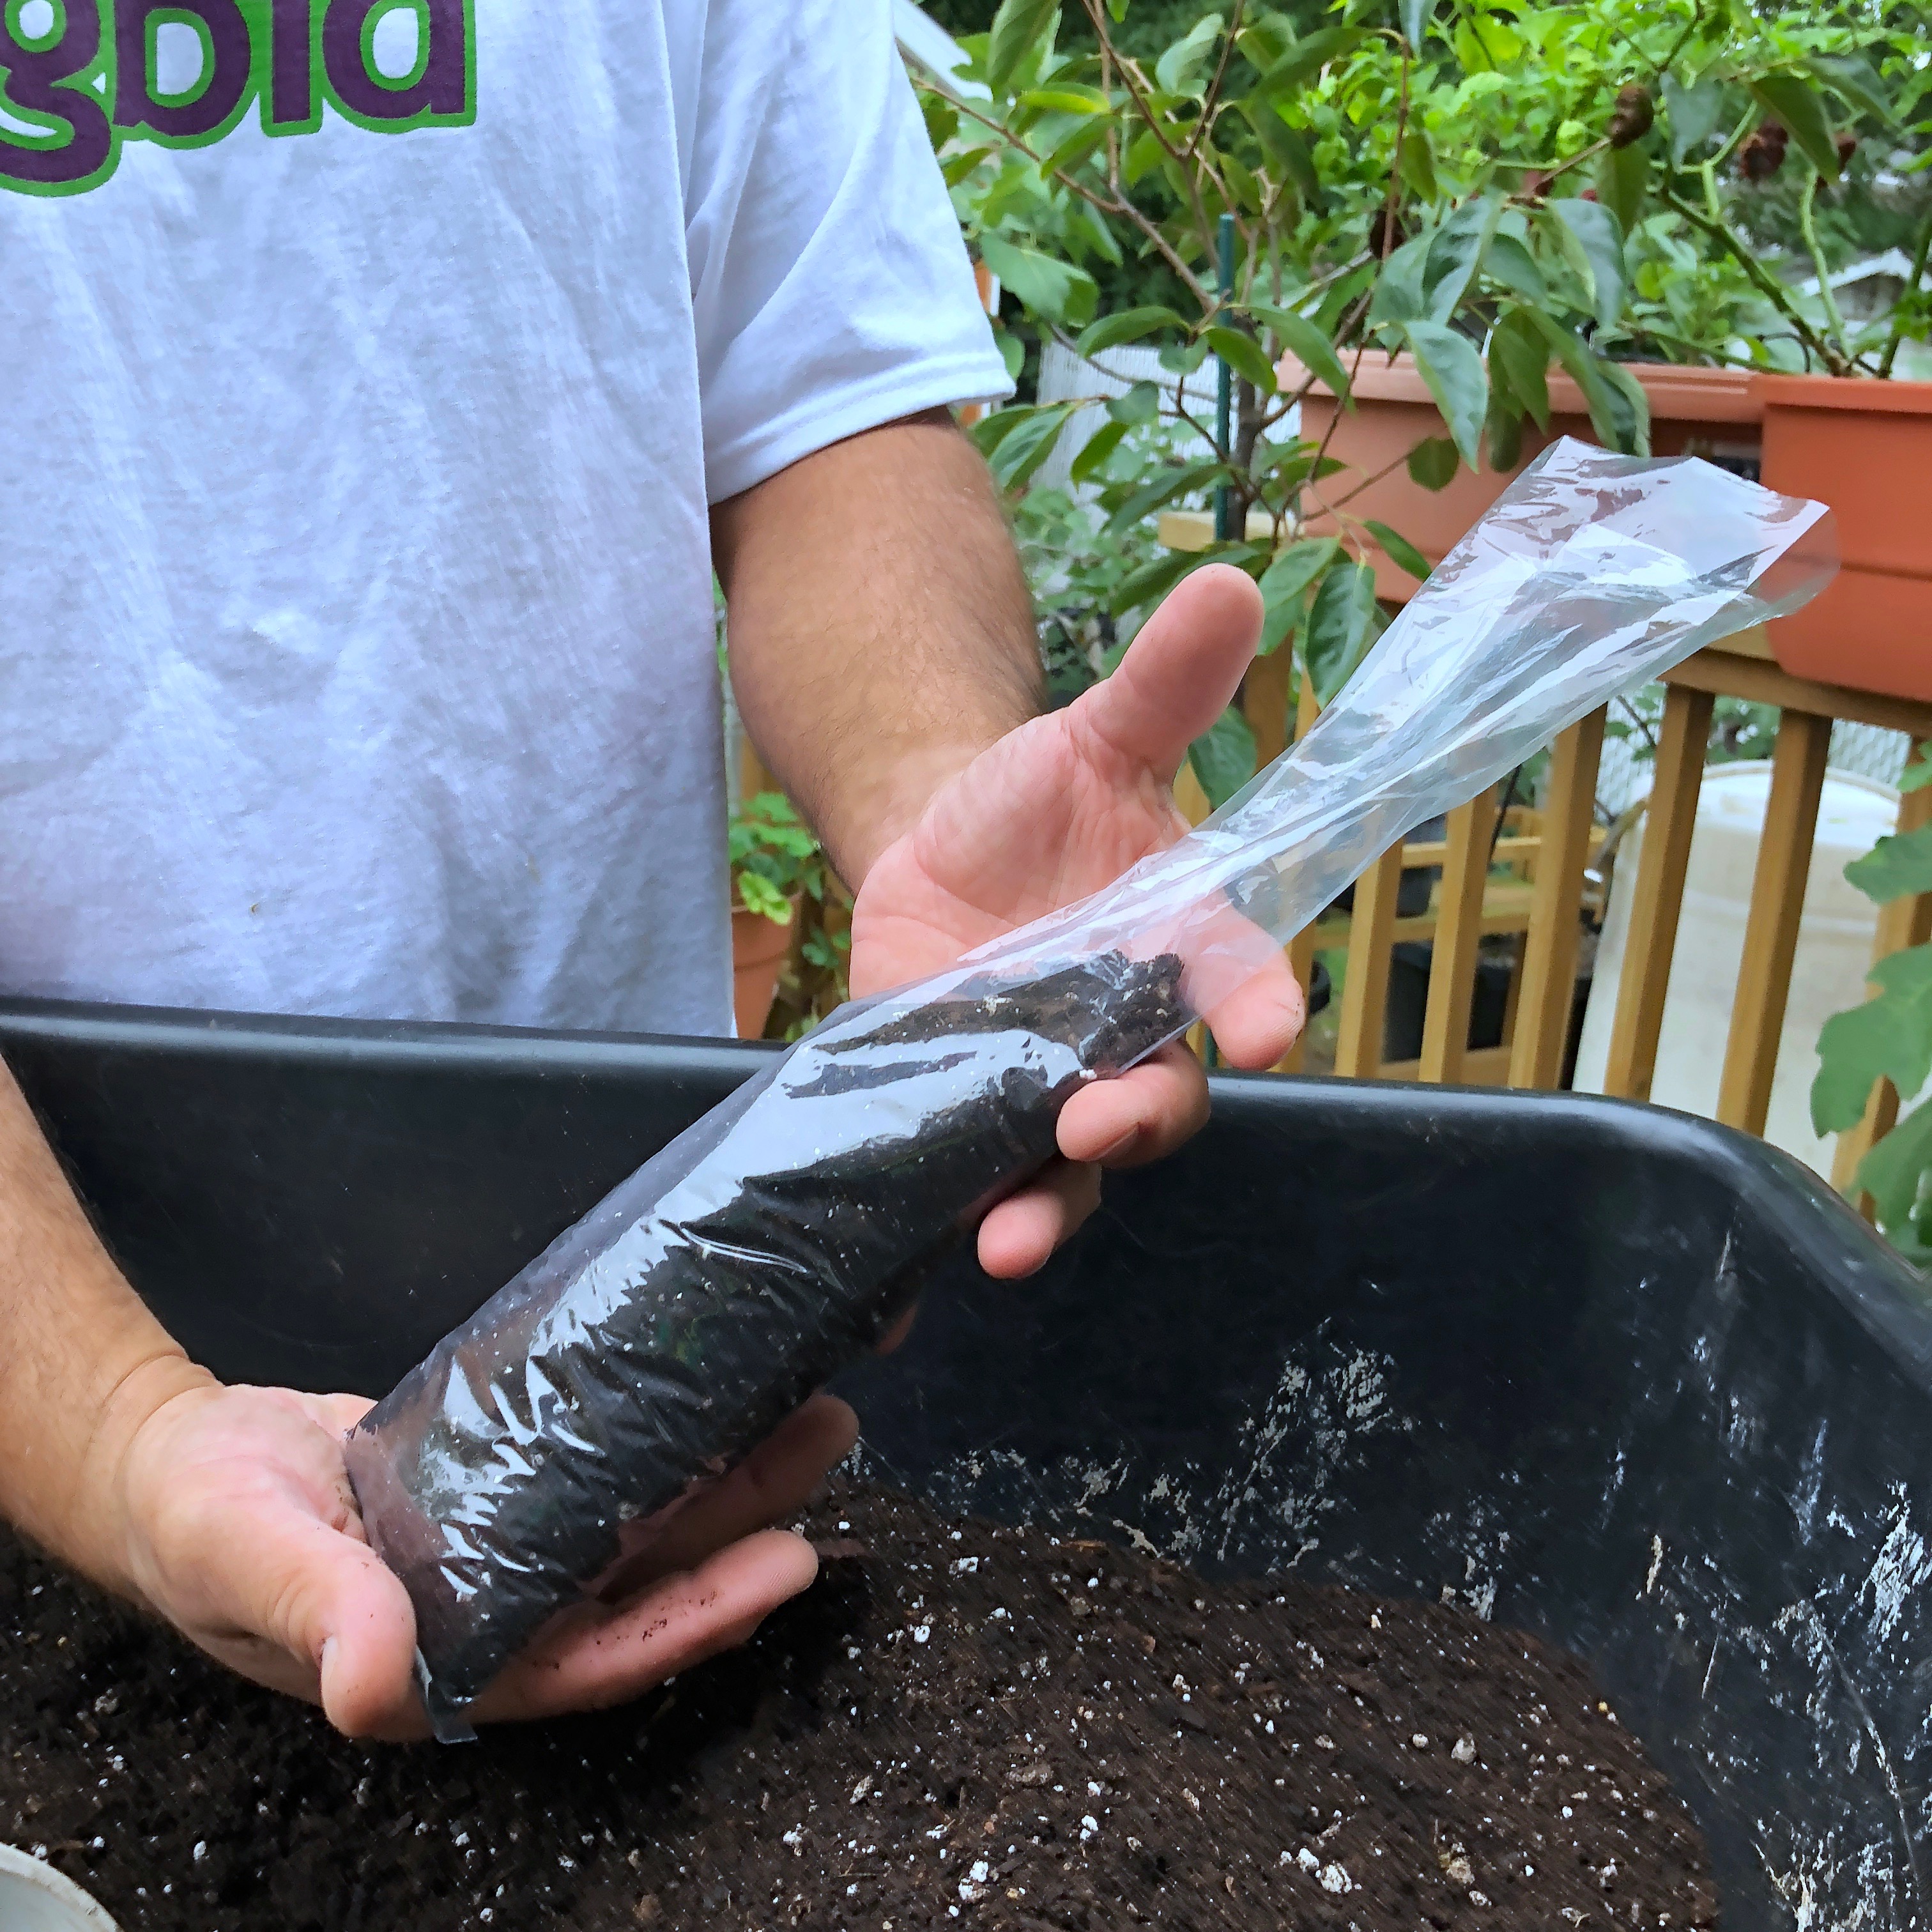
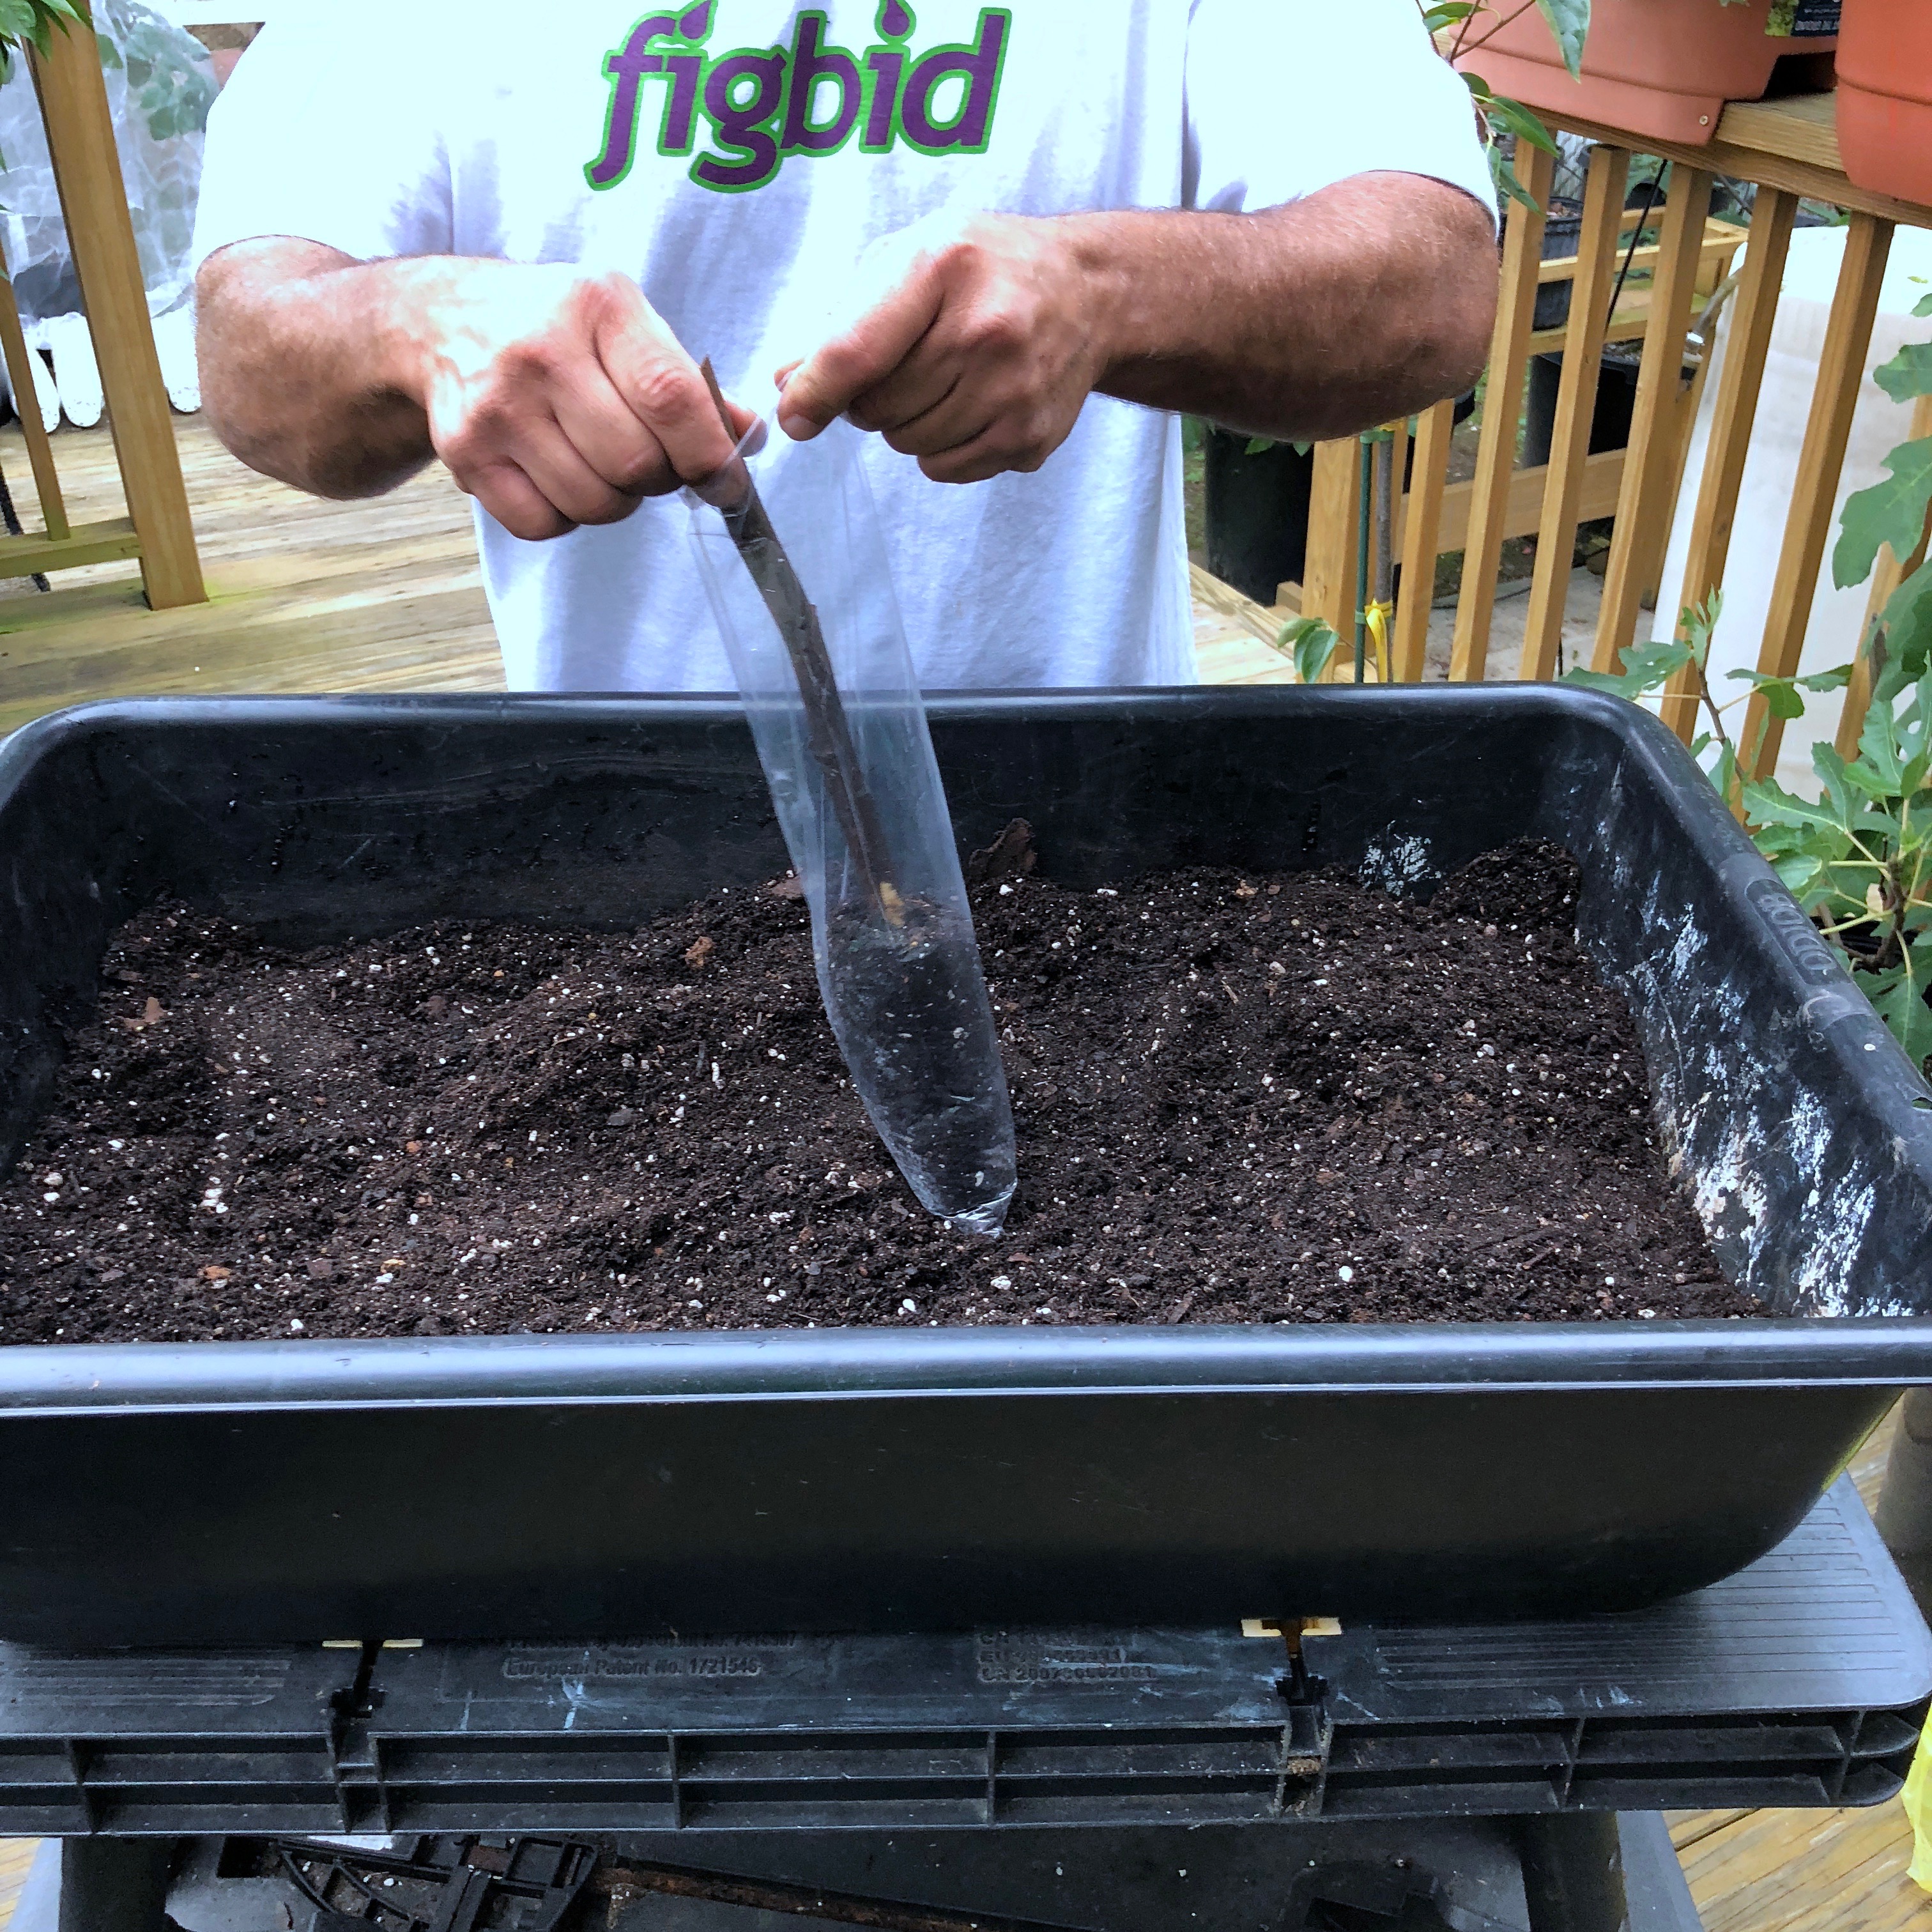
- When your potting mix is ready, grab a 4” x 16” Uline baggy and fill it a little more than halfway with potting mix. I think I’ve used every tool in the world for this job and the easiest method is the figPop tool that I’ve created from PVC pipe. Works like a charm and cleanly delivers the proper amount of potting soil into your baggie every time. You can make your own or buy one from figBid when they’re available. Fill all of your baggies right now. You can also fill your baggies and store them in a cool place for future use. This is a great idea for anyone planning to root in the winter and may have to deal with snow.
-

-

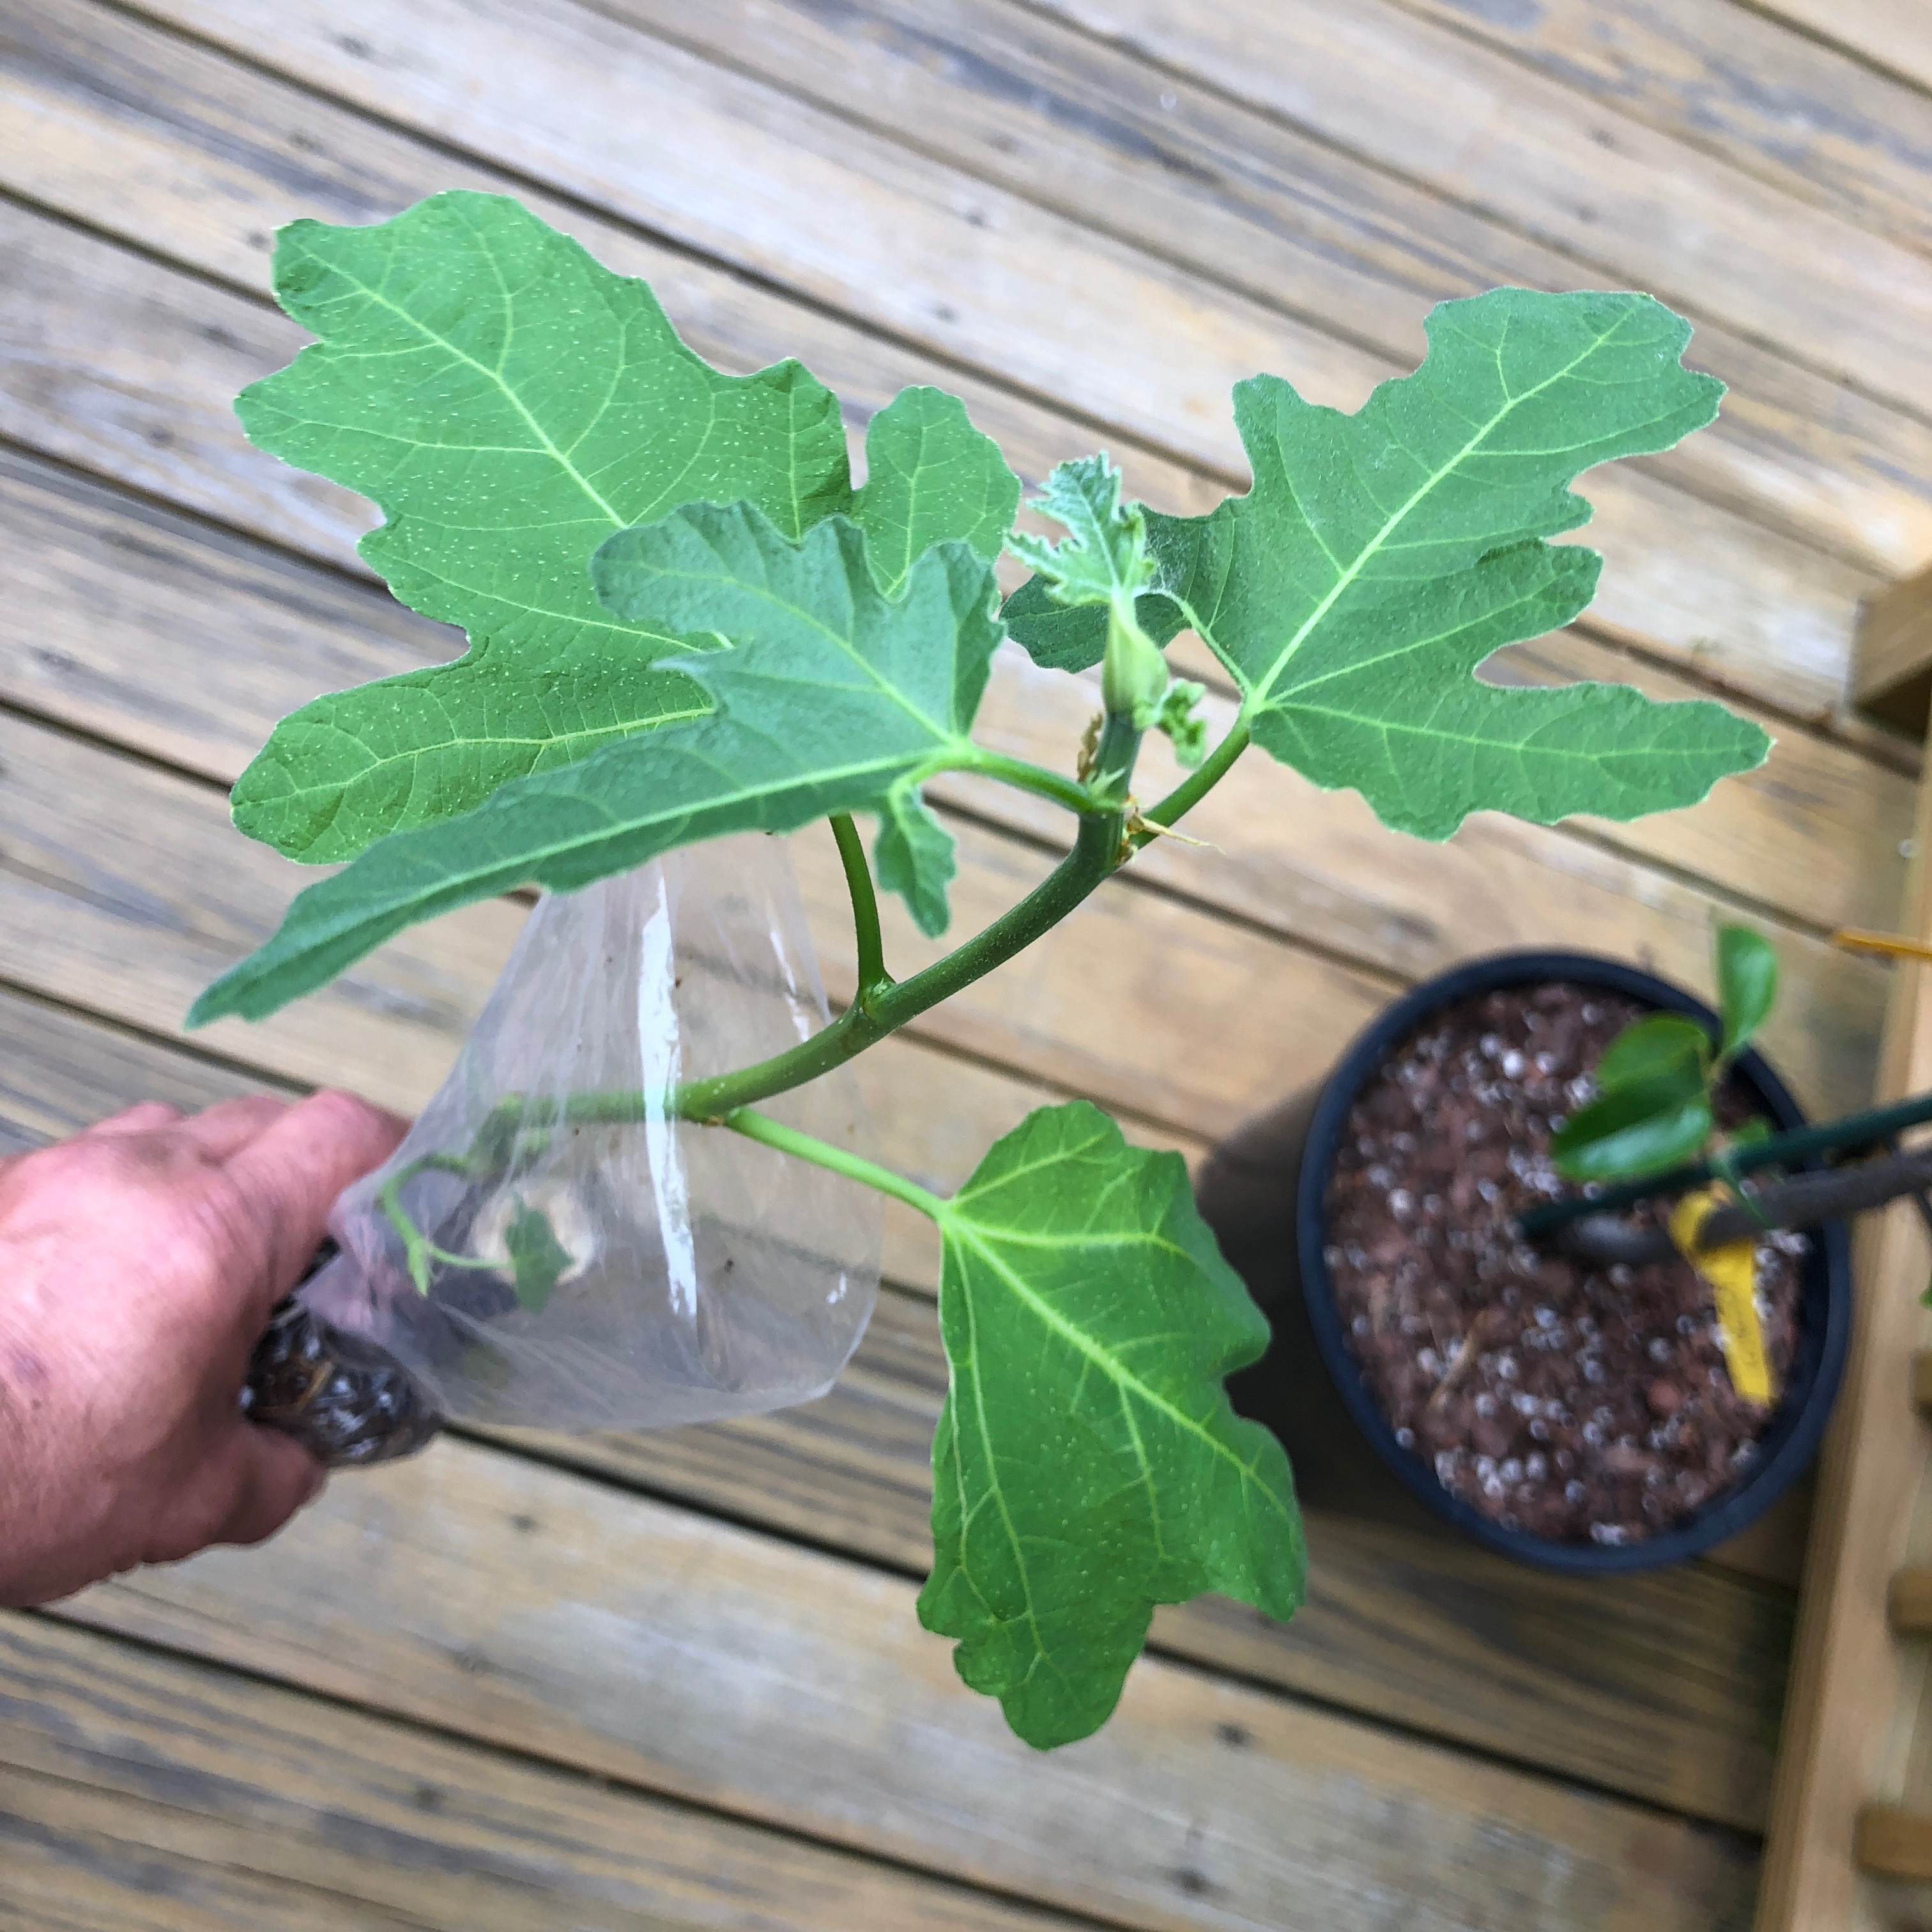
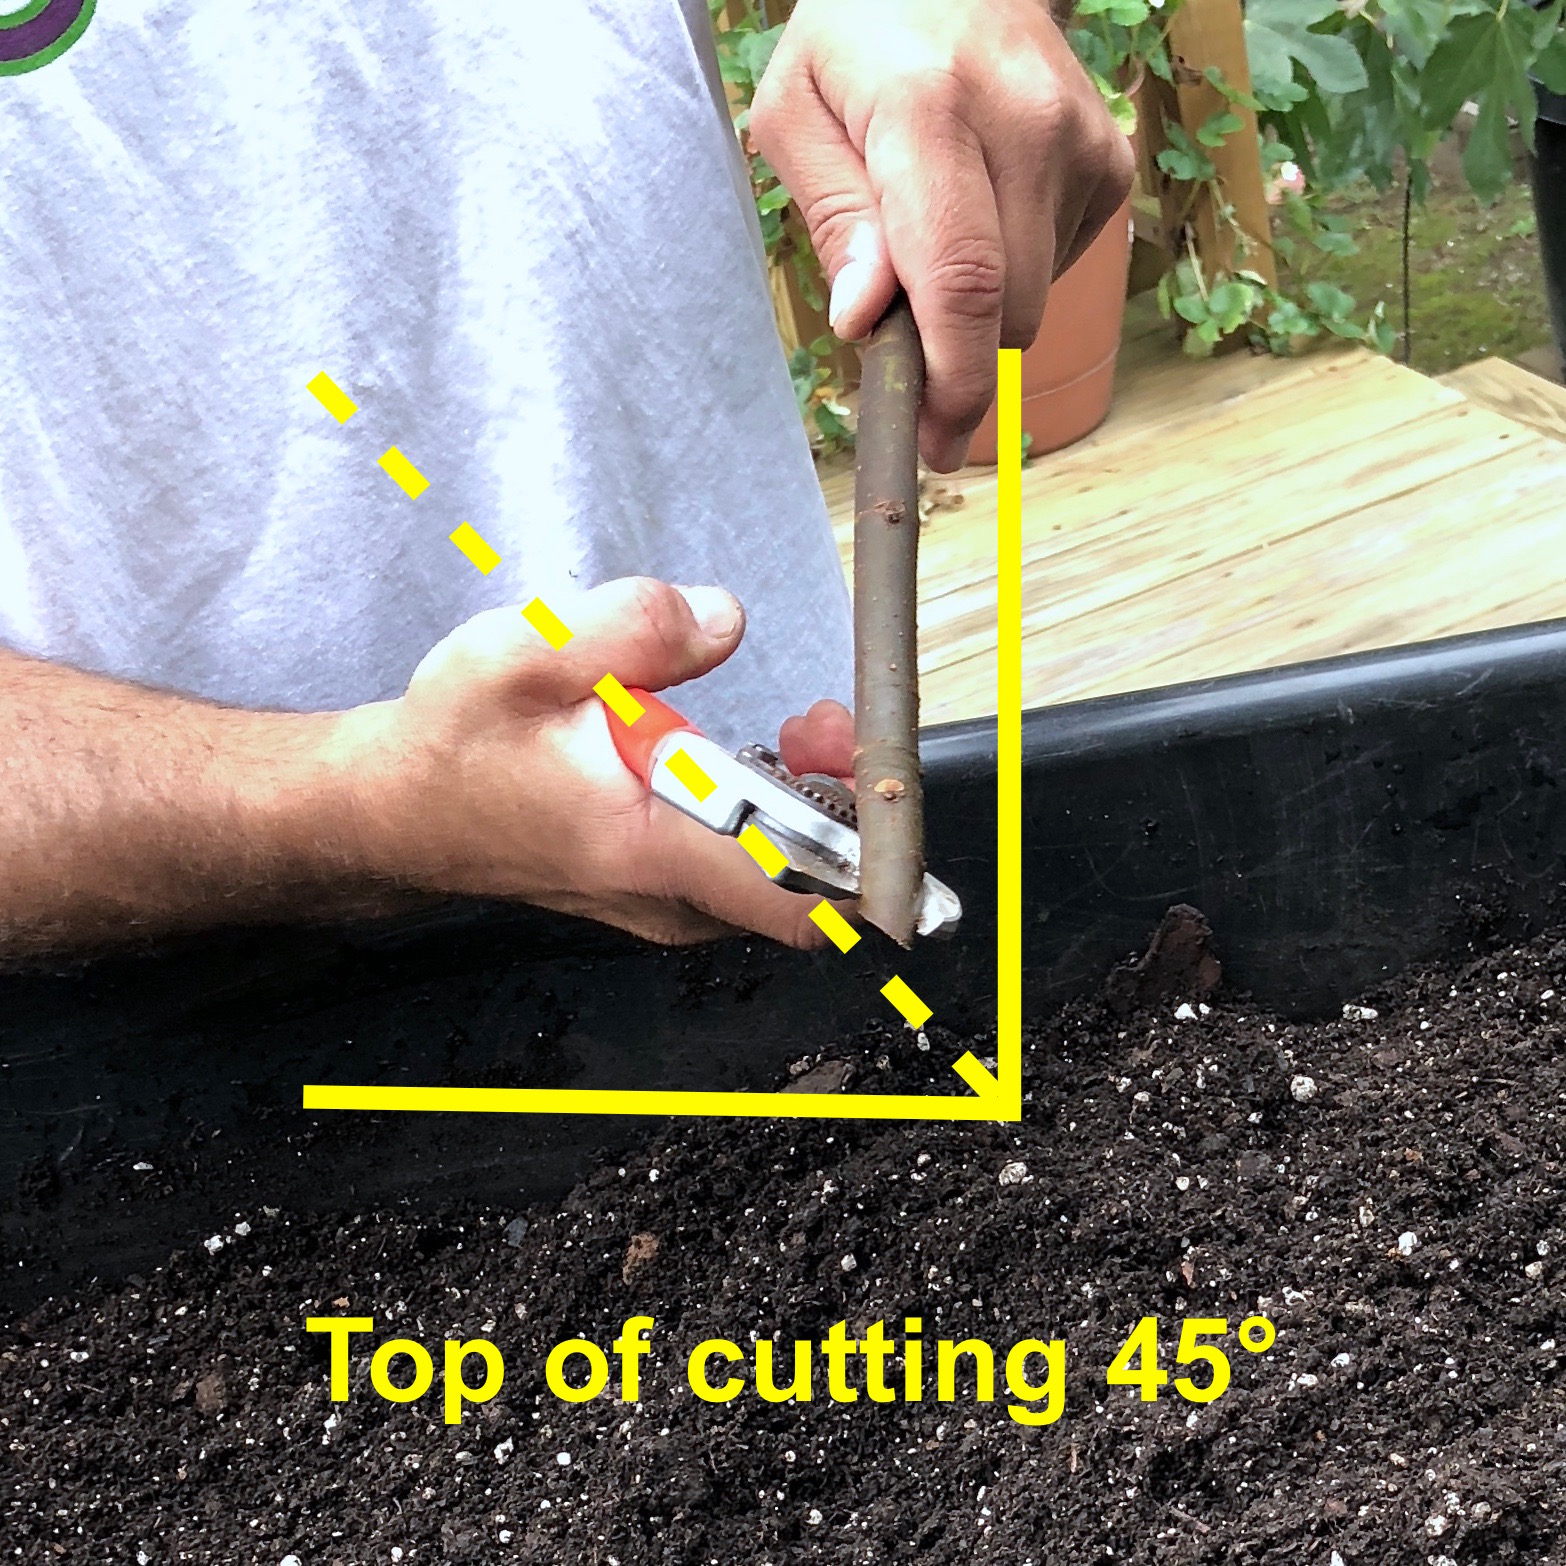
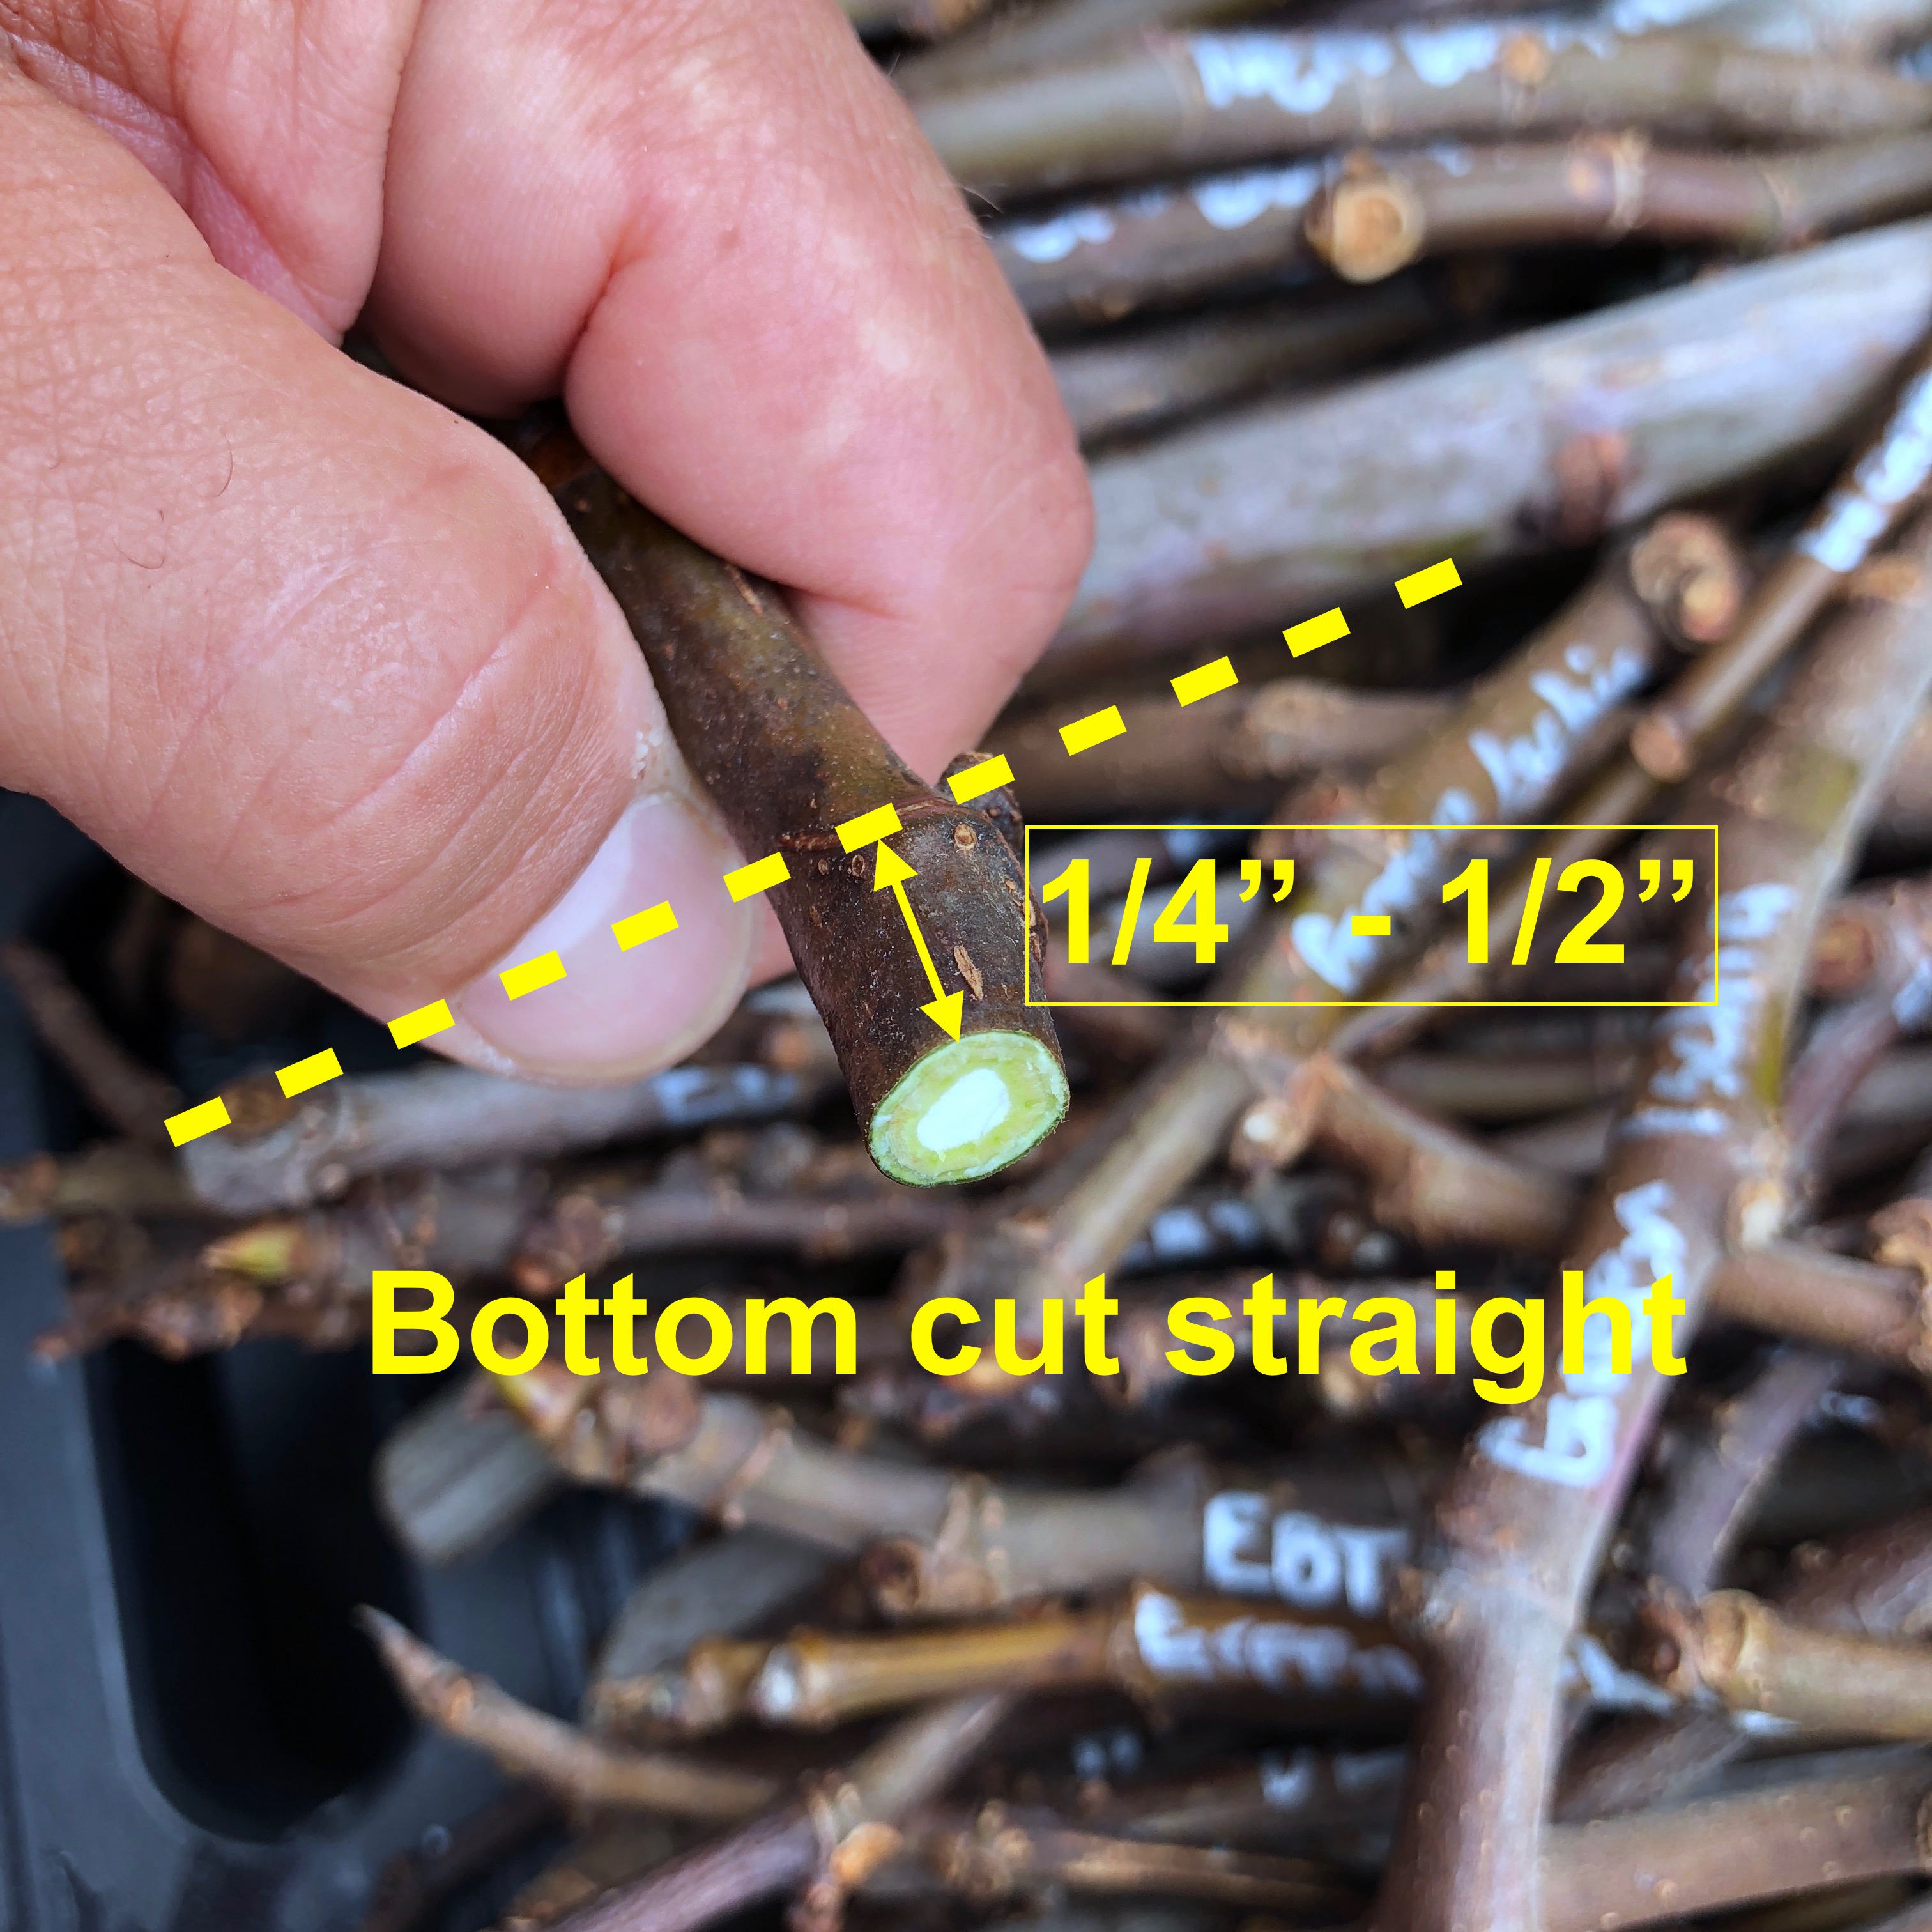
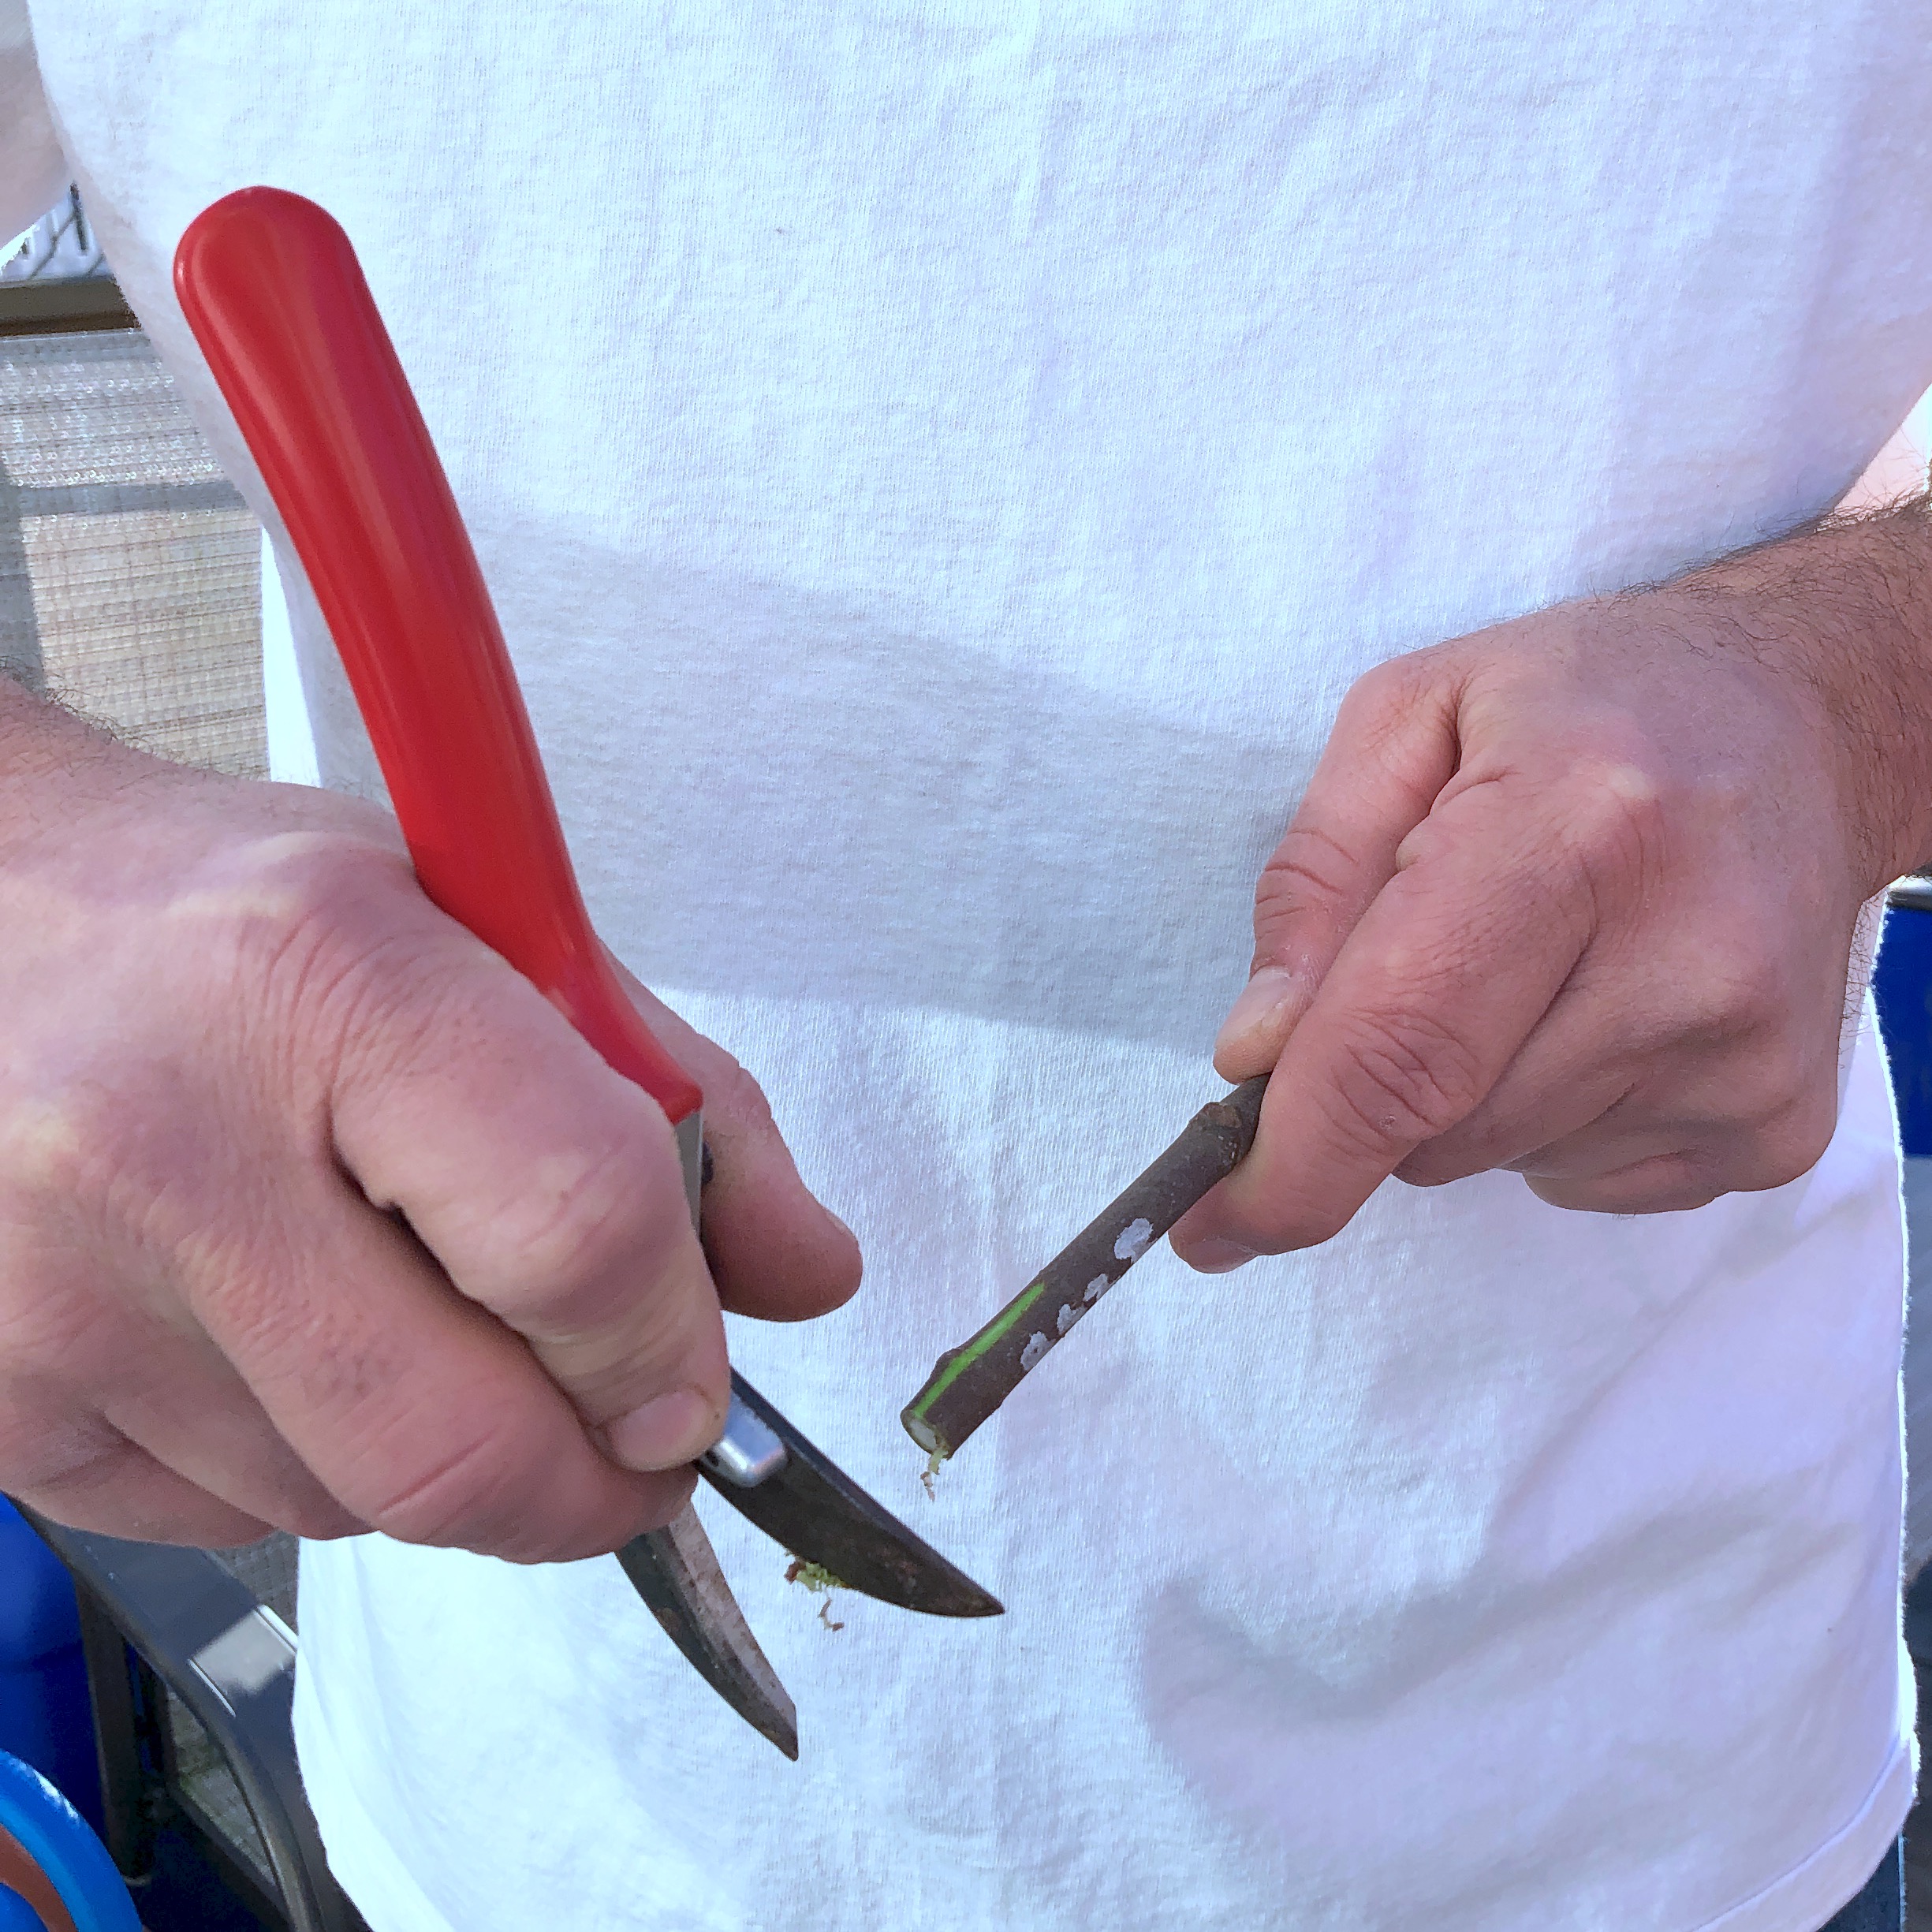
- Give your clean and dry cuttings a fresh cut on the top at 45 degrees and another straight across the bottom, ¼” to ½” from the bottom node. The 45 degree cut at the top is an easy method of remembering which side is up. Moisture will also roll off the top of the cutting and help prevent rot later on. The bottom cut will aid in the next step.
-
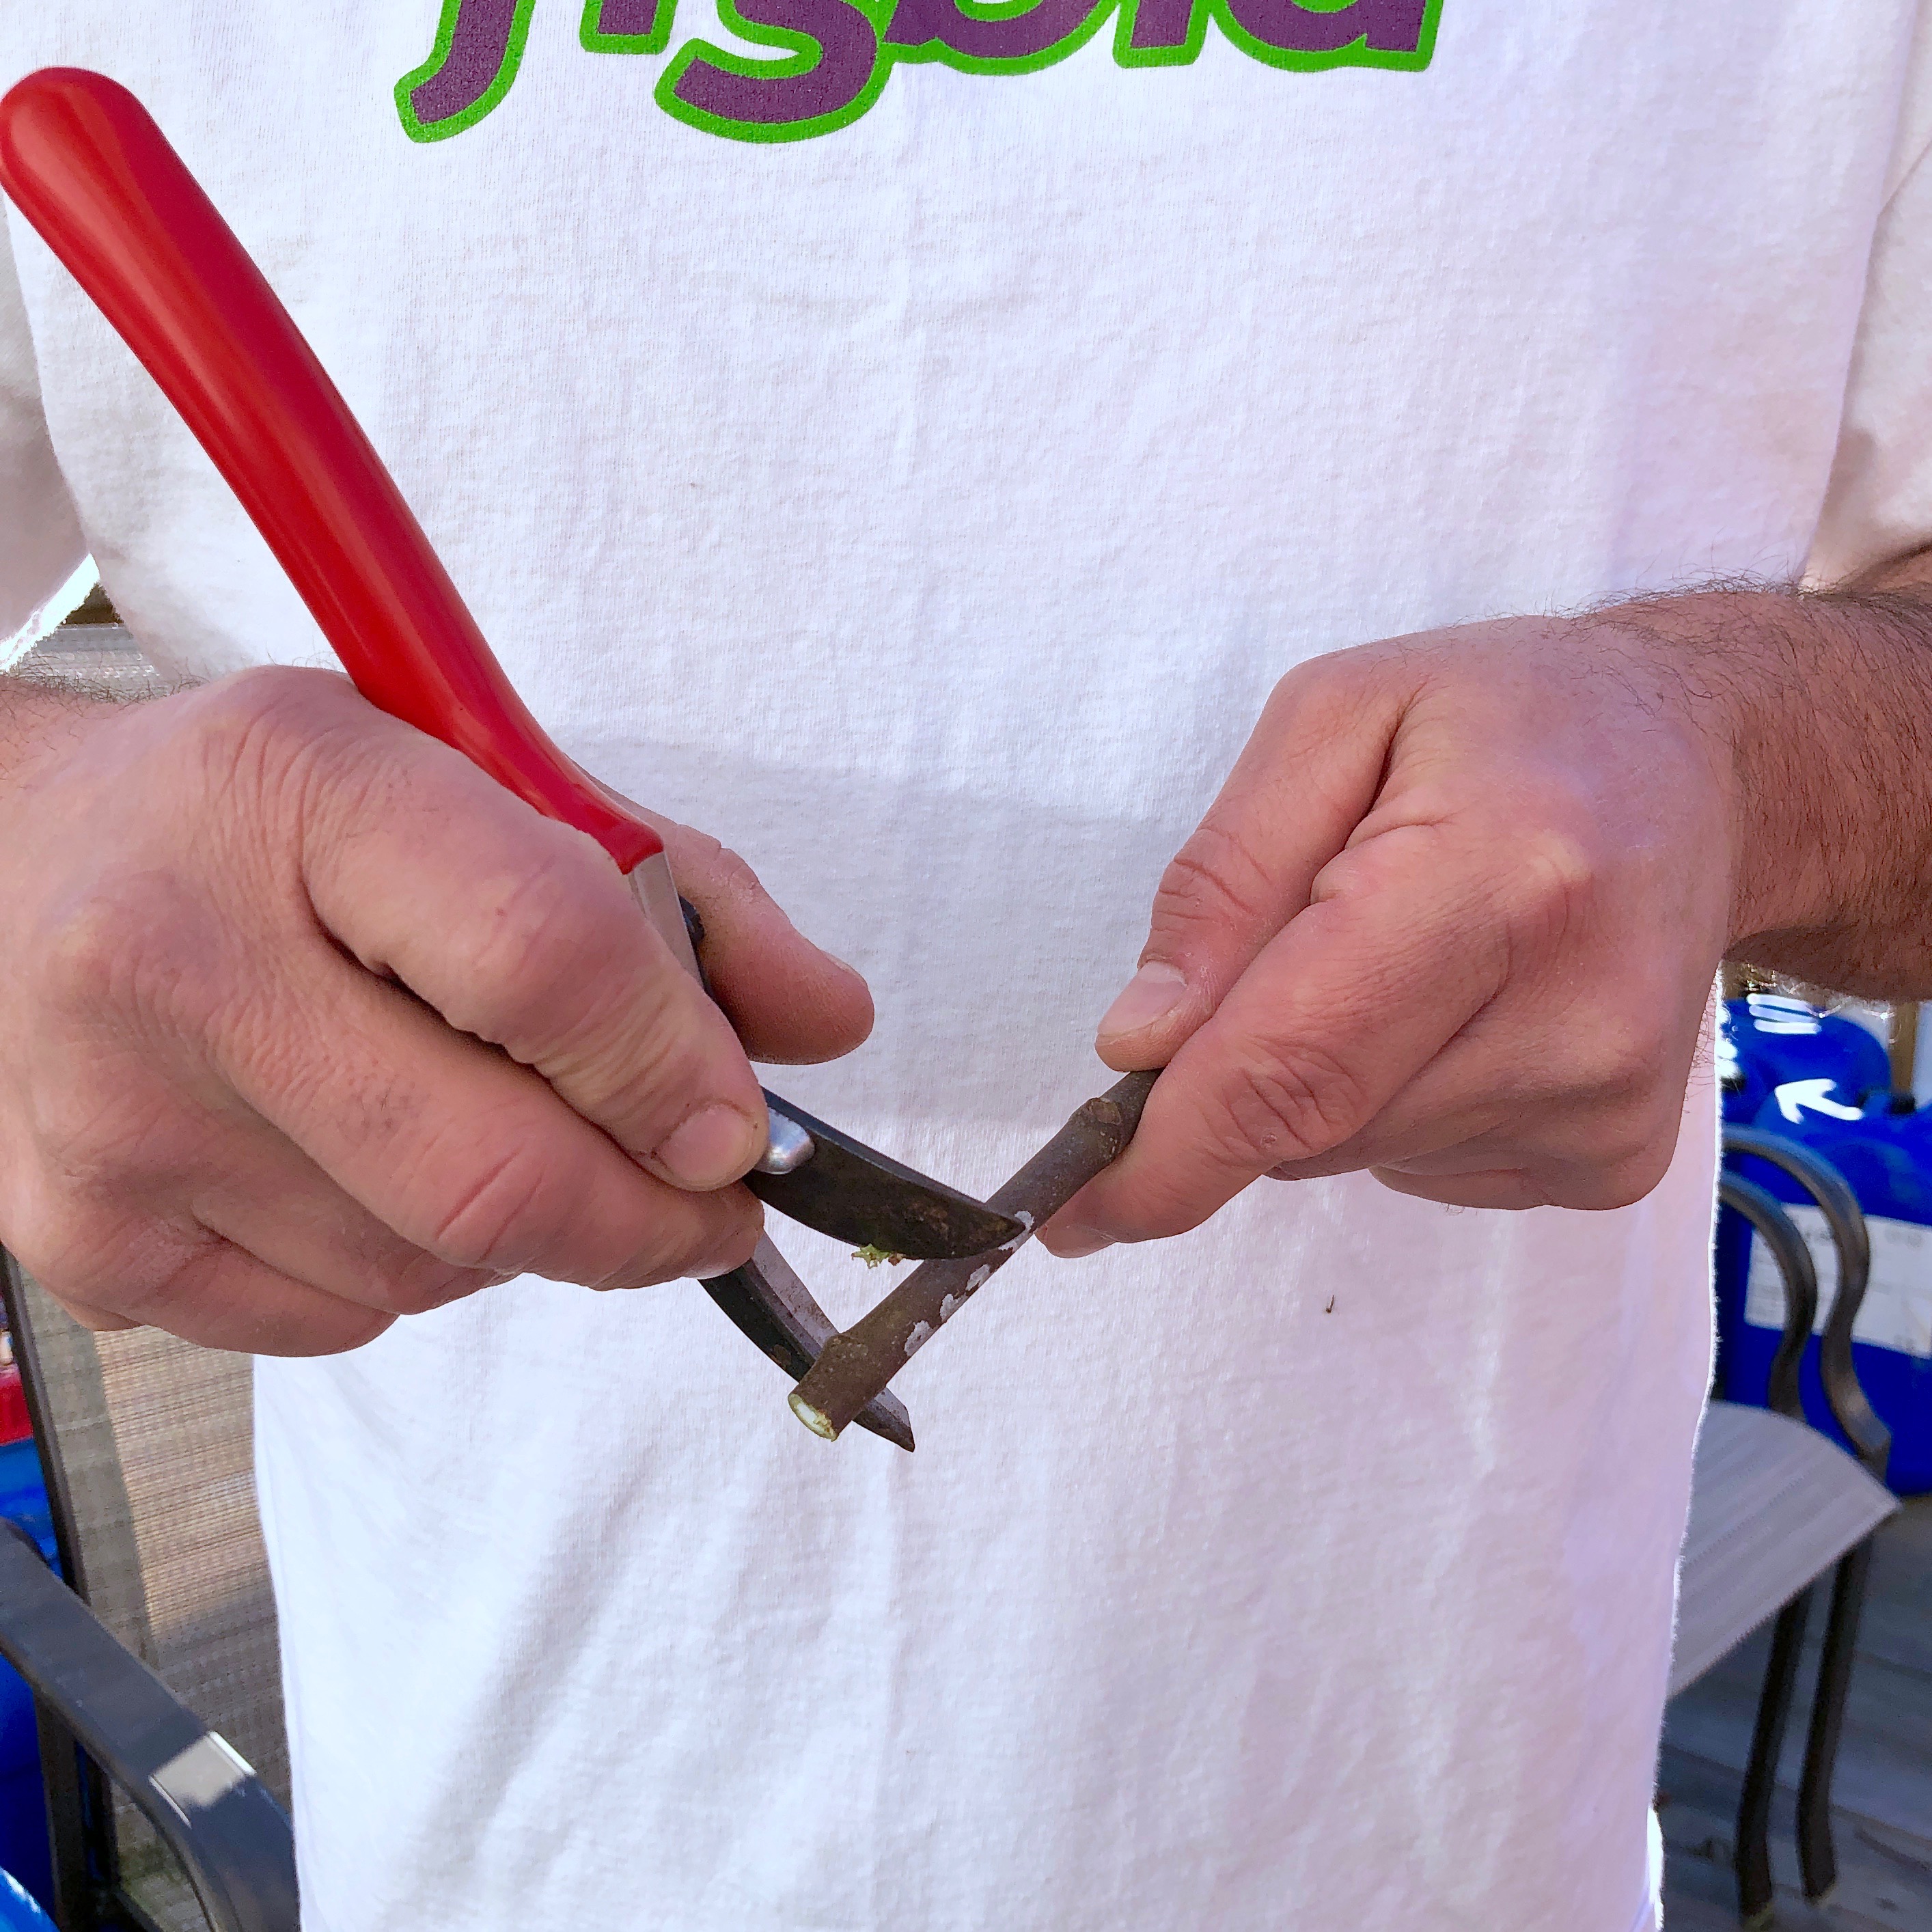
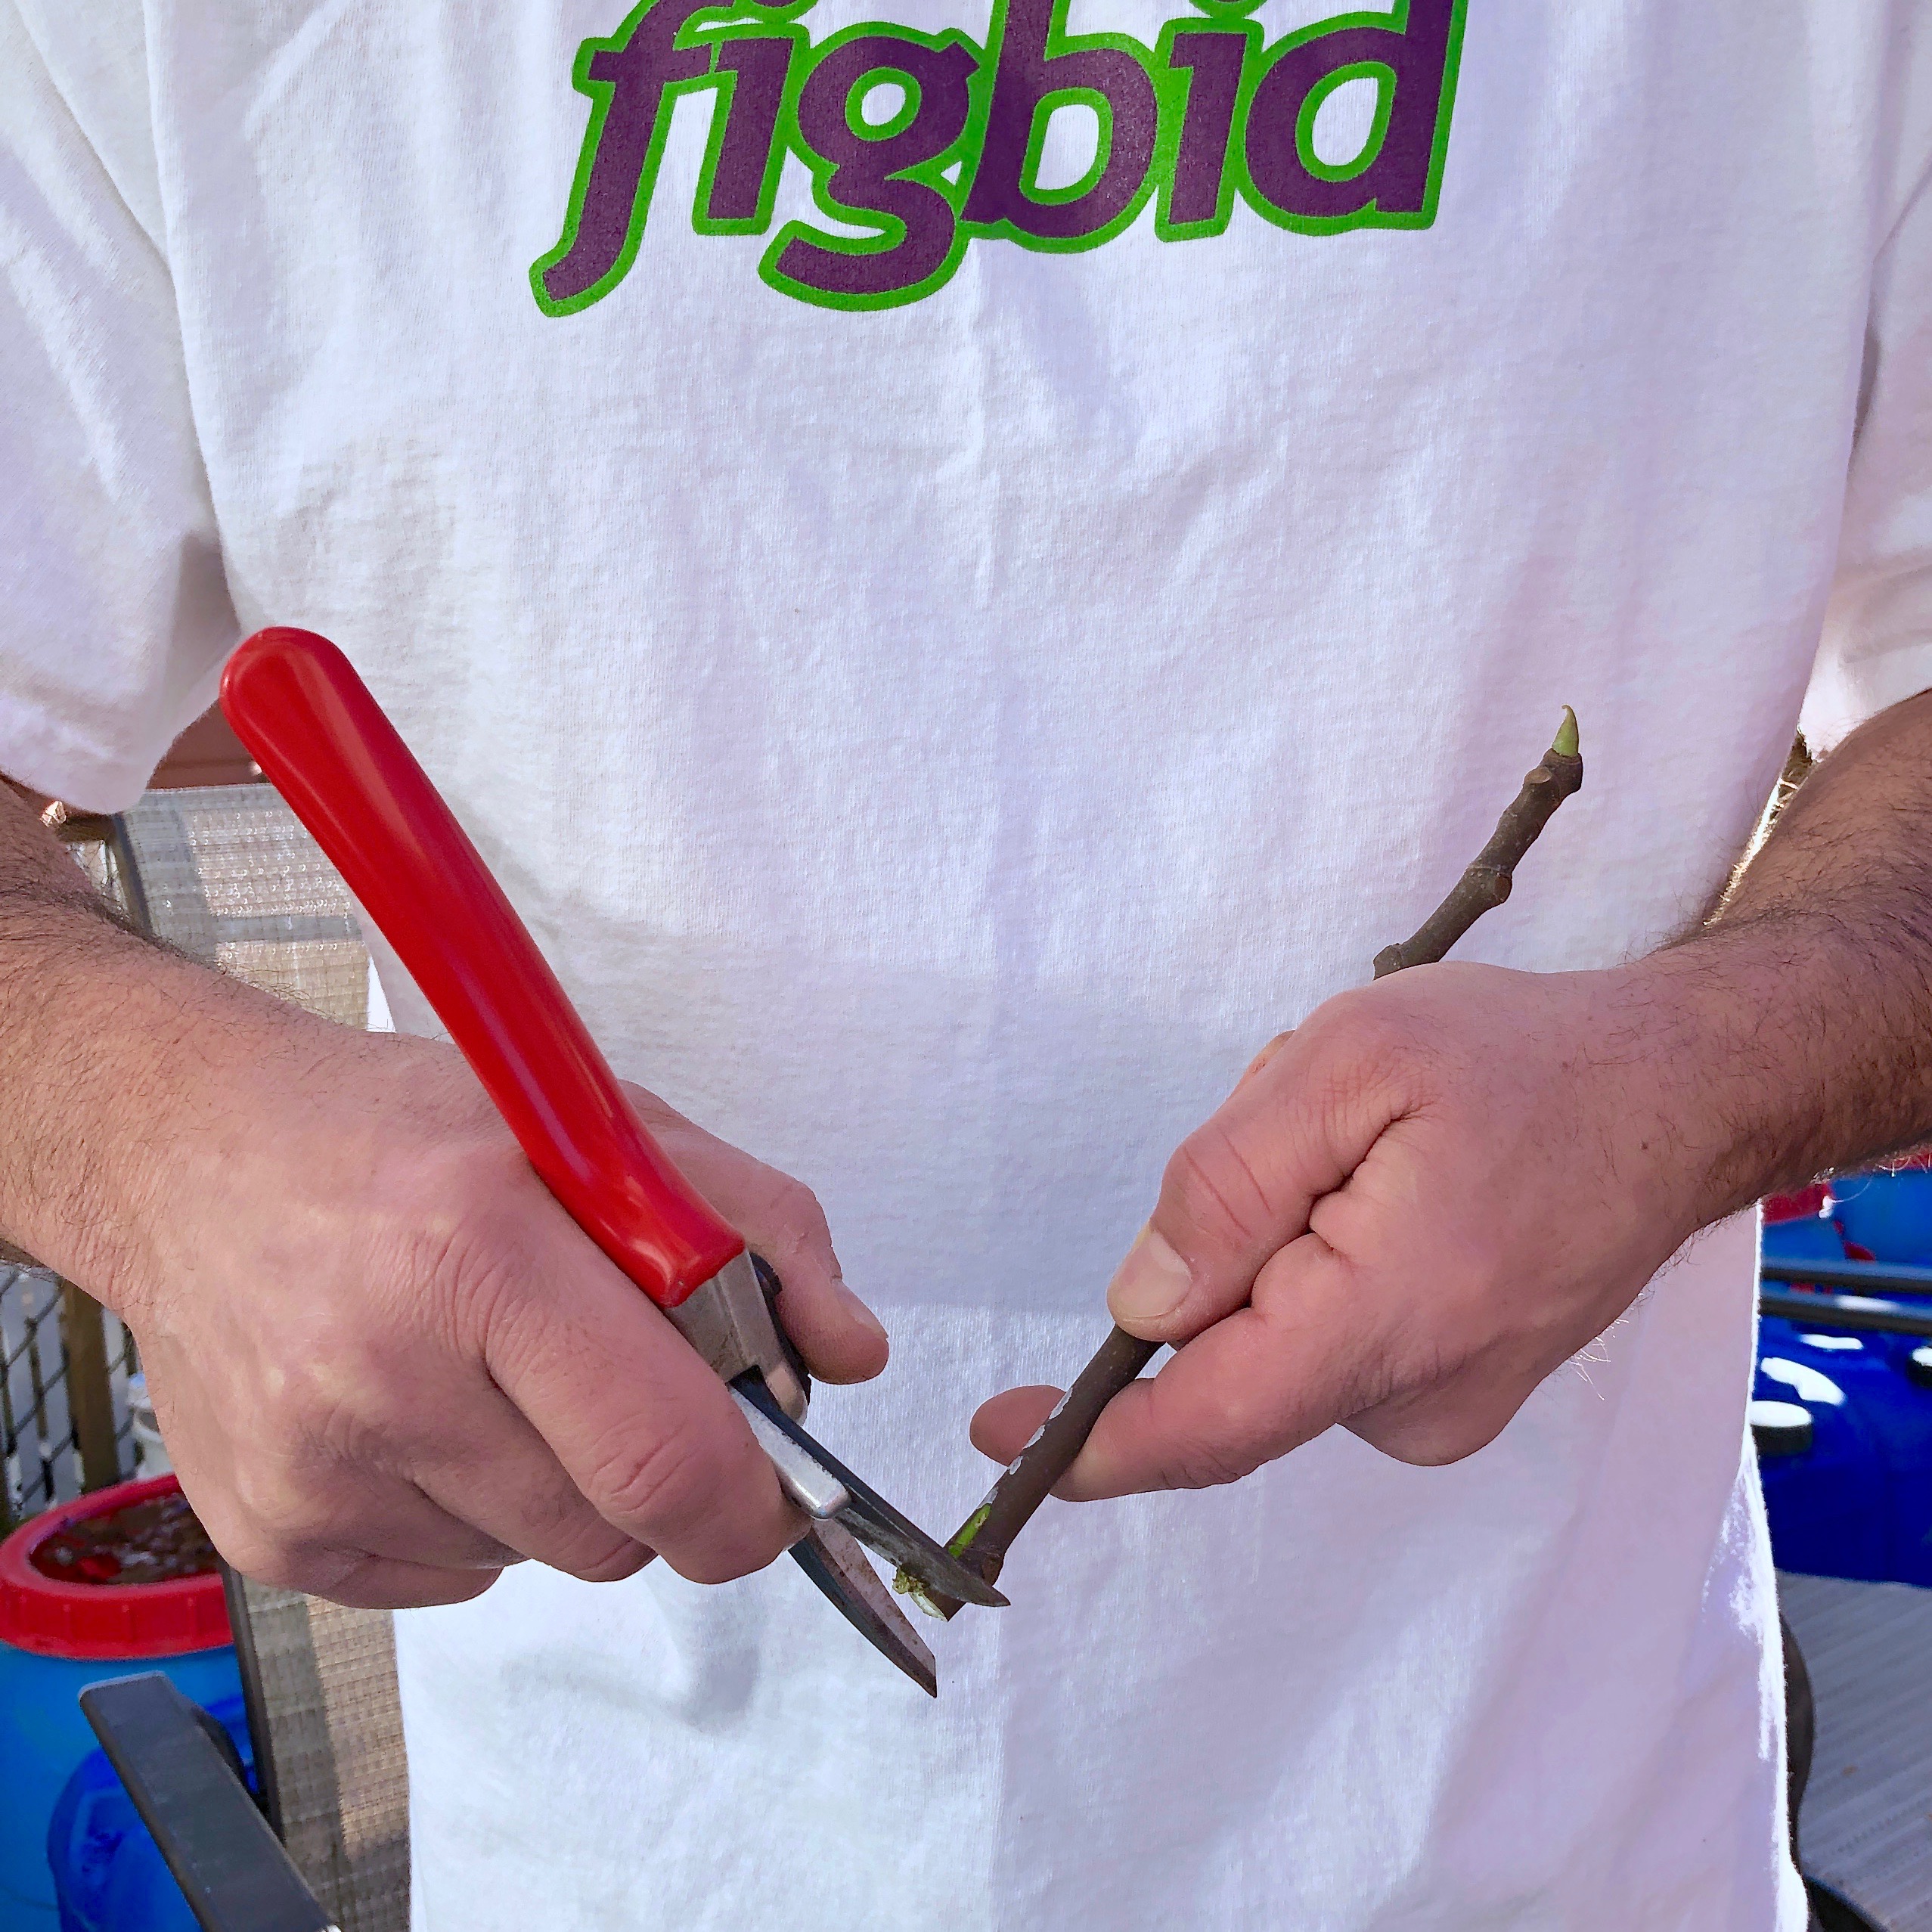
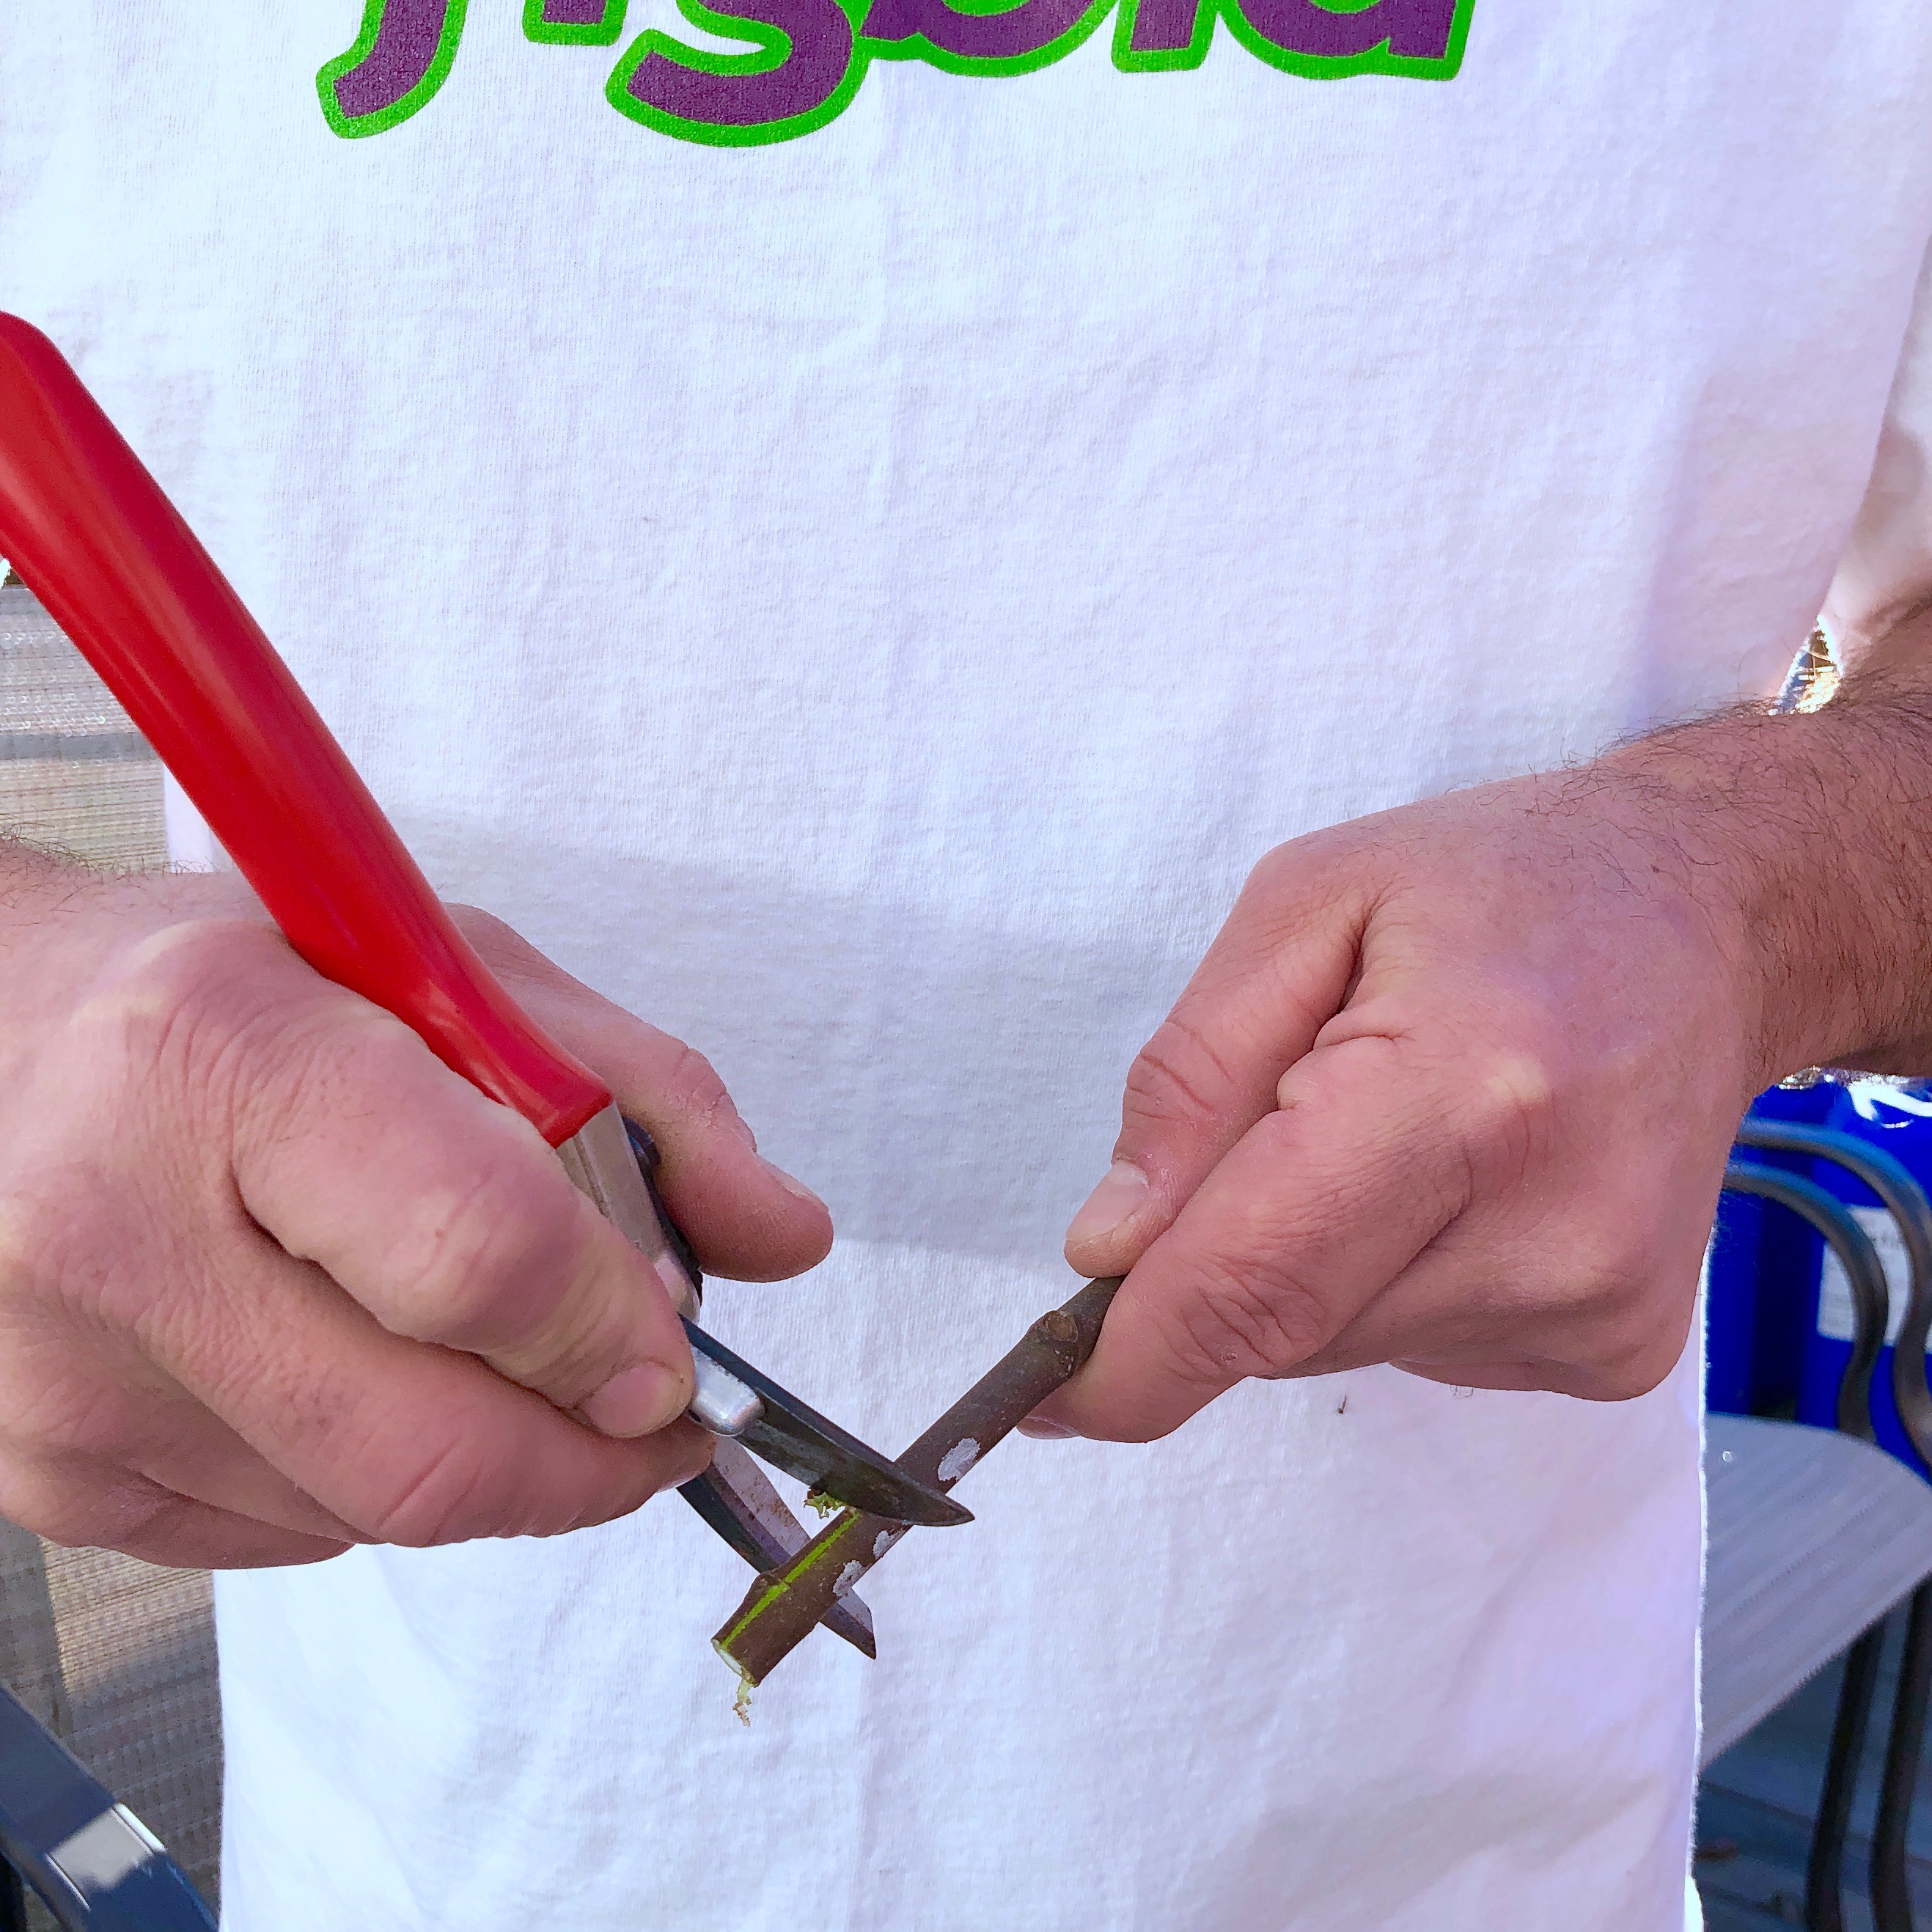
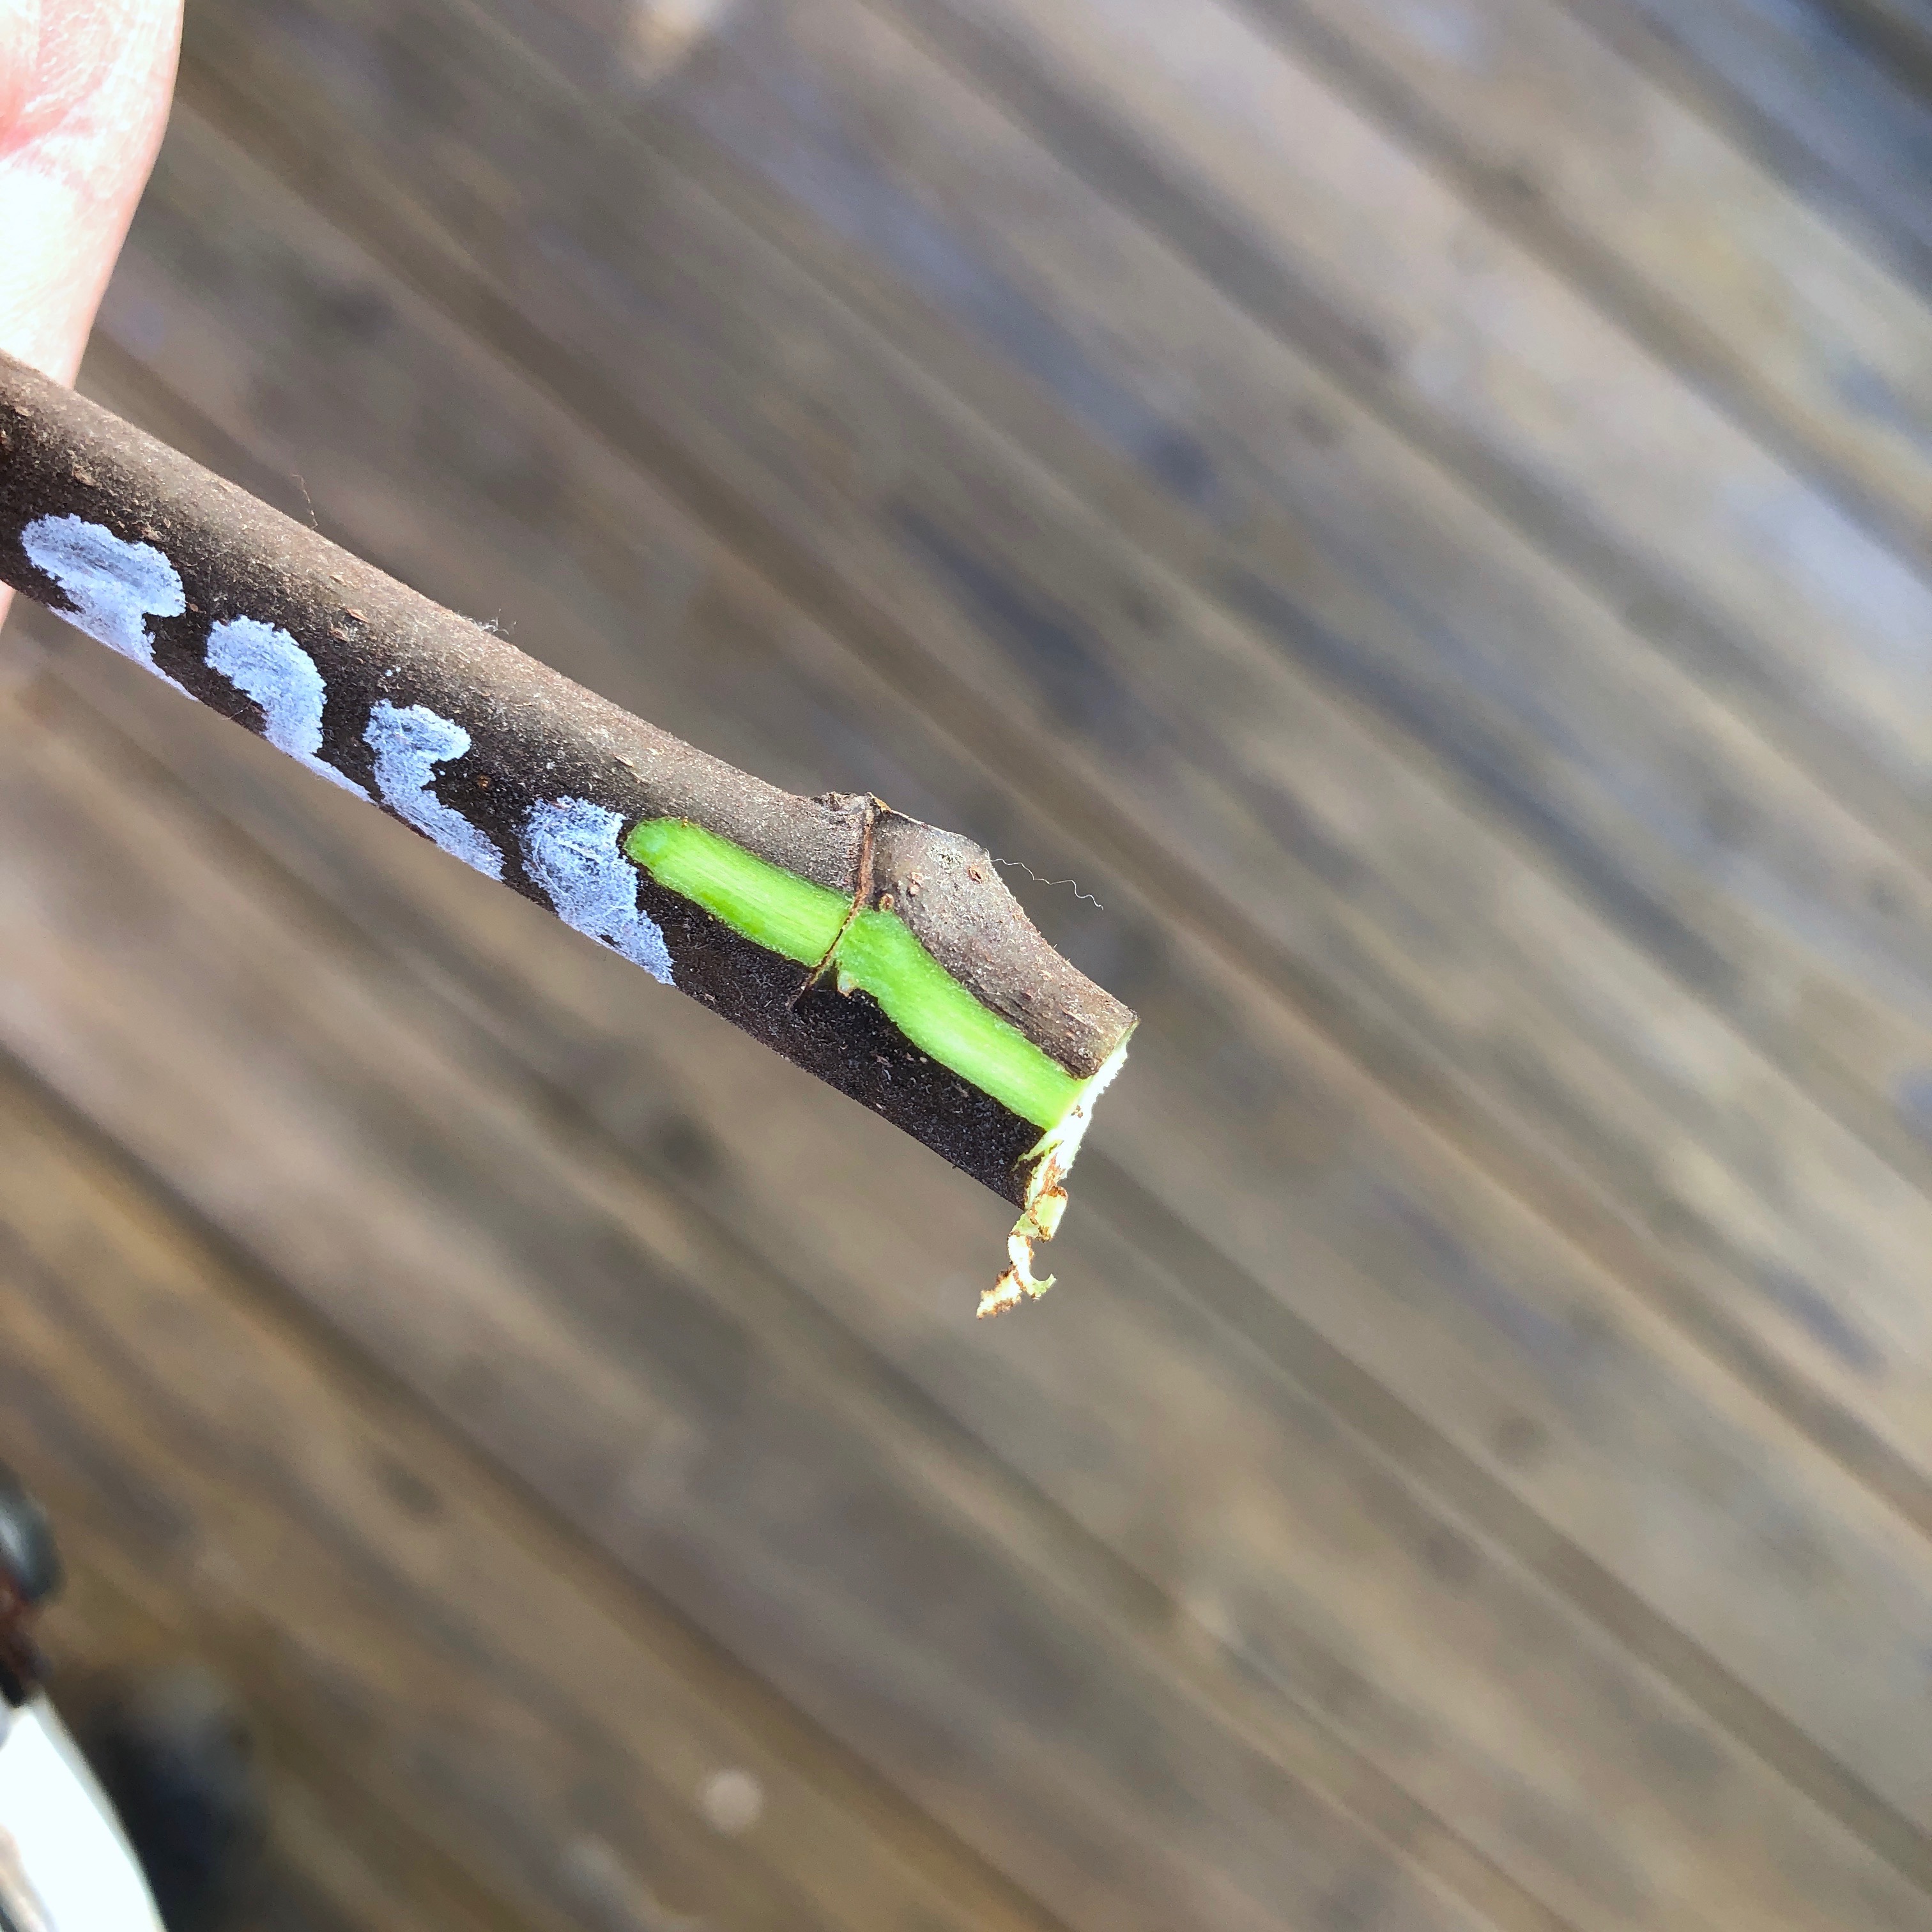
- Optional: Once your cuttings have a fresh clip, you’ll want to scrape the bark through the bottom node. Using the pruner blade, start about 1/4" above the bottom node. Scrape downward and away from you, dragging the pruner blade through the node to the bottom of the fig cutting. You may need to go back and forth a few times. The goal is to remove only the bark, exposing the green cambium layer below. This will release stored hormones at the location and aid in forming new roots. Check out this video of rooting fig cuttings using a different method to see how it's done. Fast-forward to 1:30 to view the operation. Alternatively, instead of scraping you can slice through the bottom node. Using a clean, sharp knife or razor blade, begin the slice about 1/4" above the bottom node. Slice downward and away from you, through the bottom node to the bottom of the cutting. The goal is the same as scraping, to remove the top layer of bark and expose the green cambium layer below. If you’d like to see how it’s done, check out this video of rooting fig cuttings using a different method. Fast-forward to 1:05 to view the operation. This step is not necessary but definitely helps. If you’re not comfortable for any reason, please don’t do it.
-
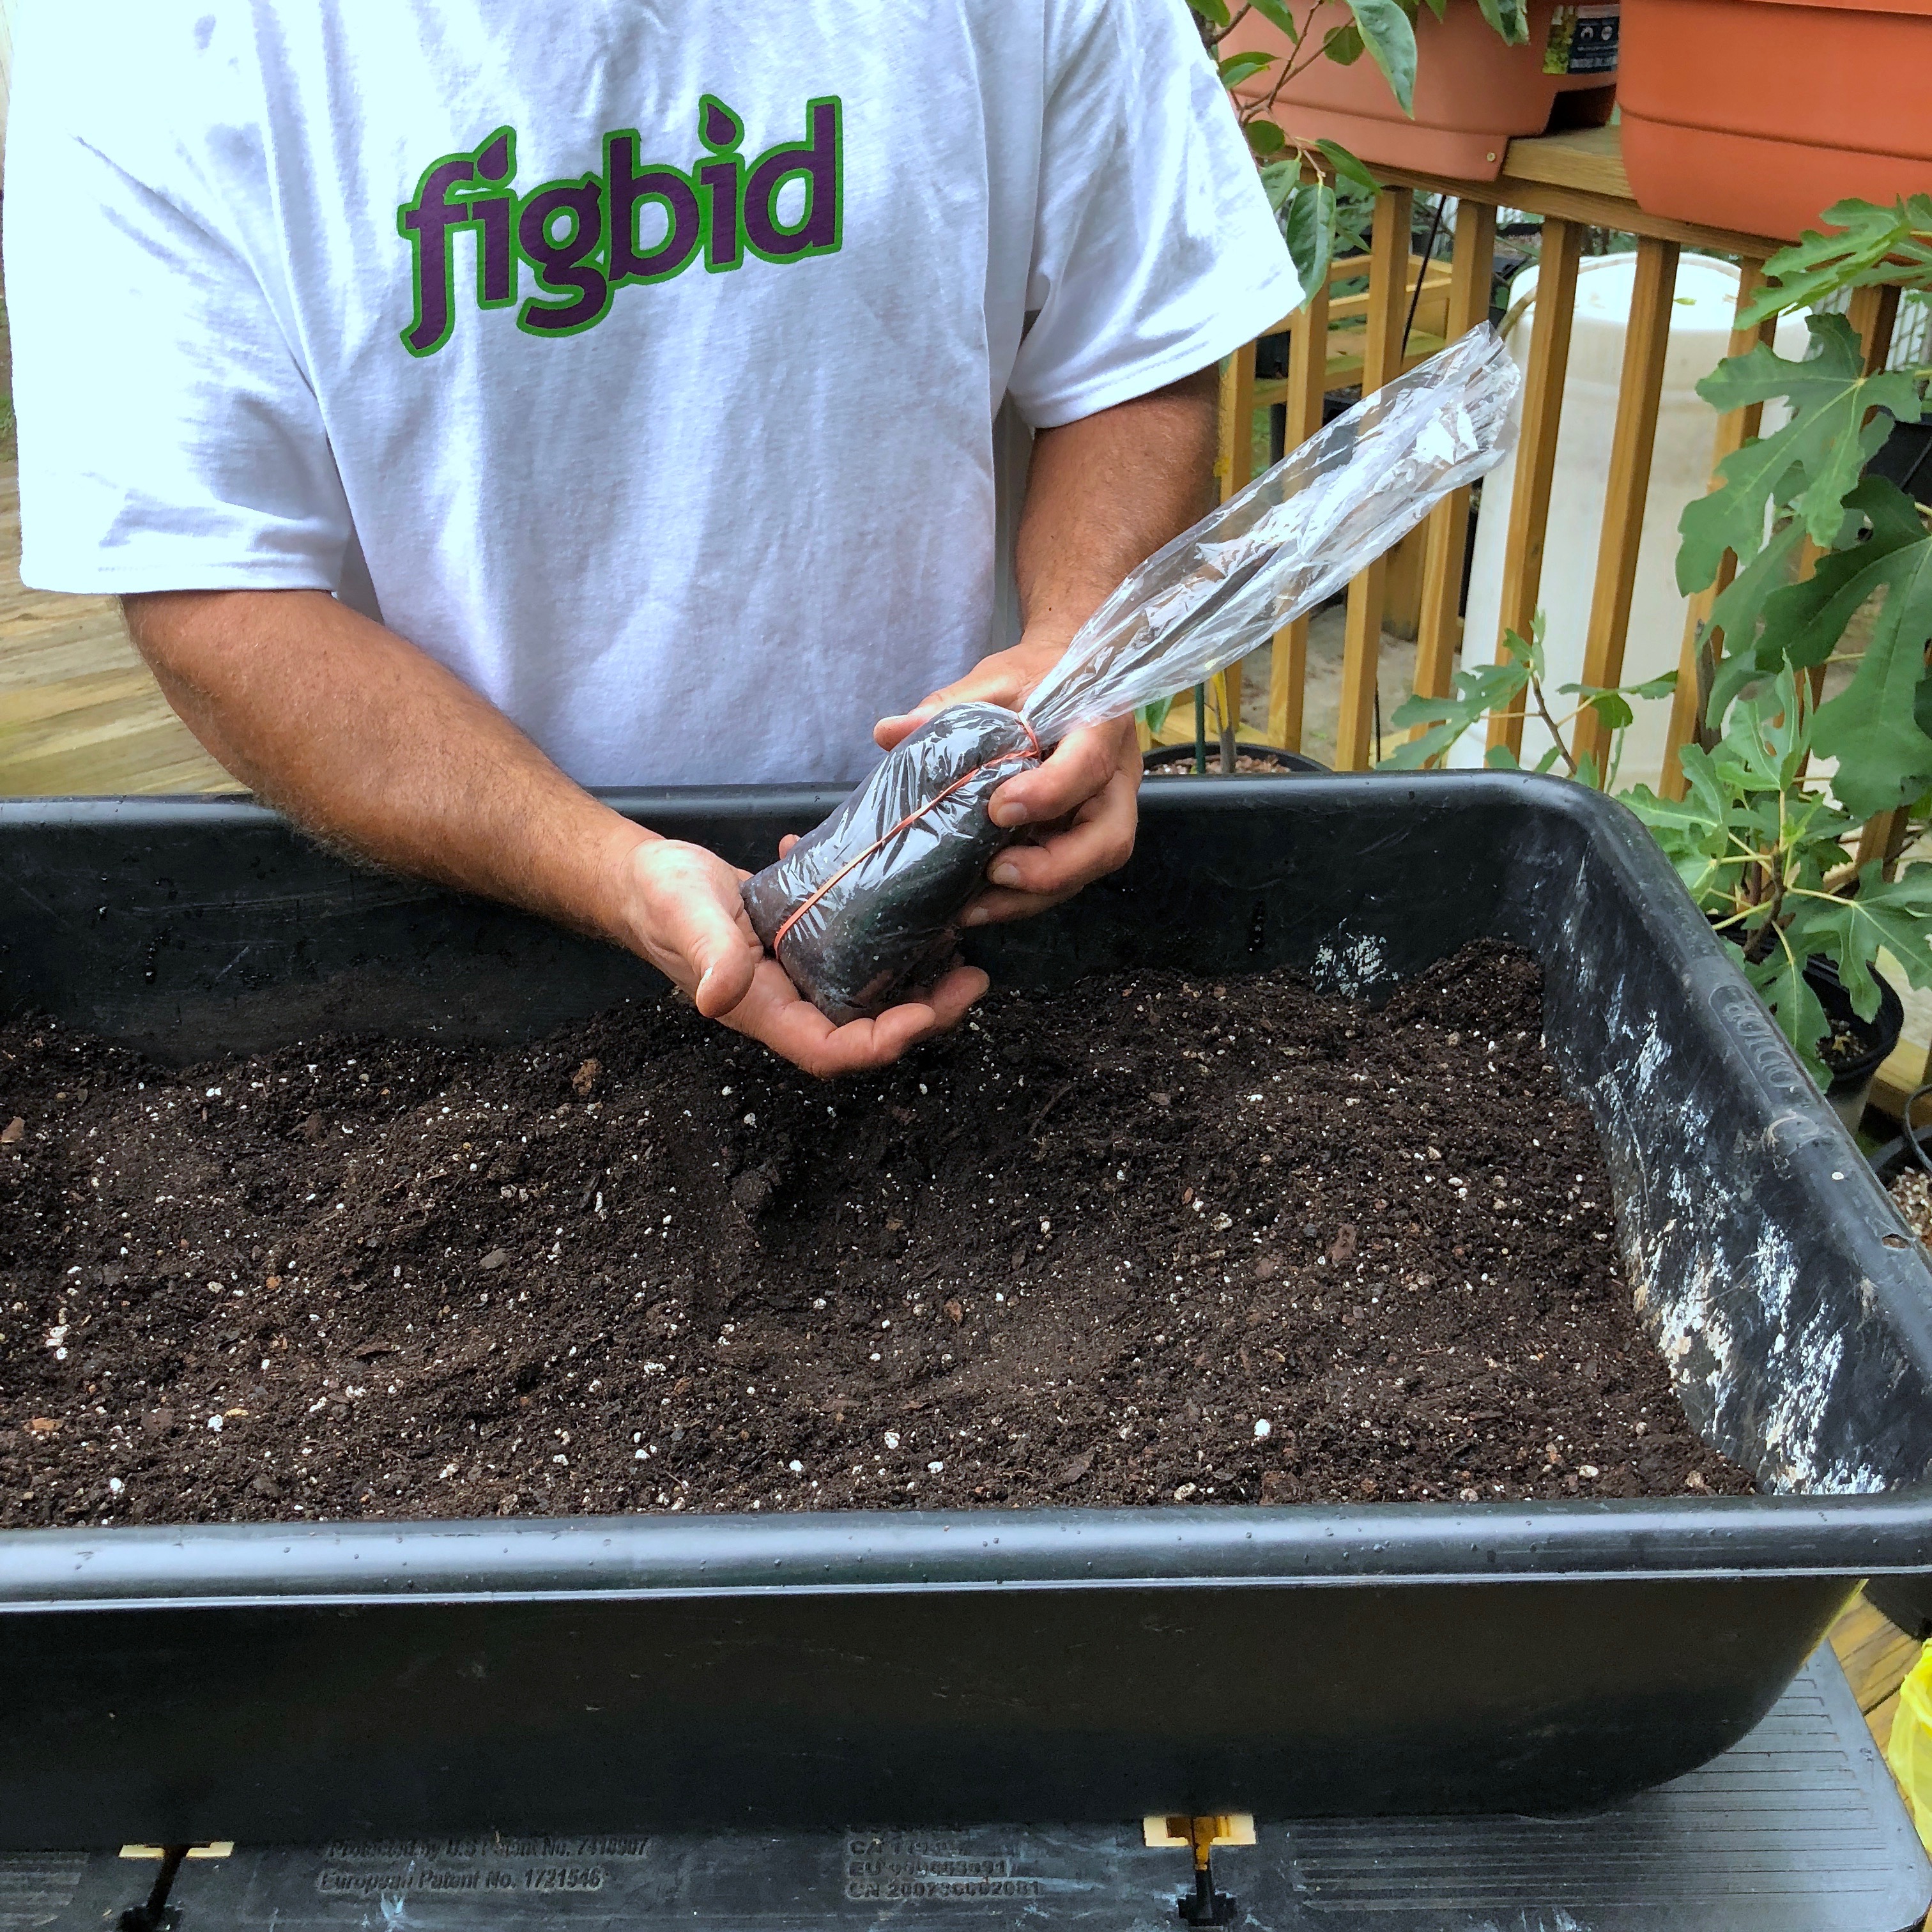
- Place the cutting, bottom side down, into the bag and push the cutting into the potting mix until it feels stable. Burying the cutting deeply speeds hydration and rooting.
-
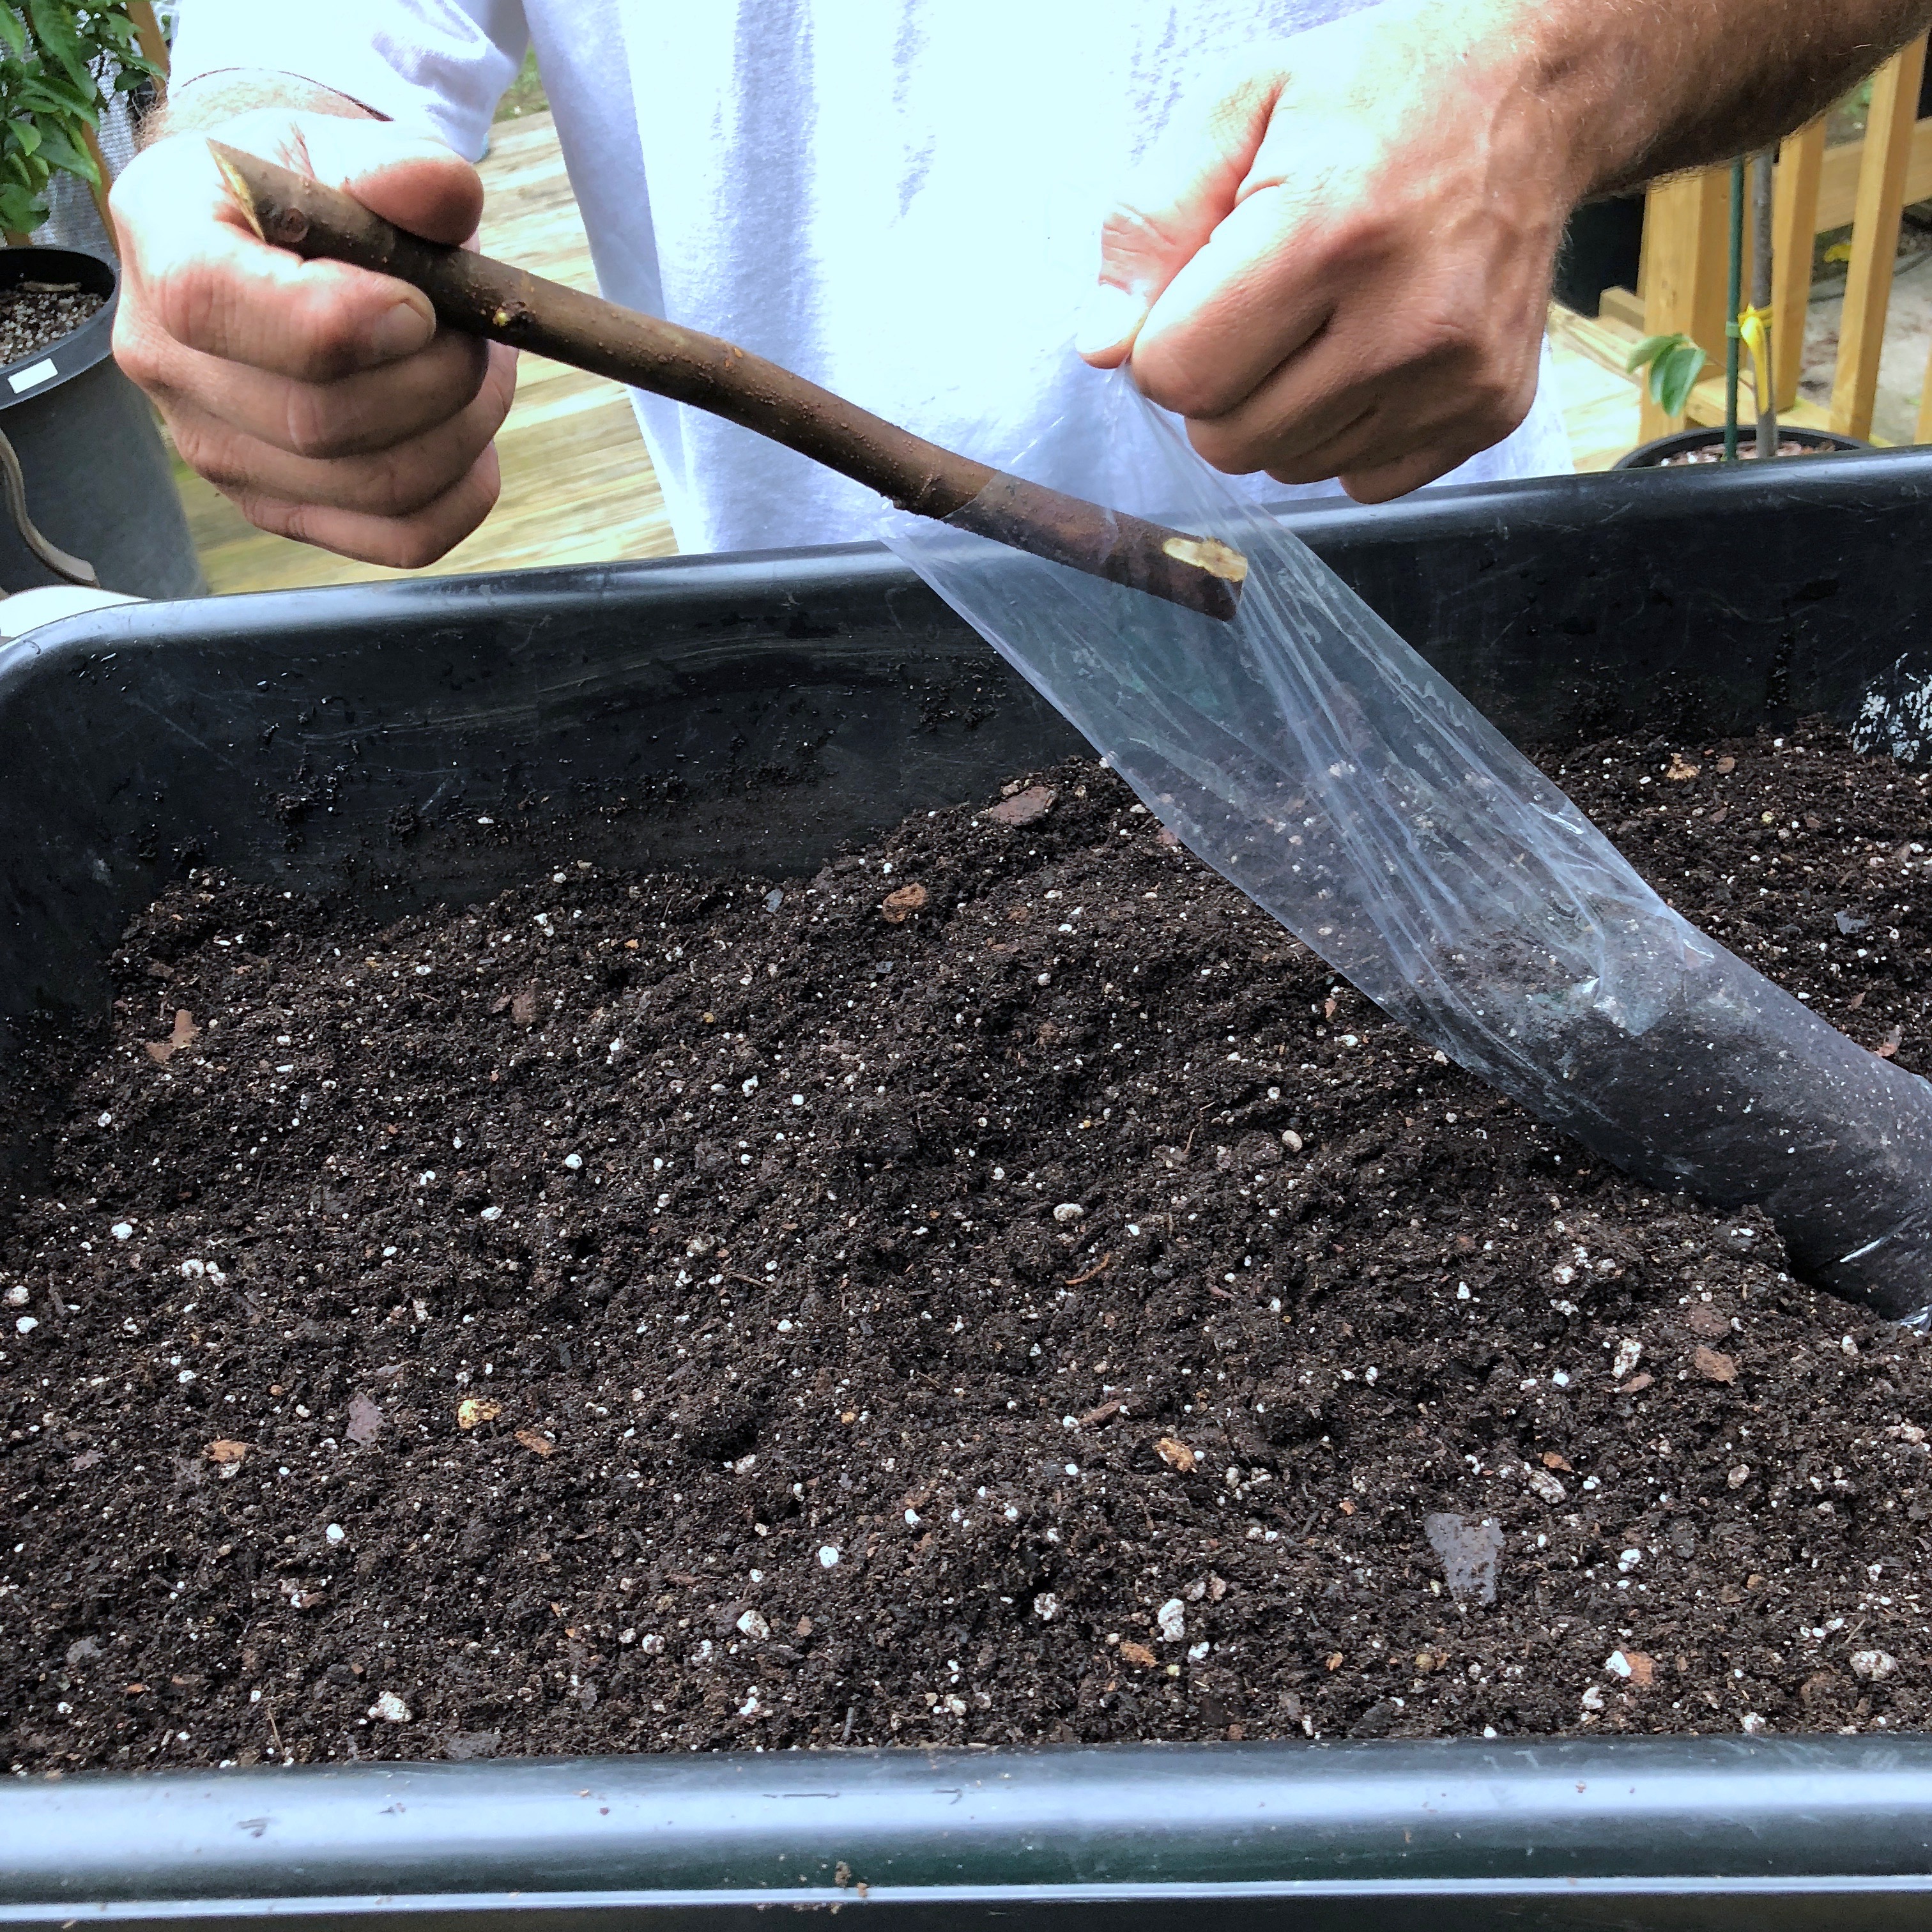
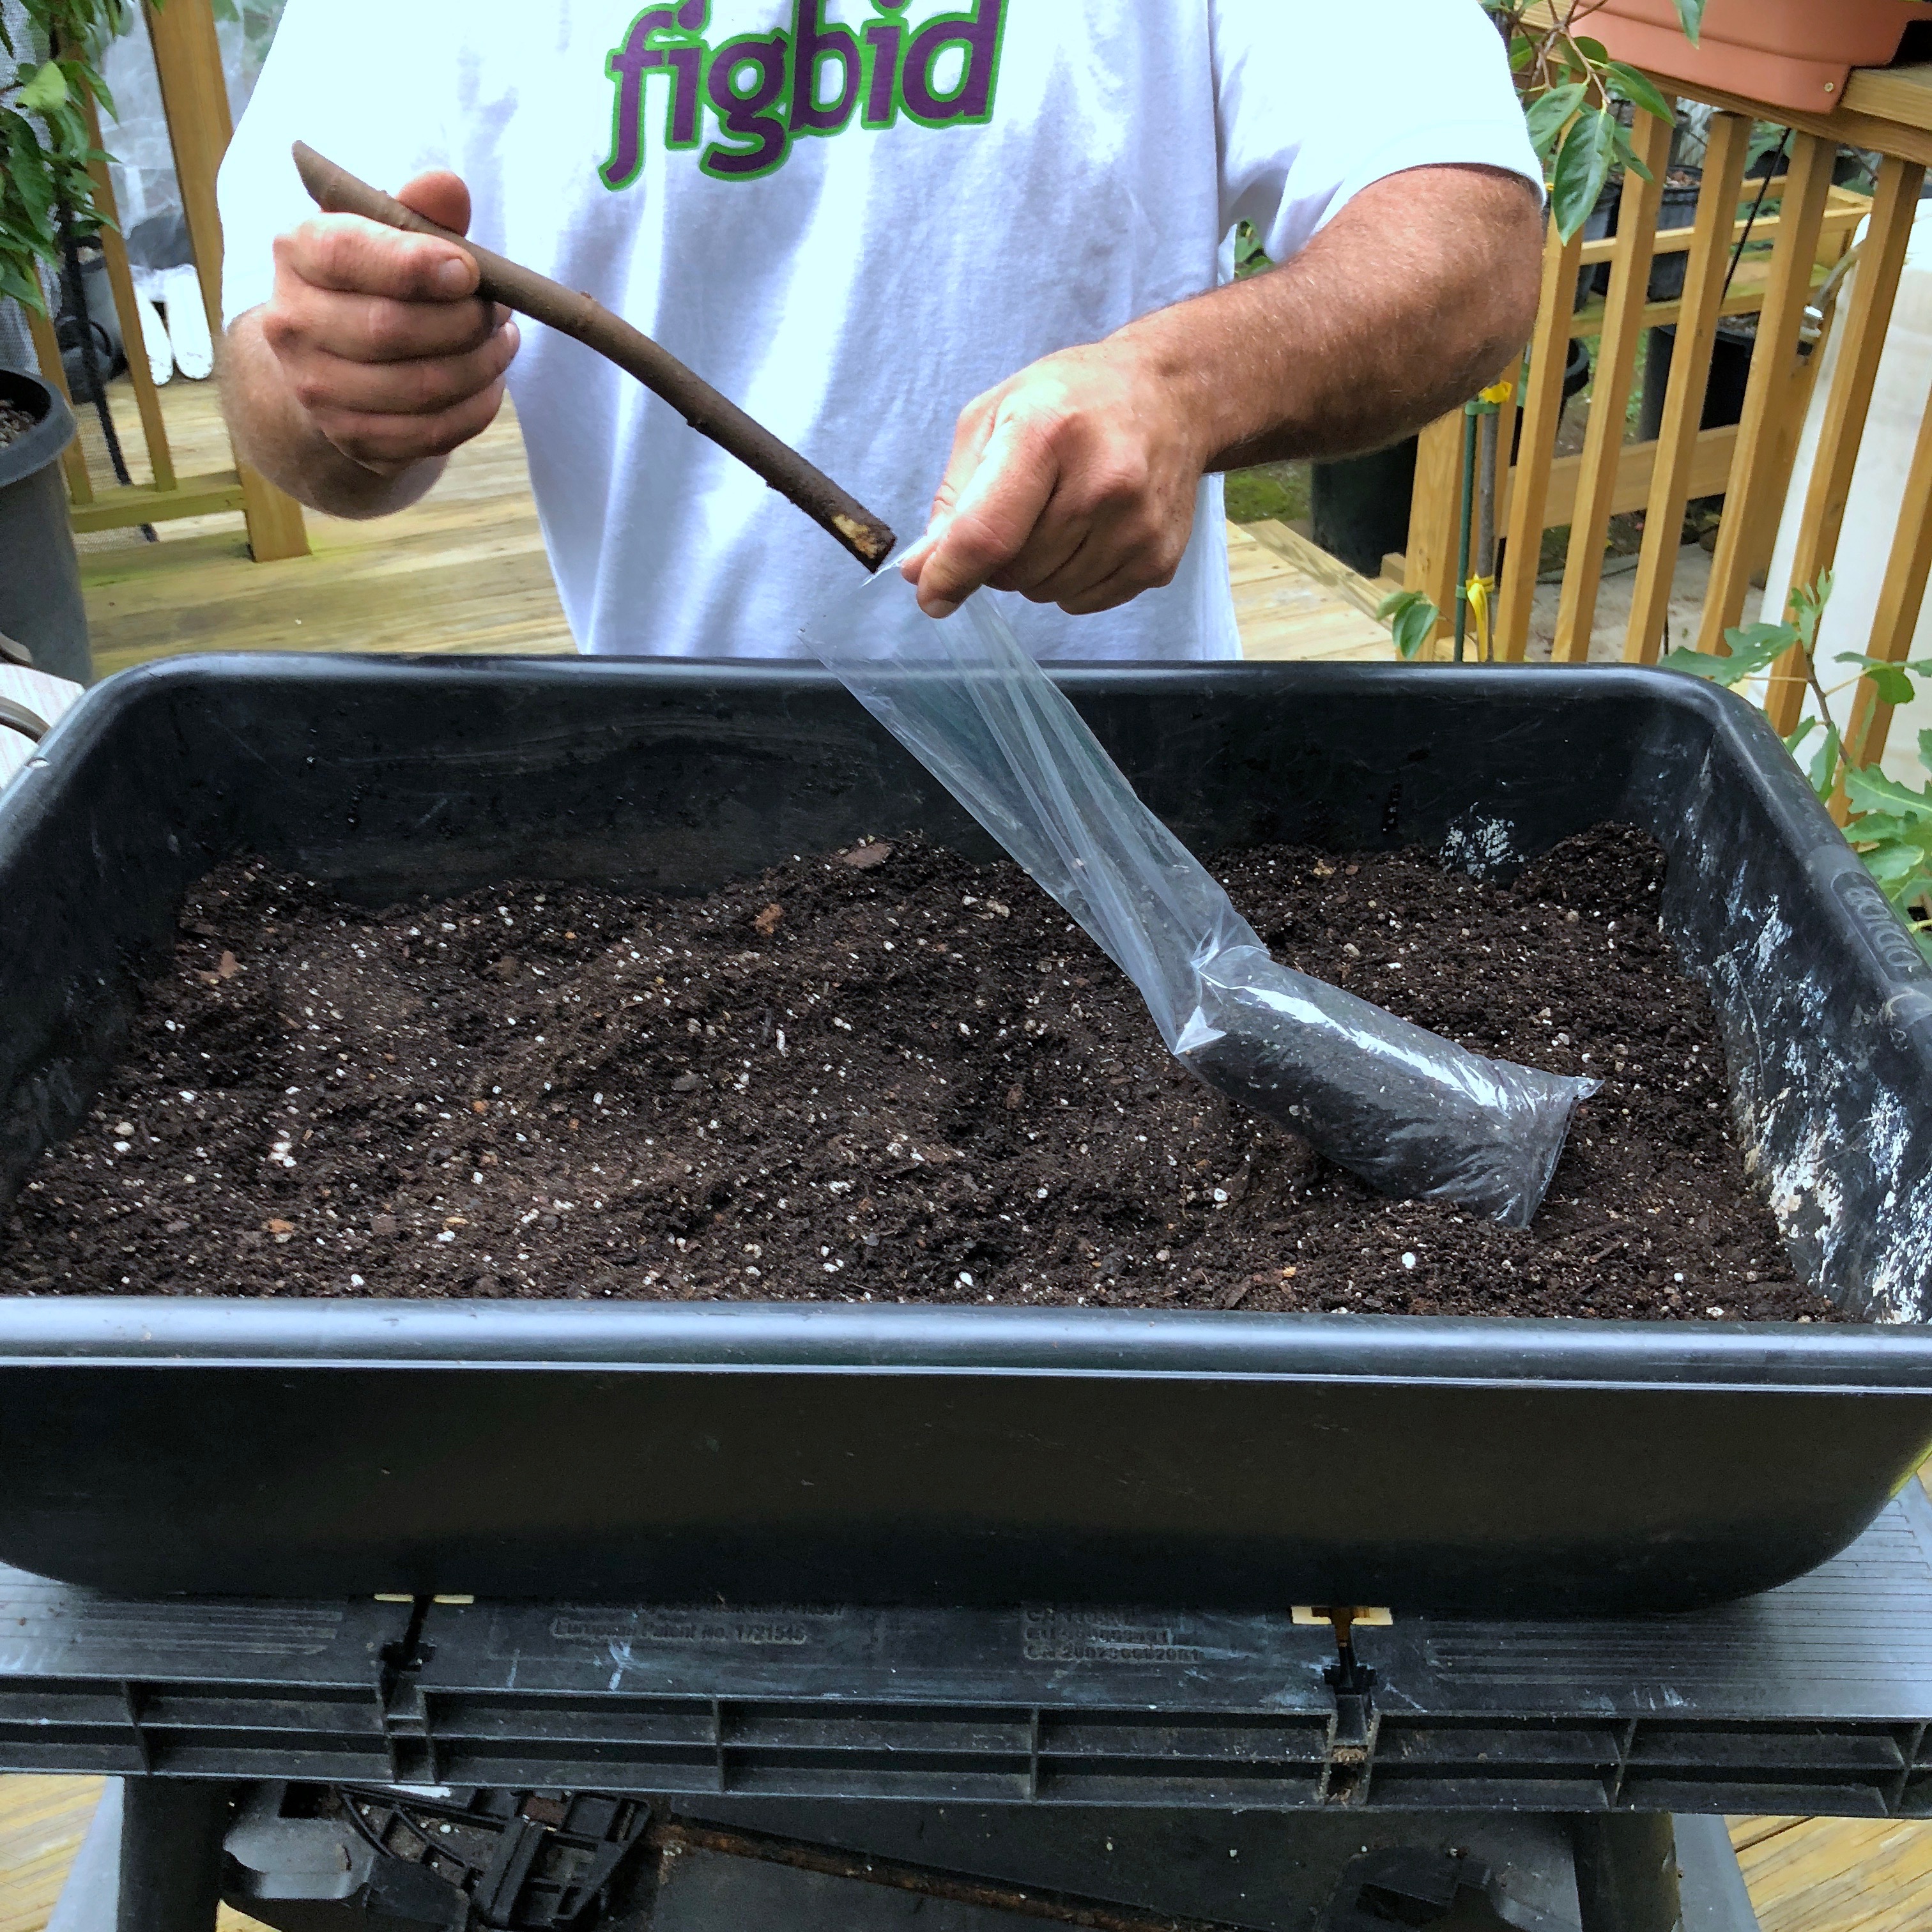
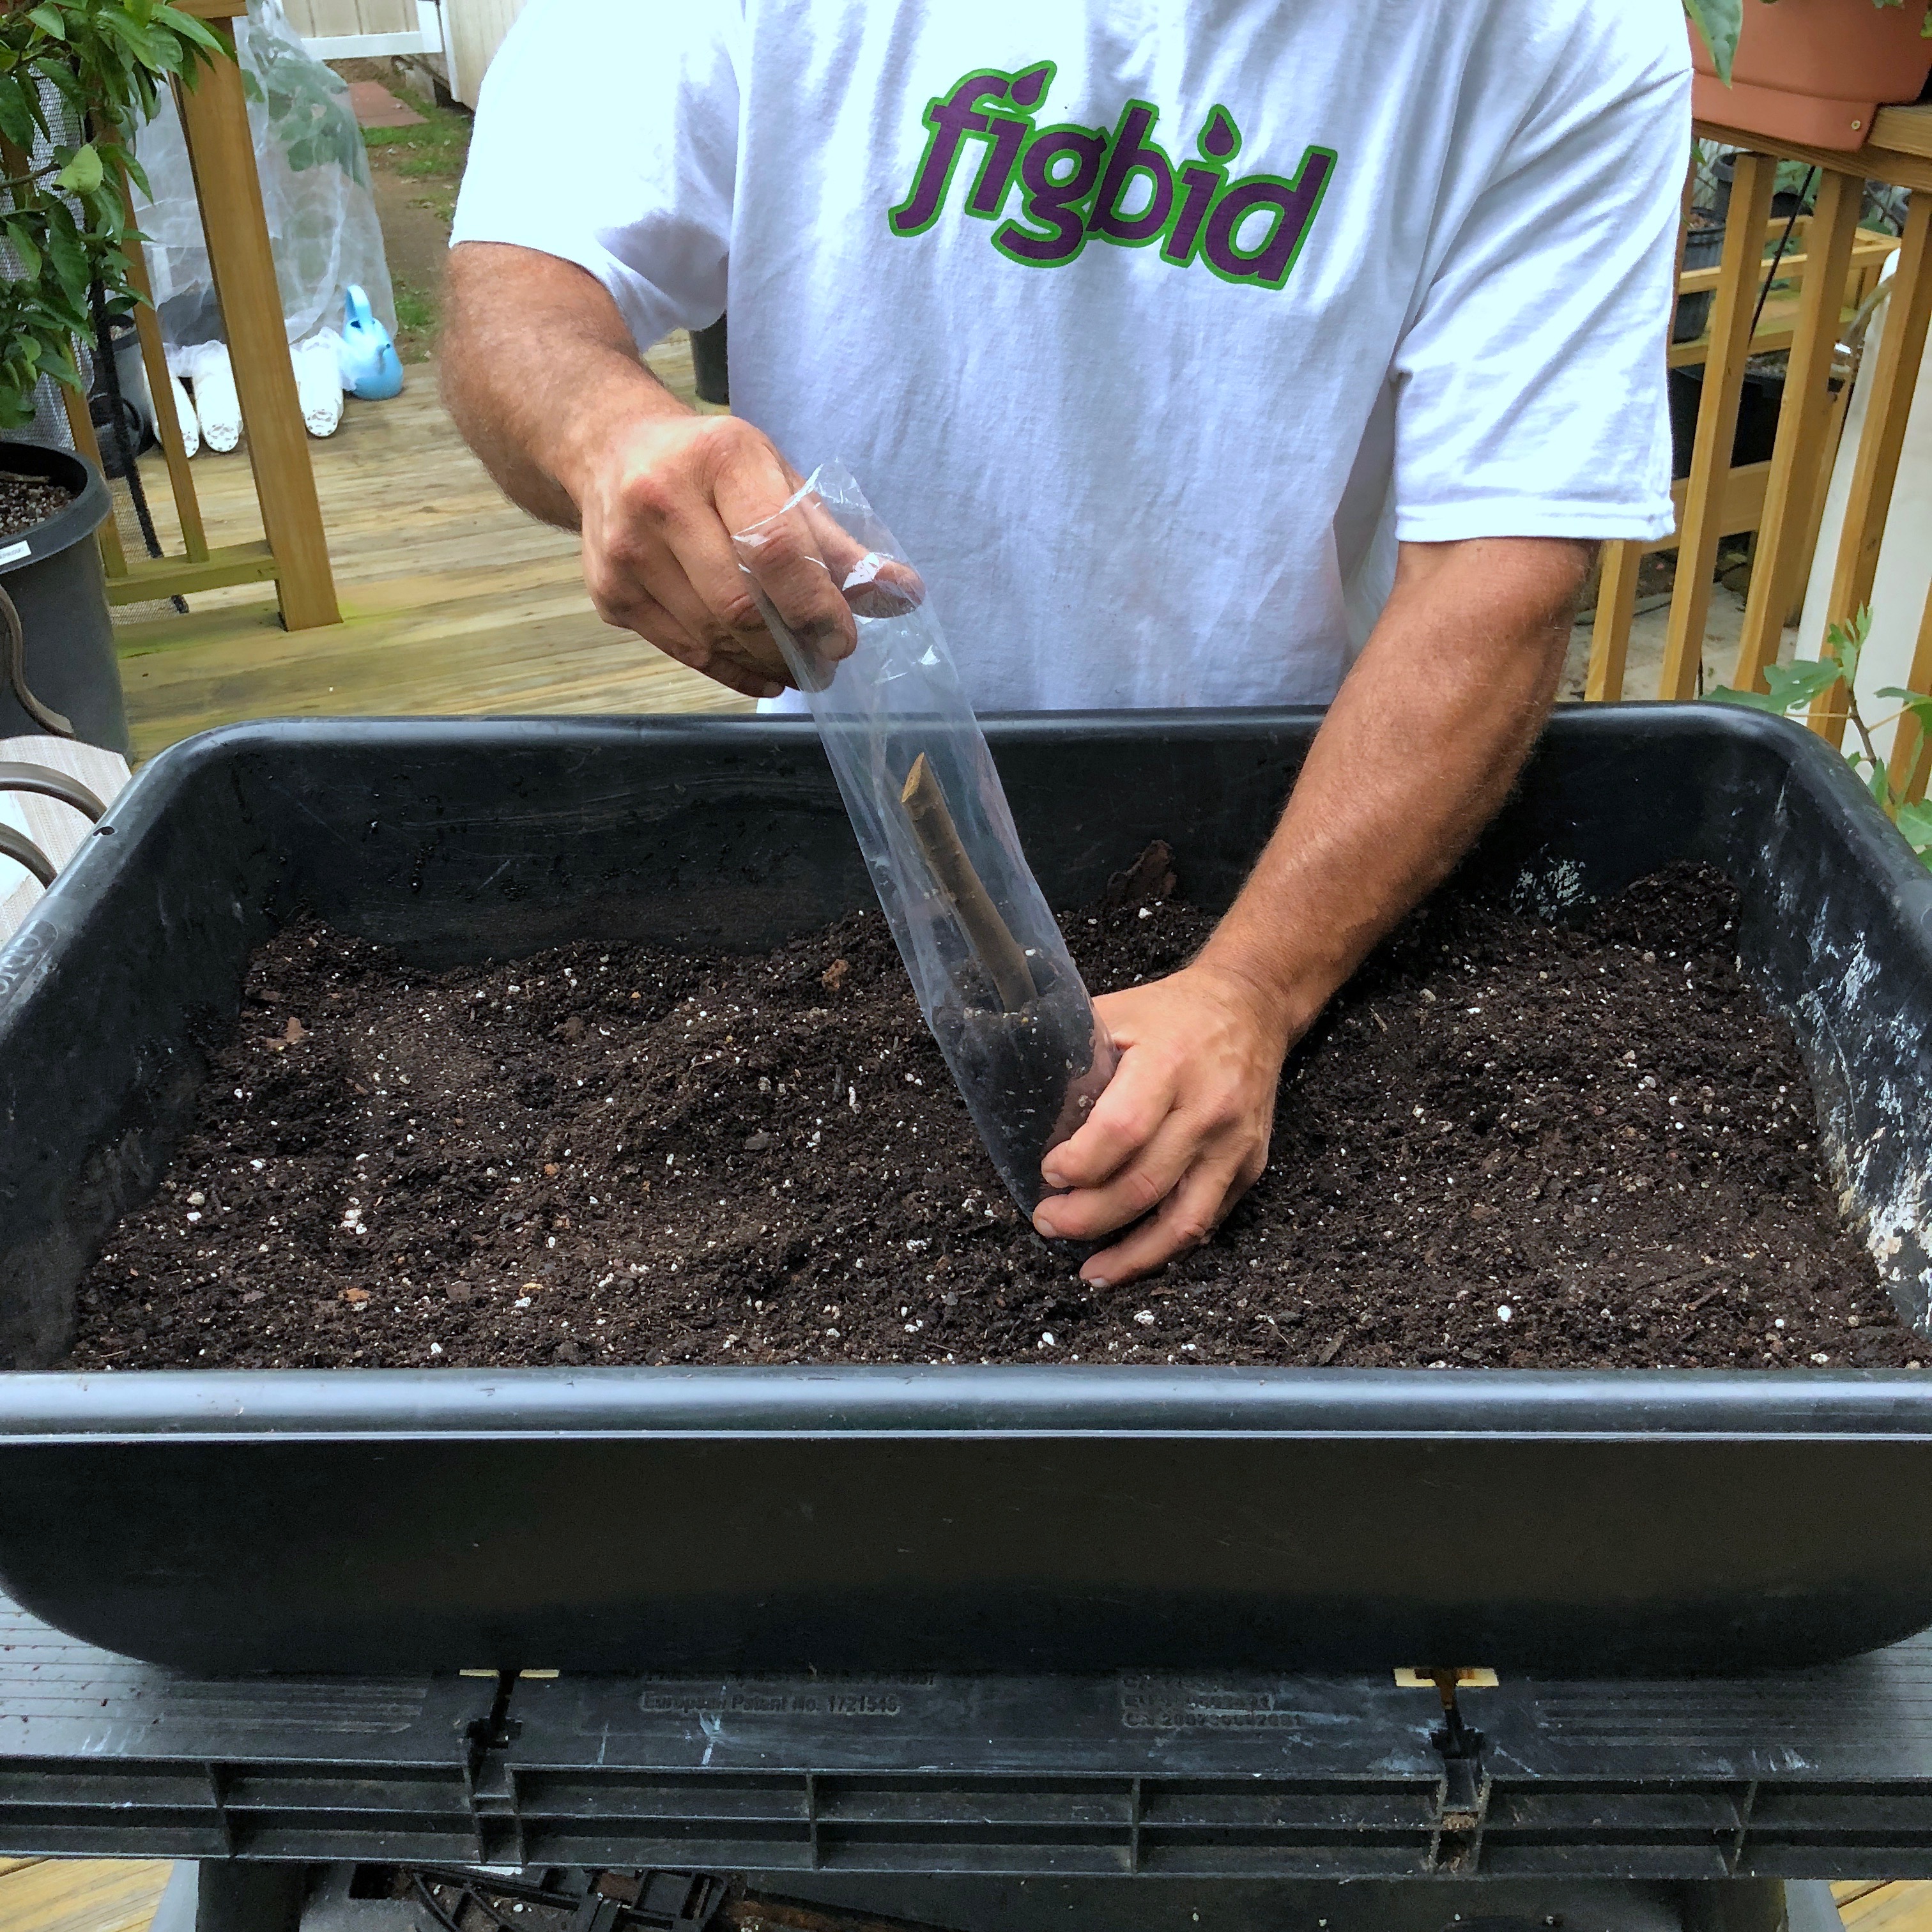
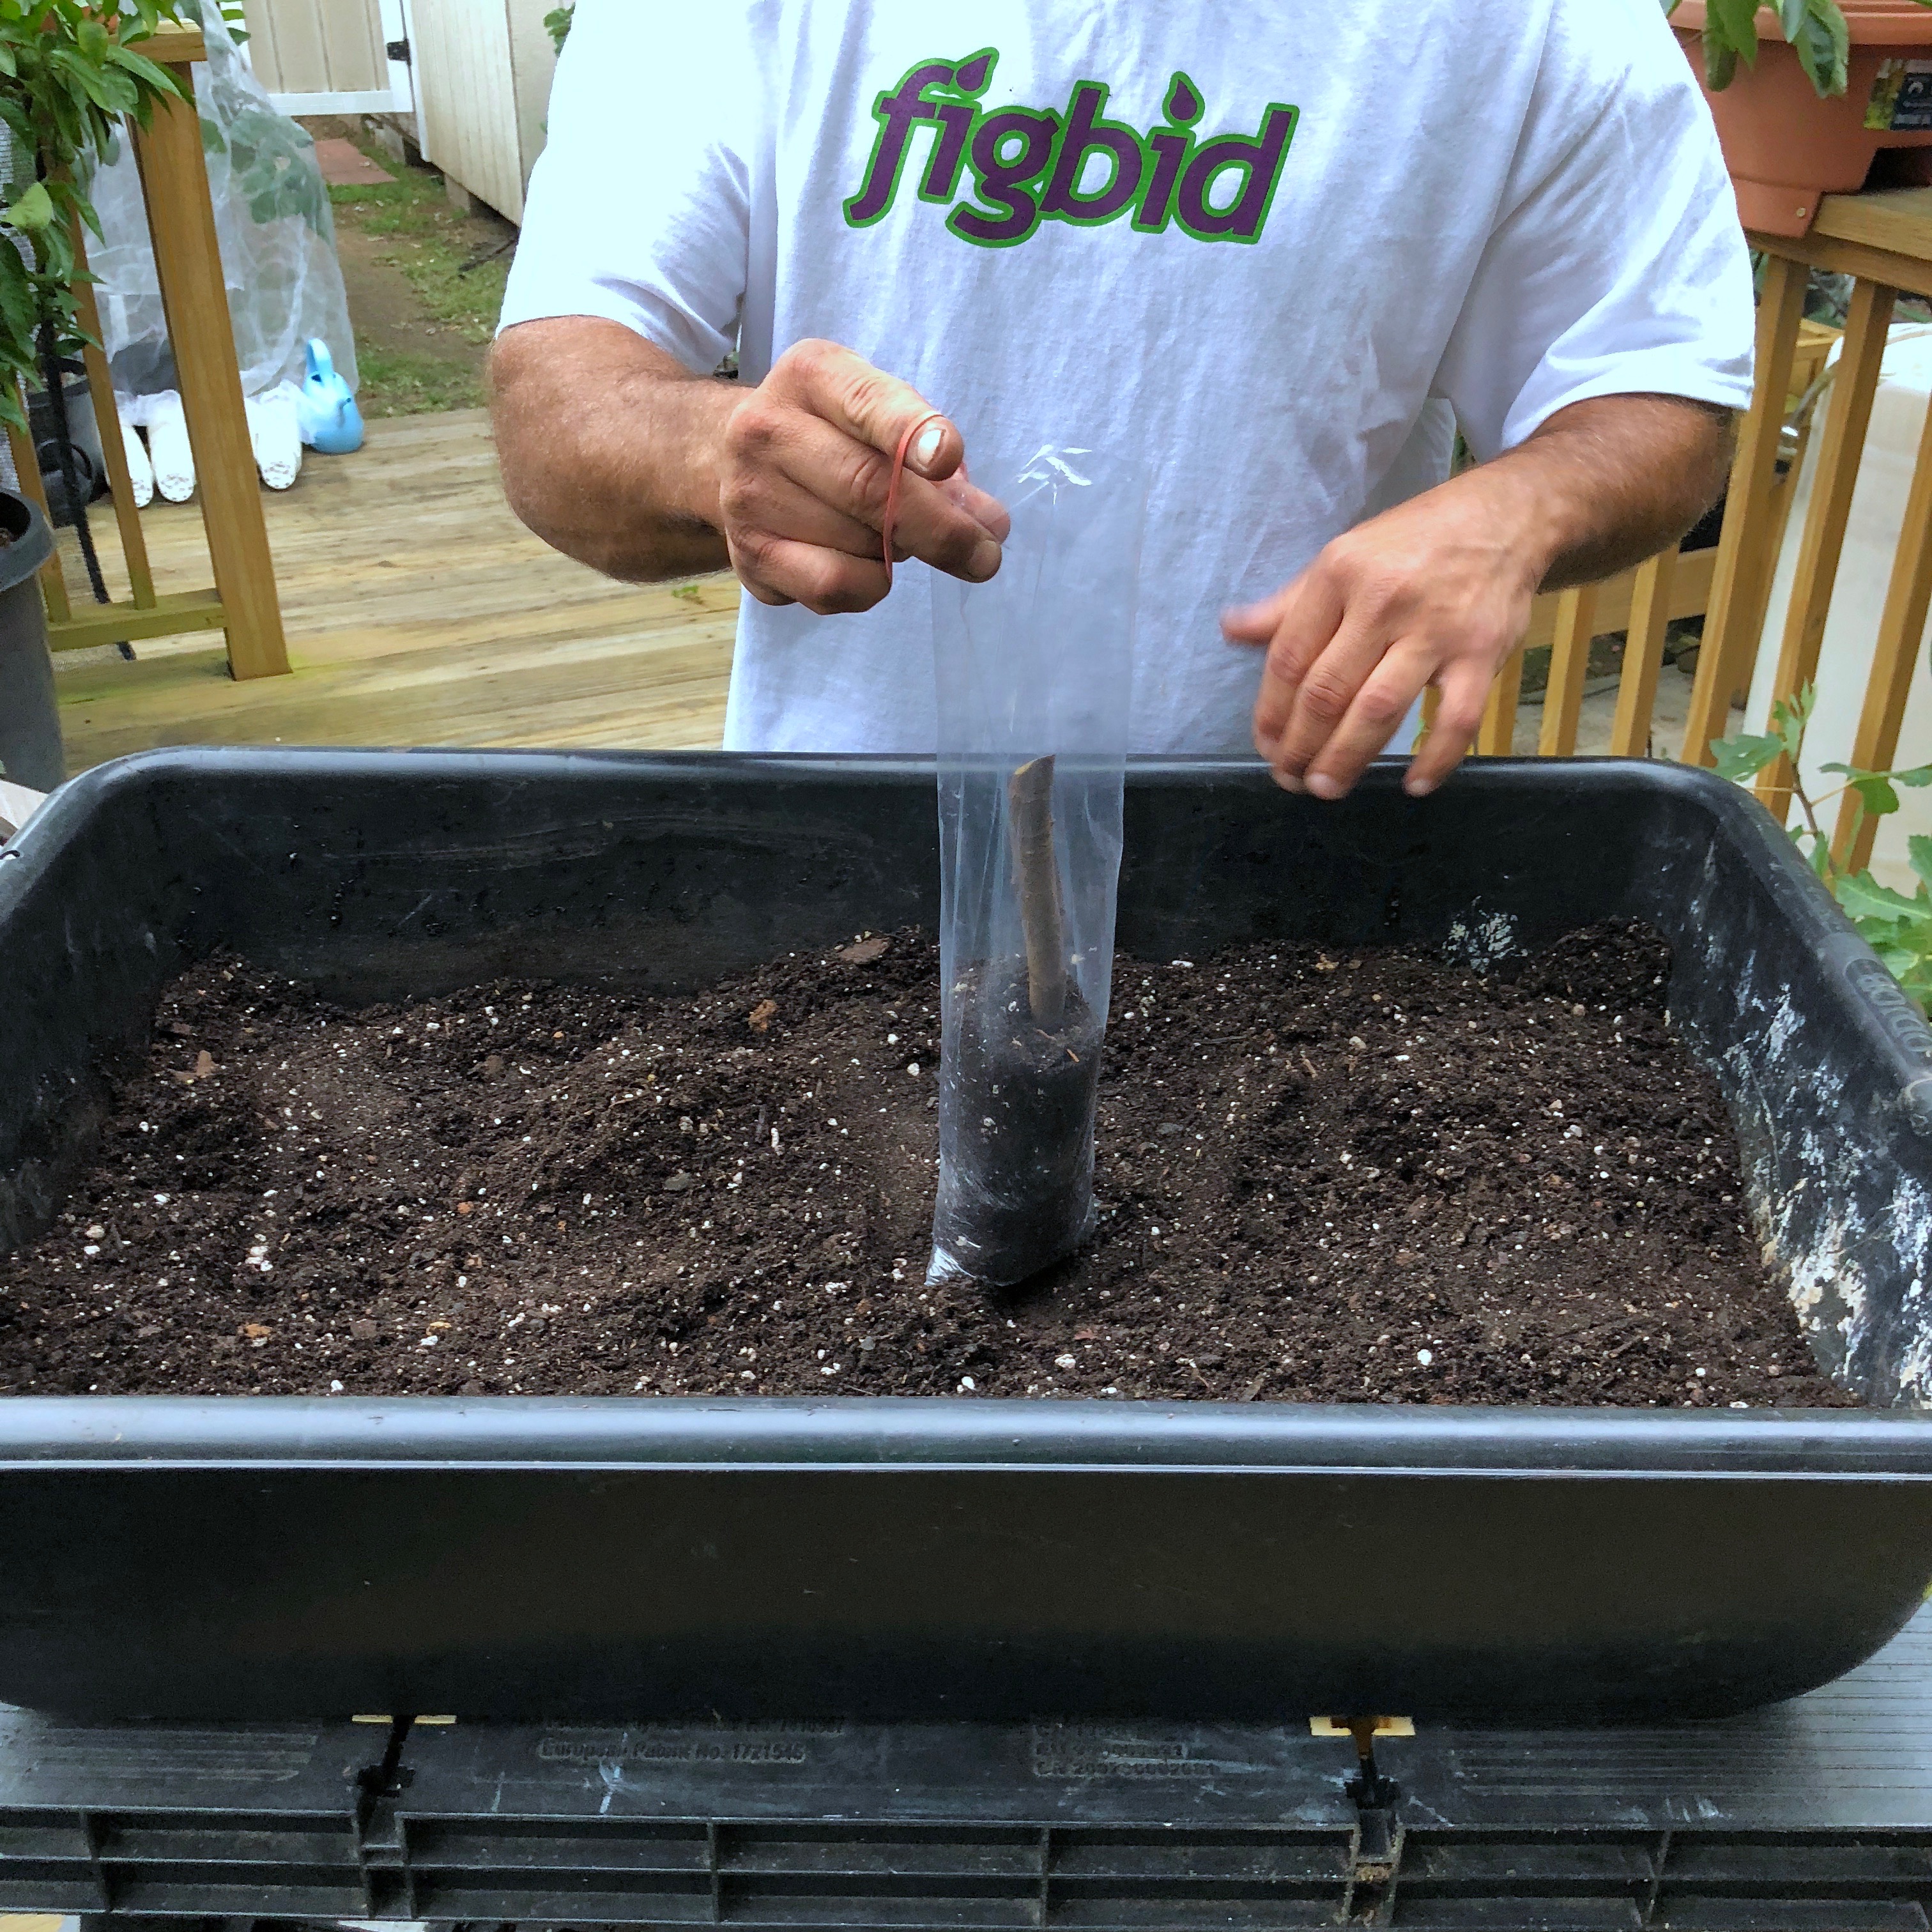
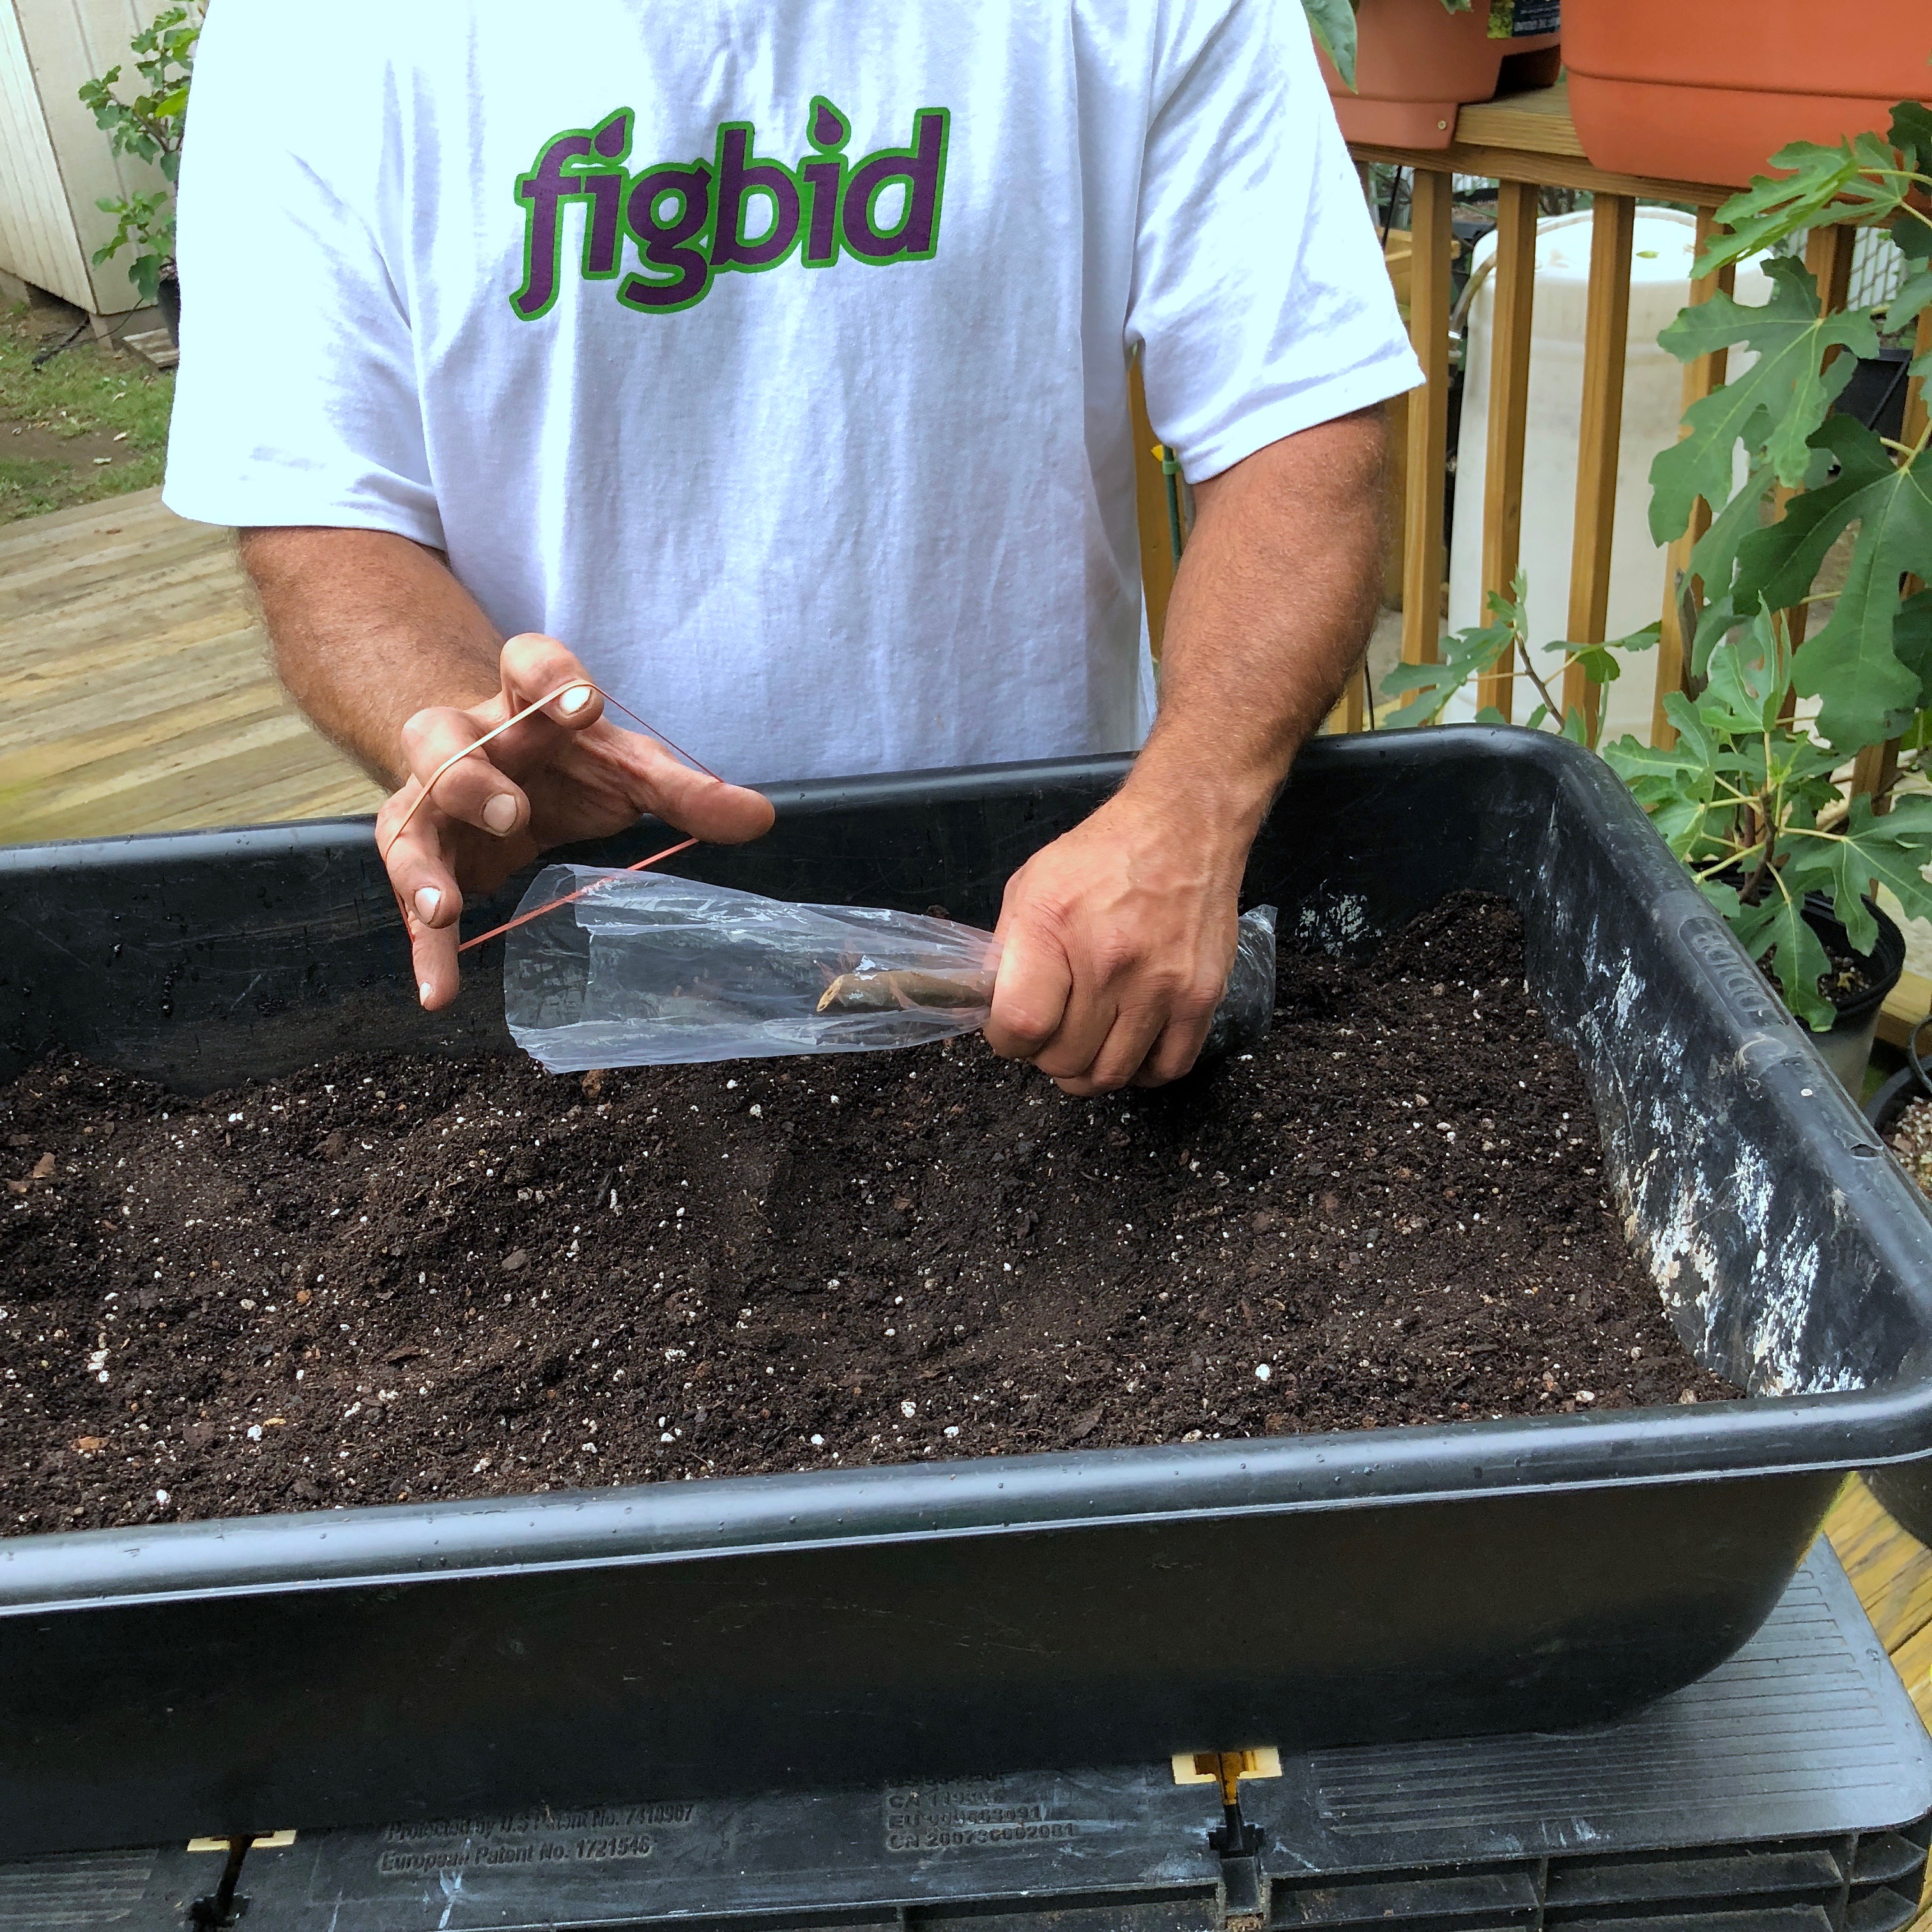
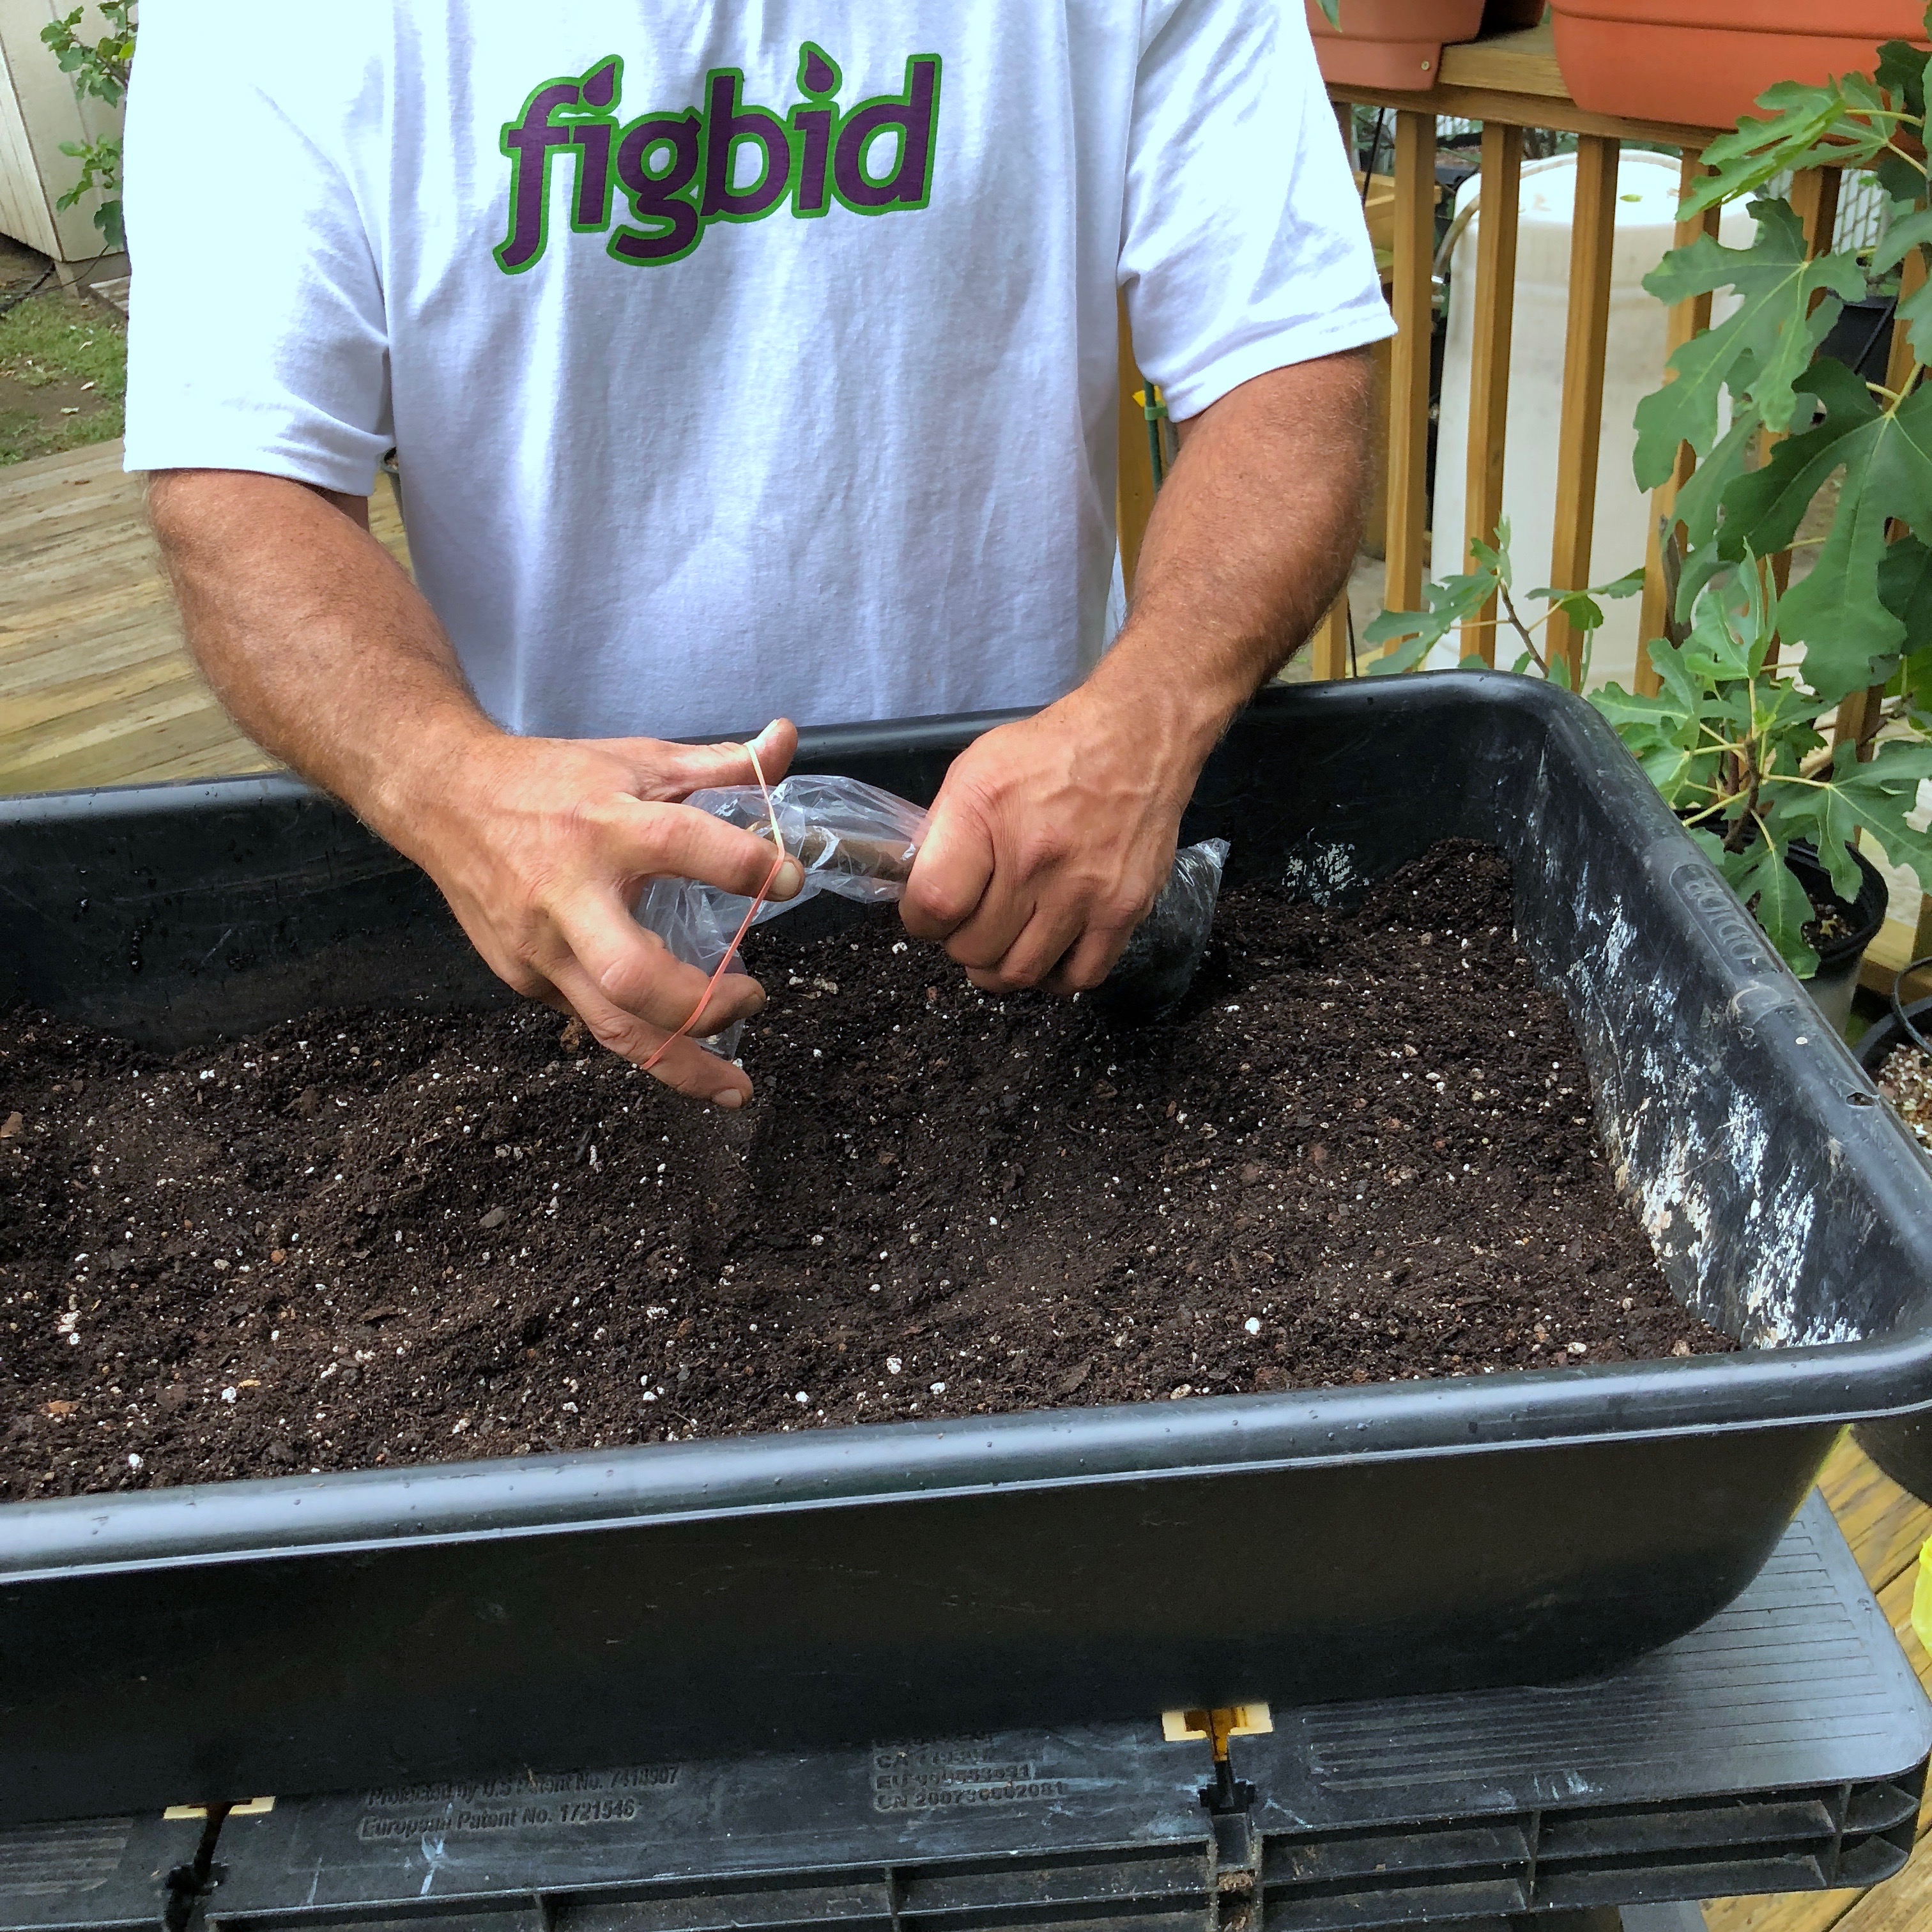
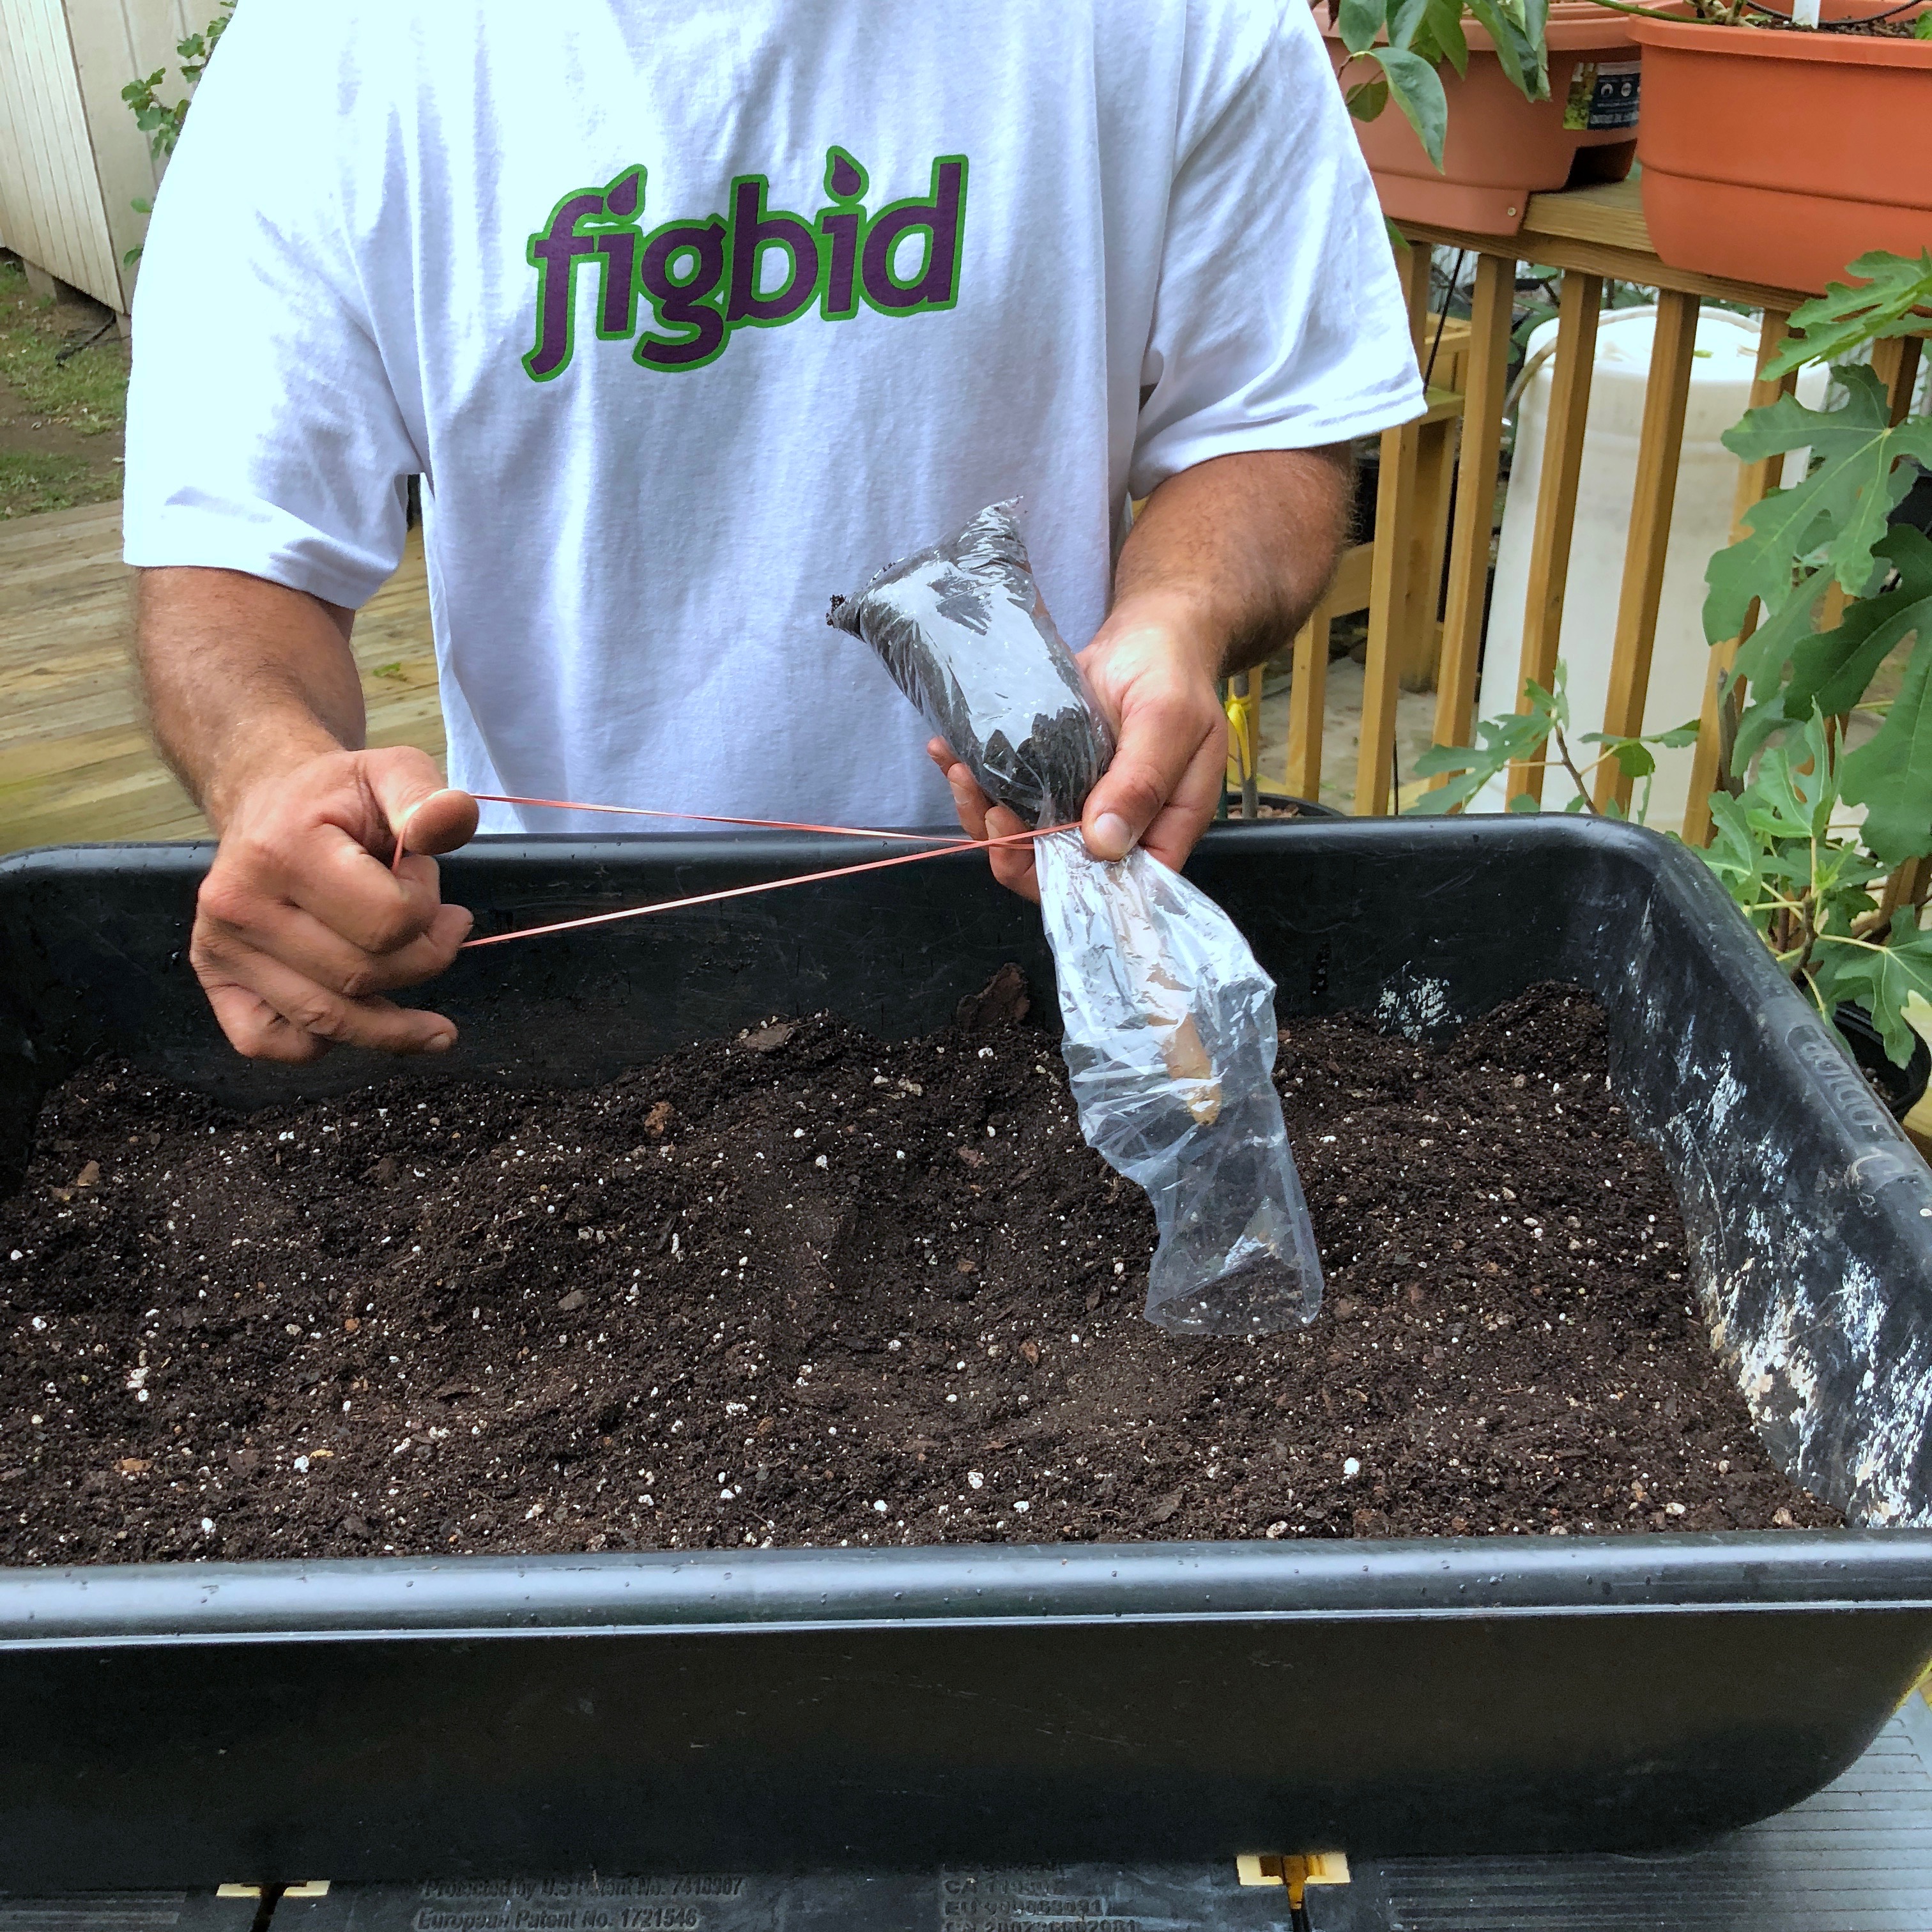
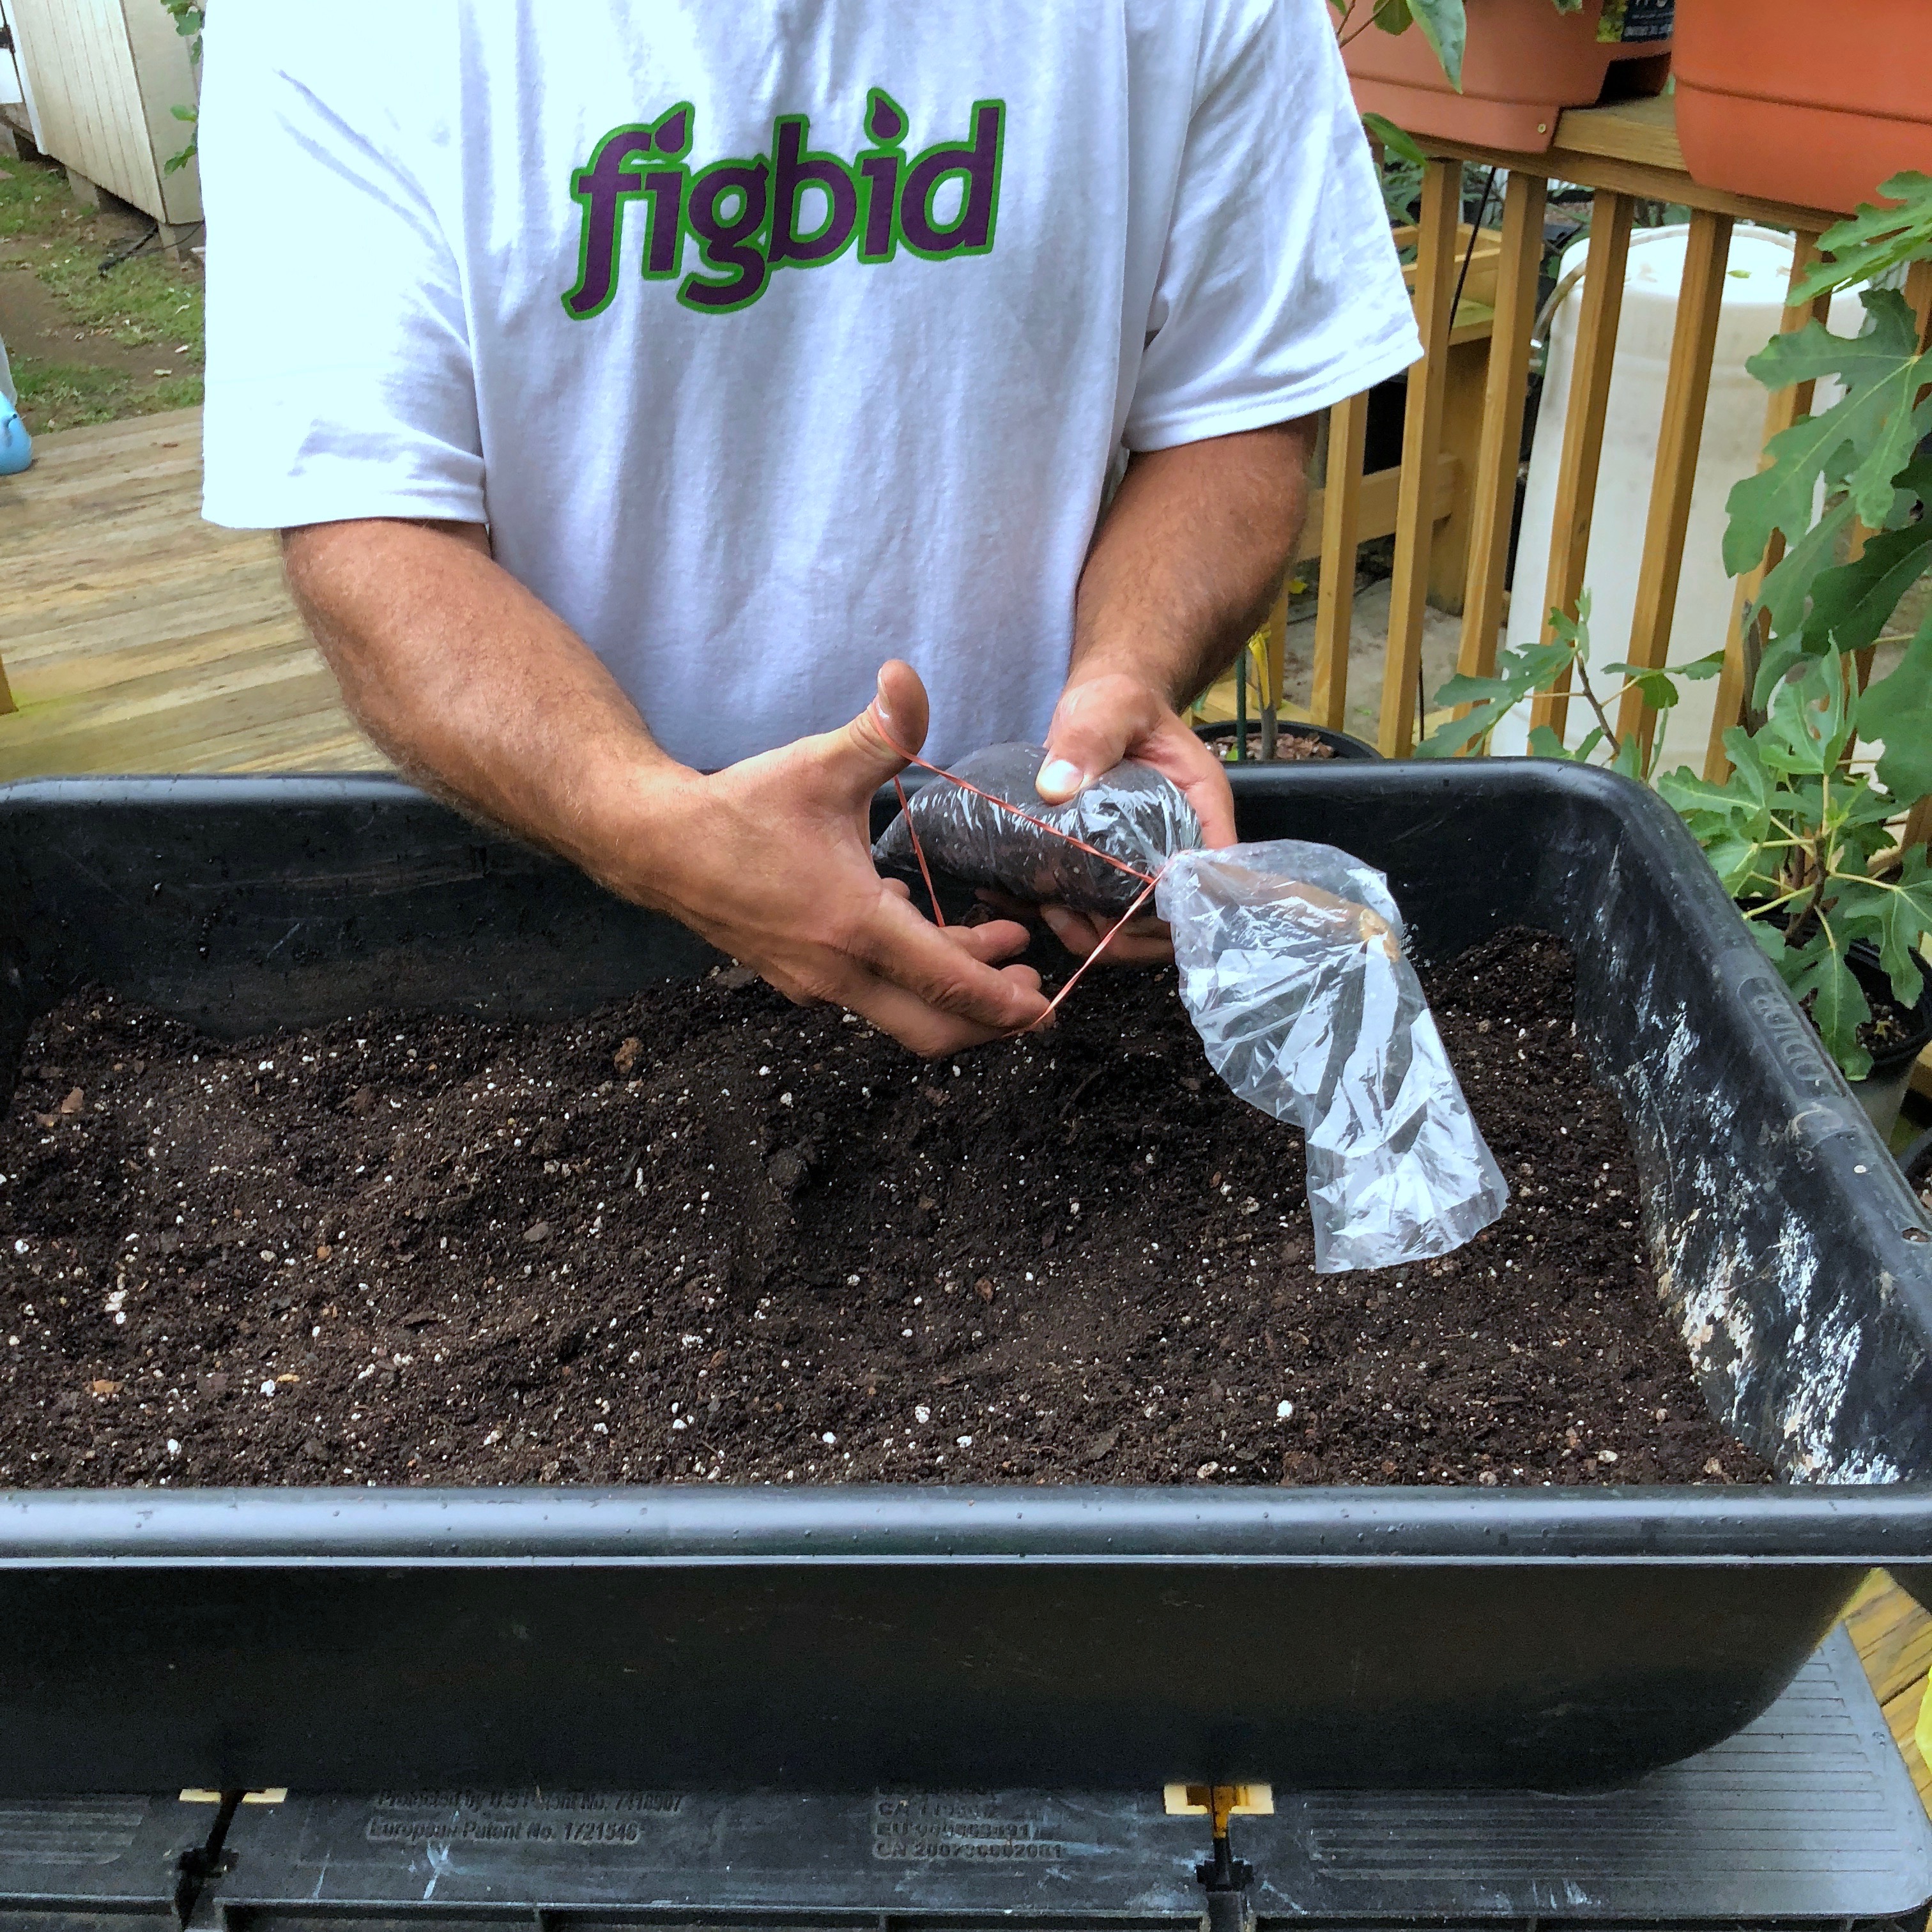
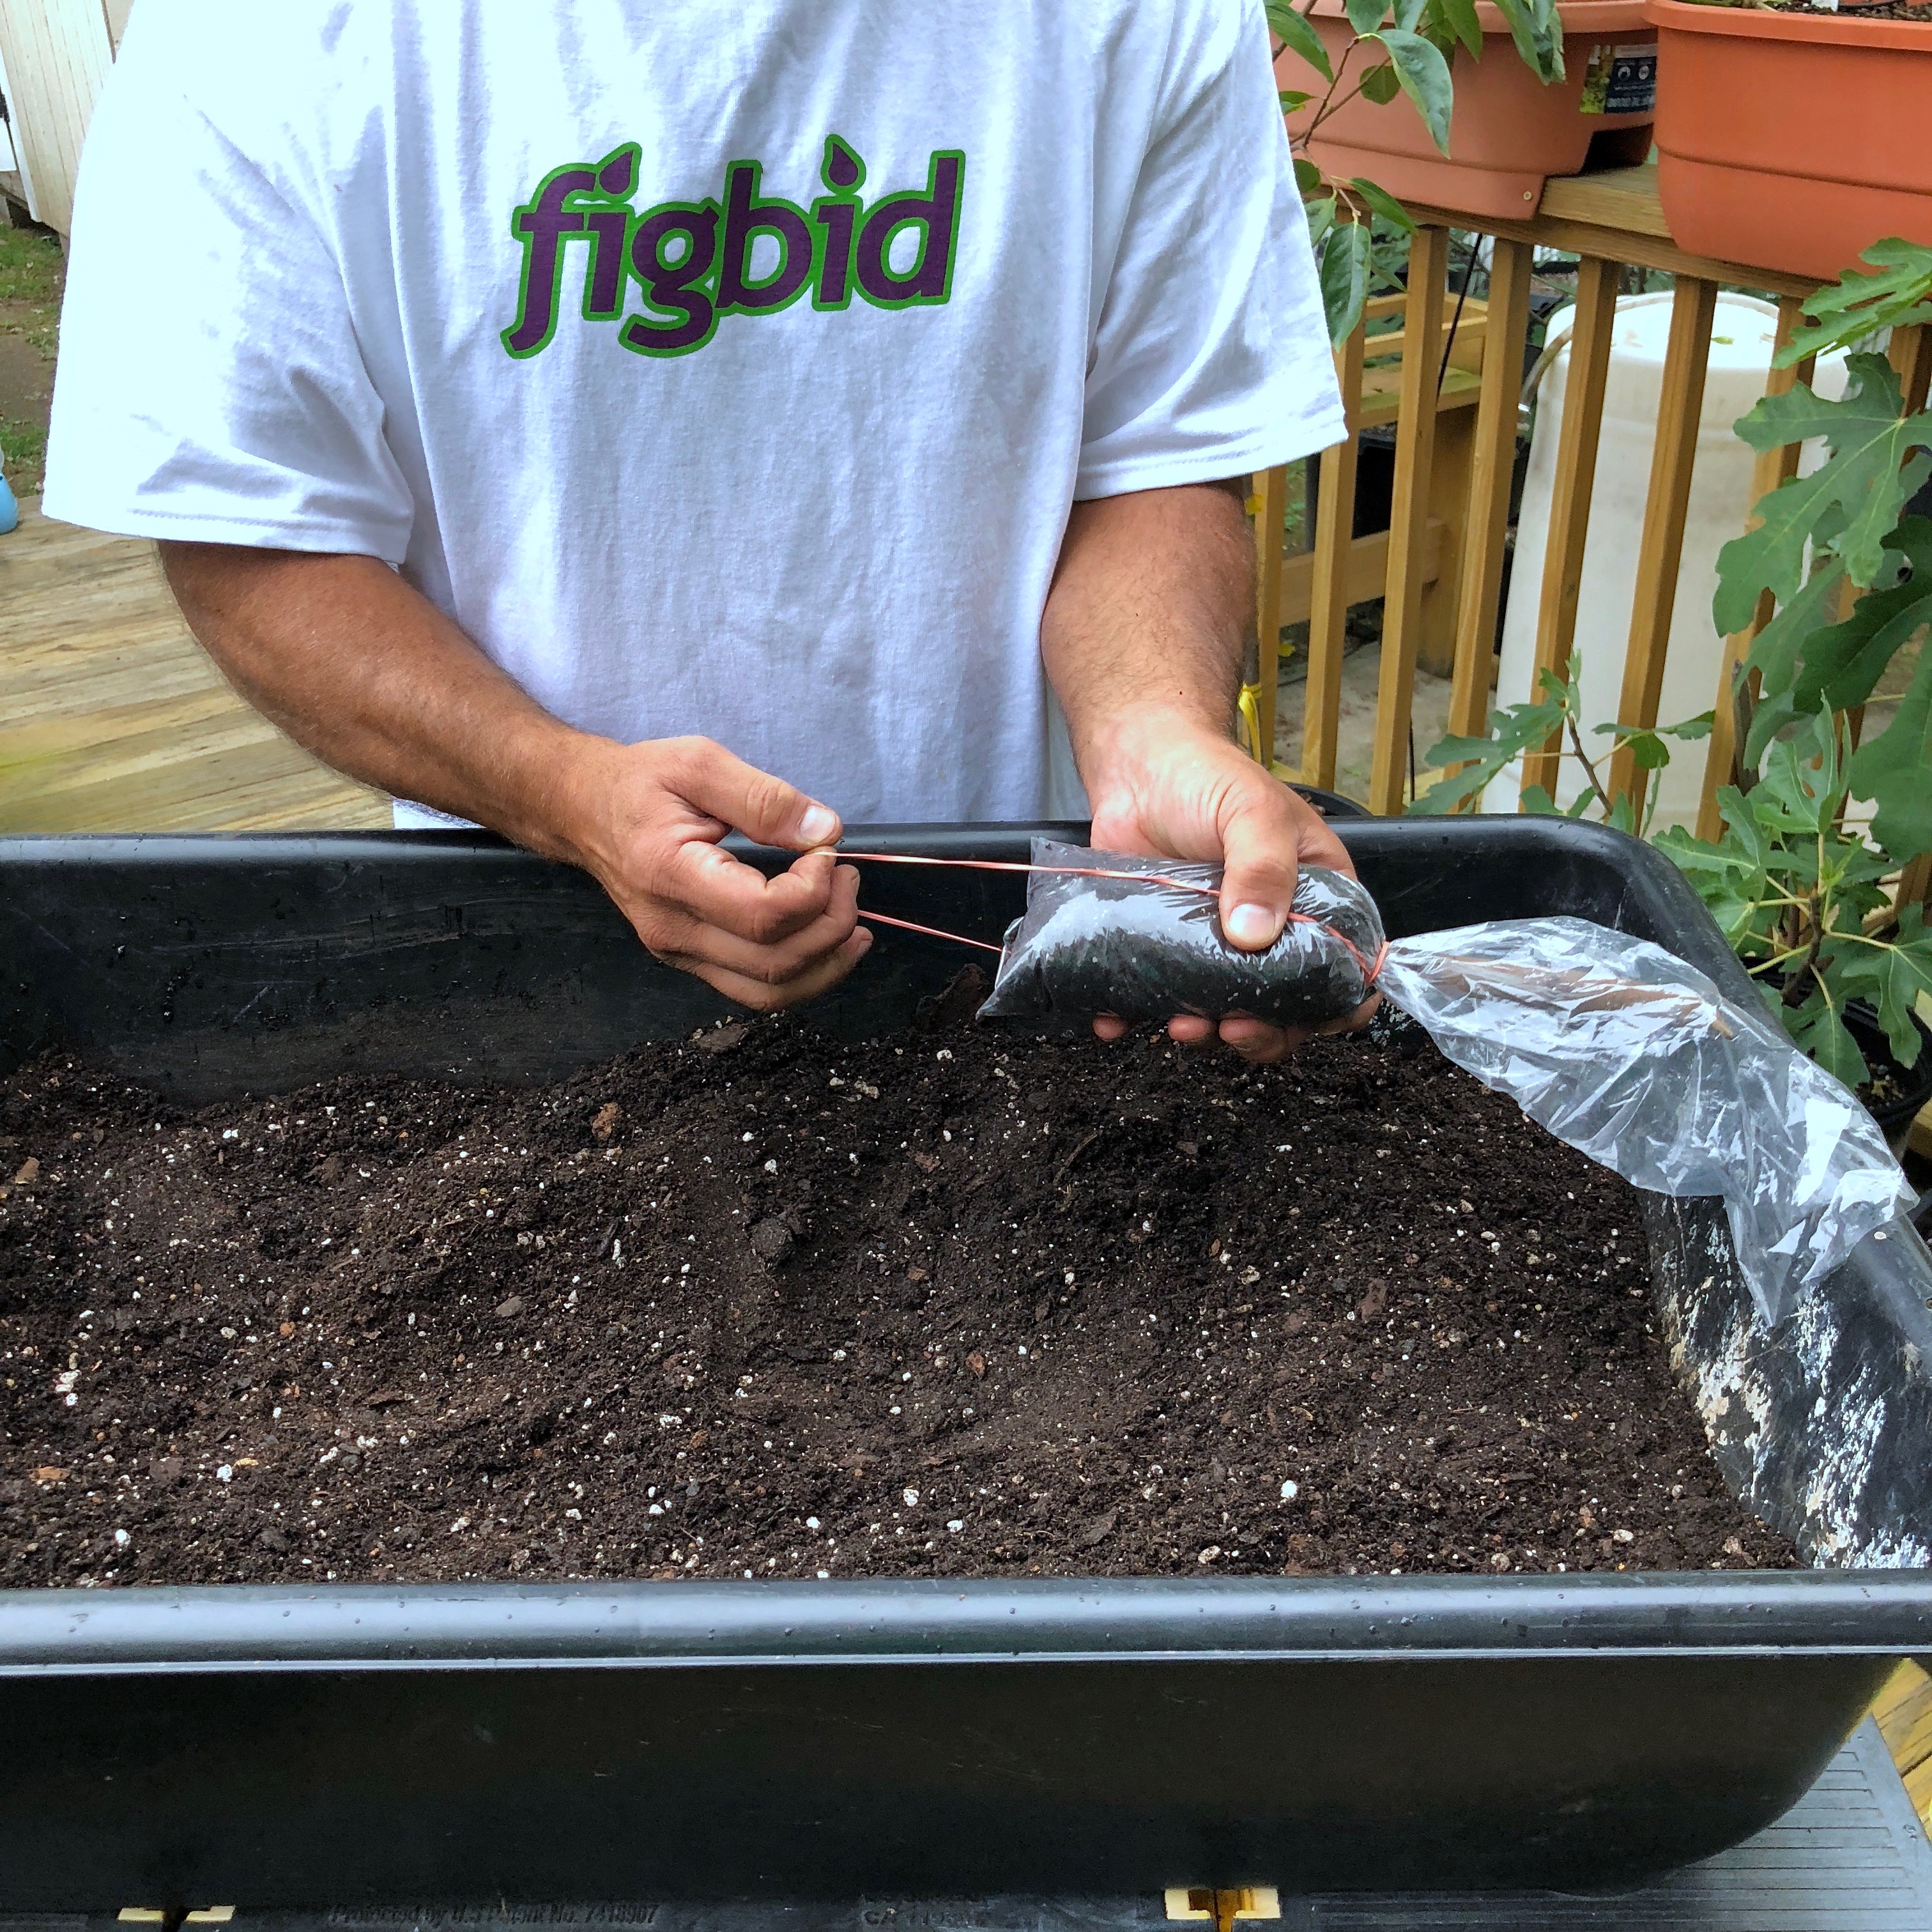
- Wrap a new #32 or #18 (for short or thin cuttings) rubber band around the cutting, twist and pull around the bottom of the figPop. Don't reuse rubber bands as band failure can occur.
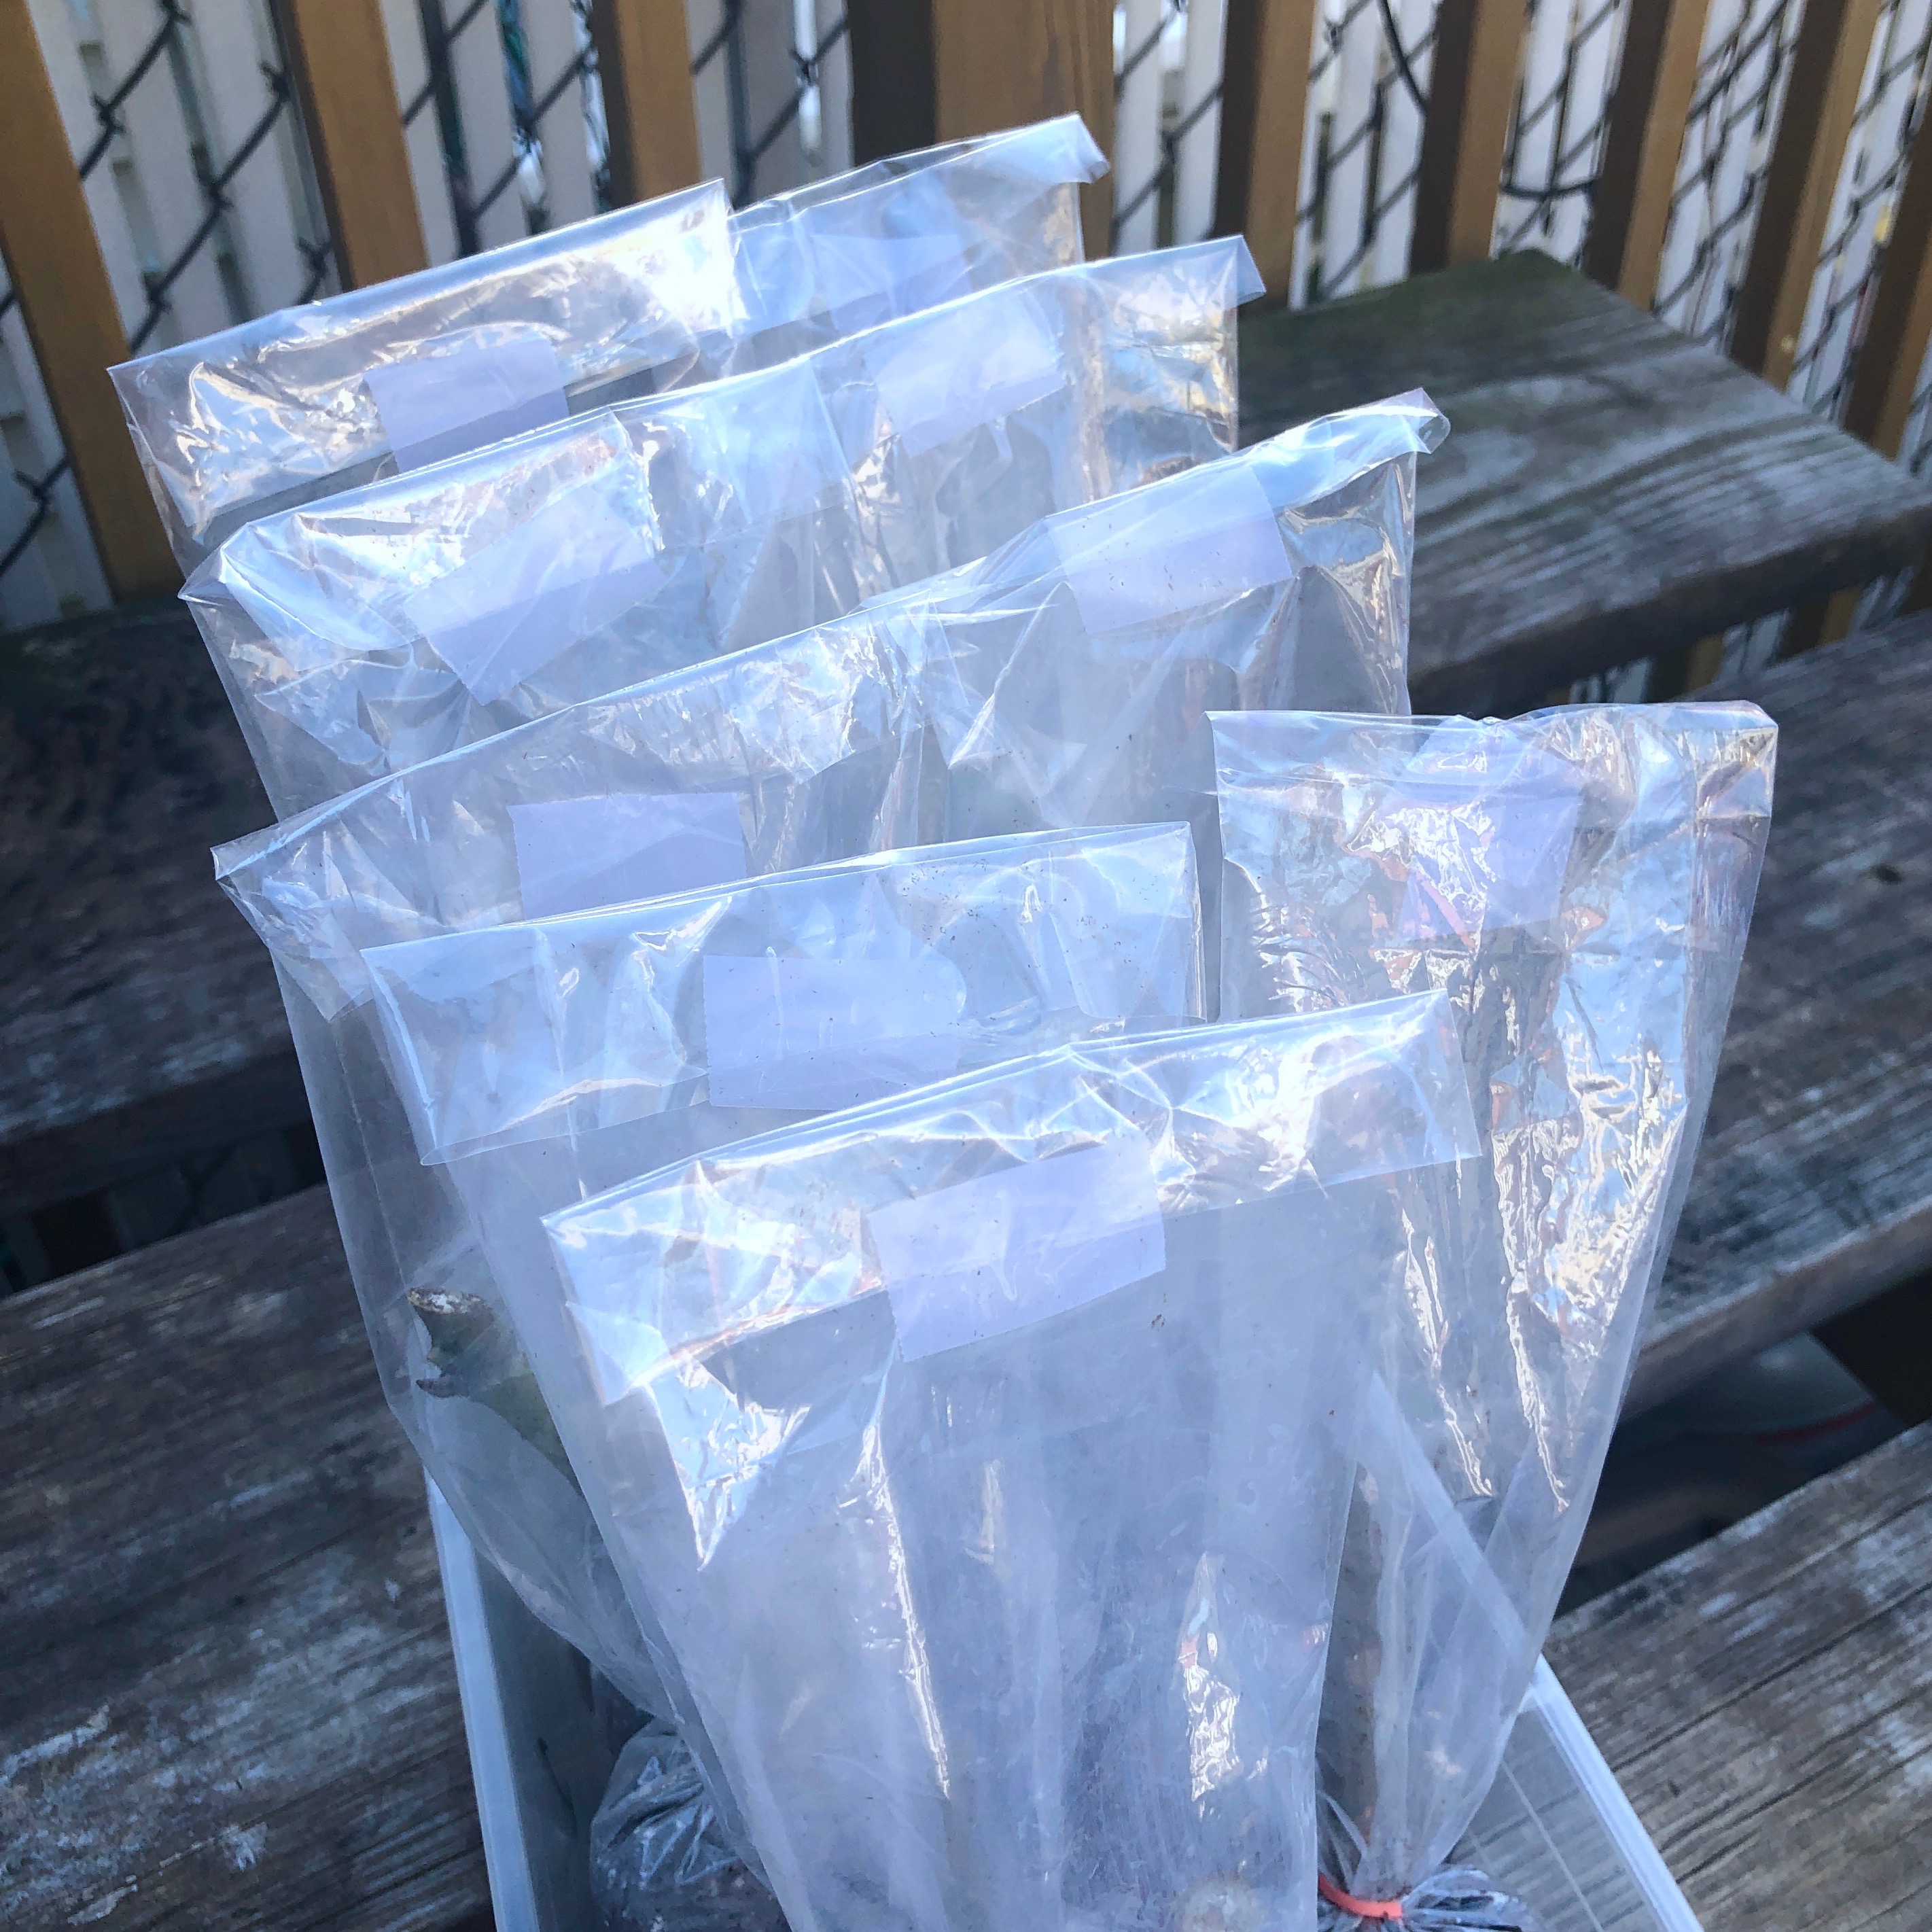
- Fold top of the bag over and seal with a piece of transparent tape.
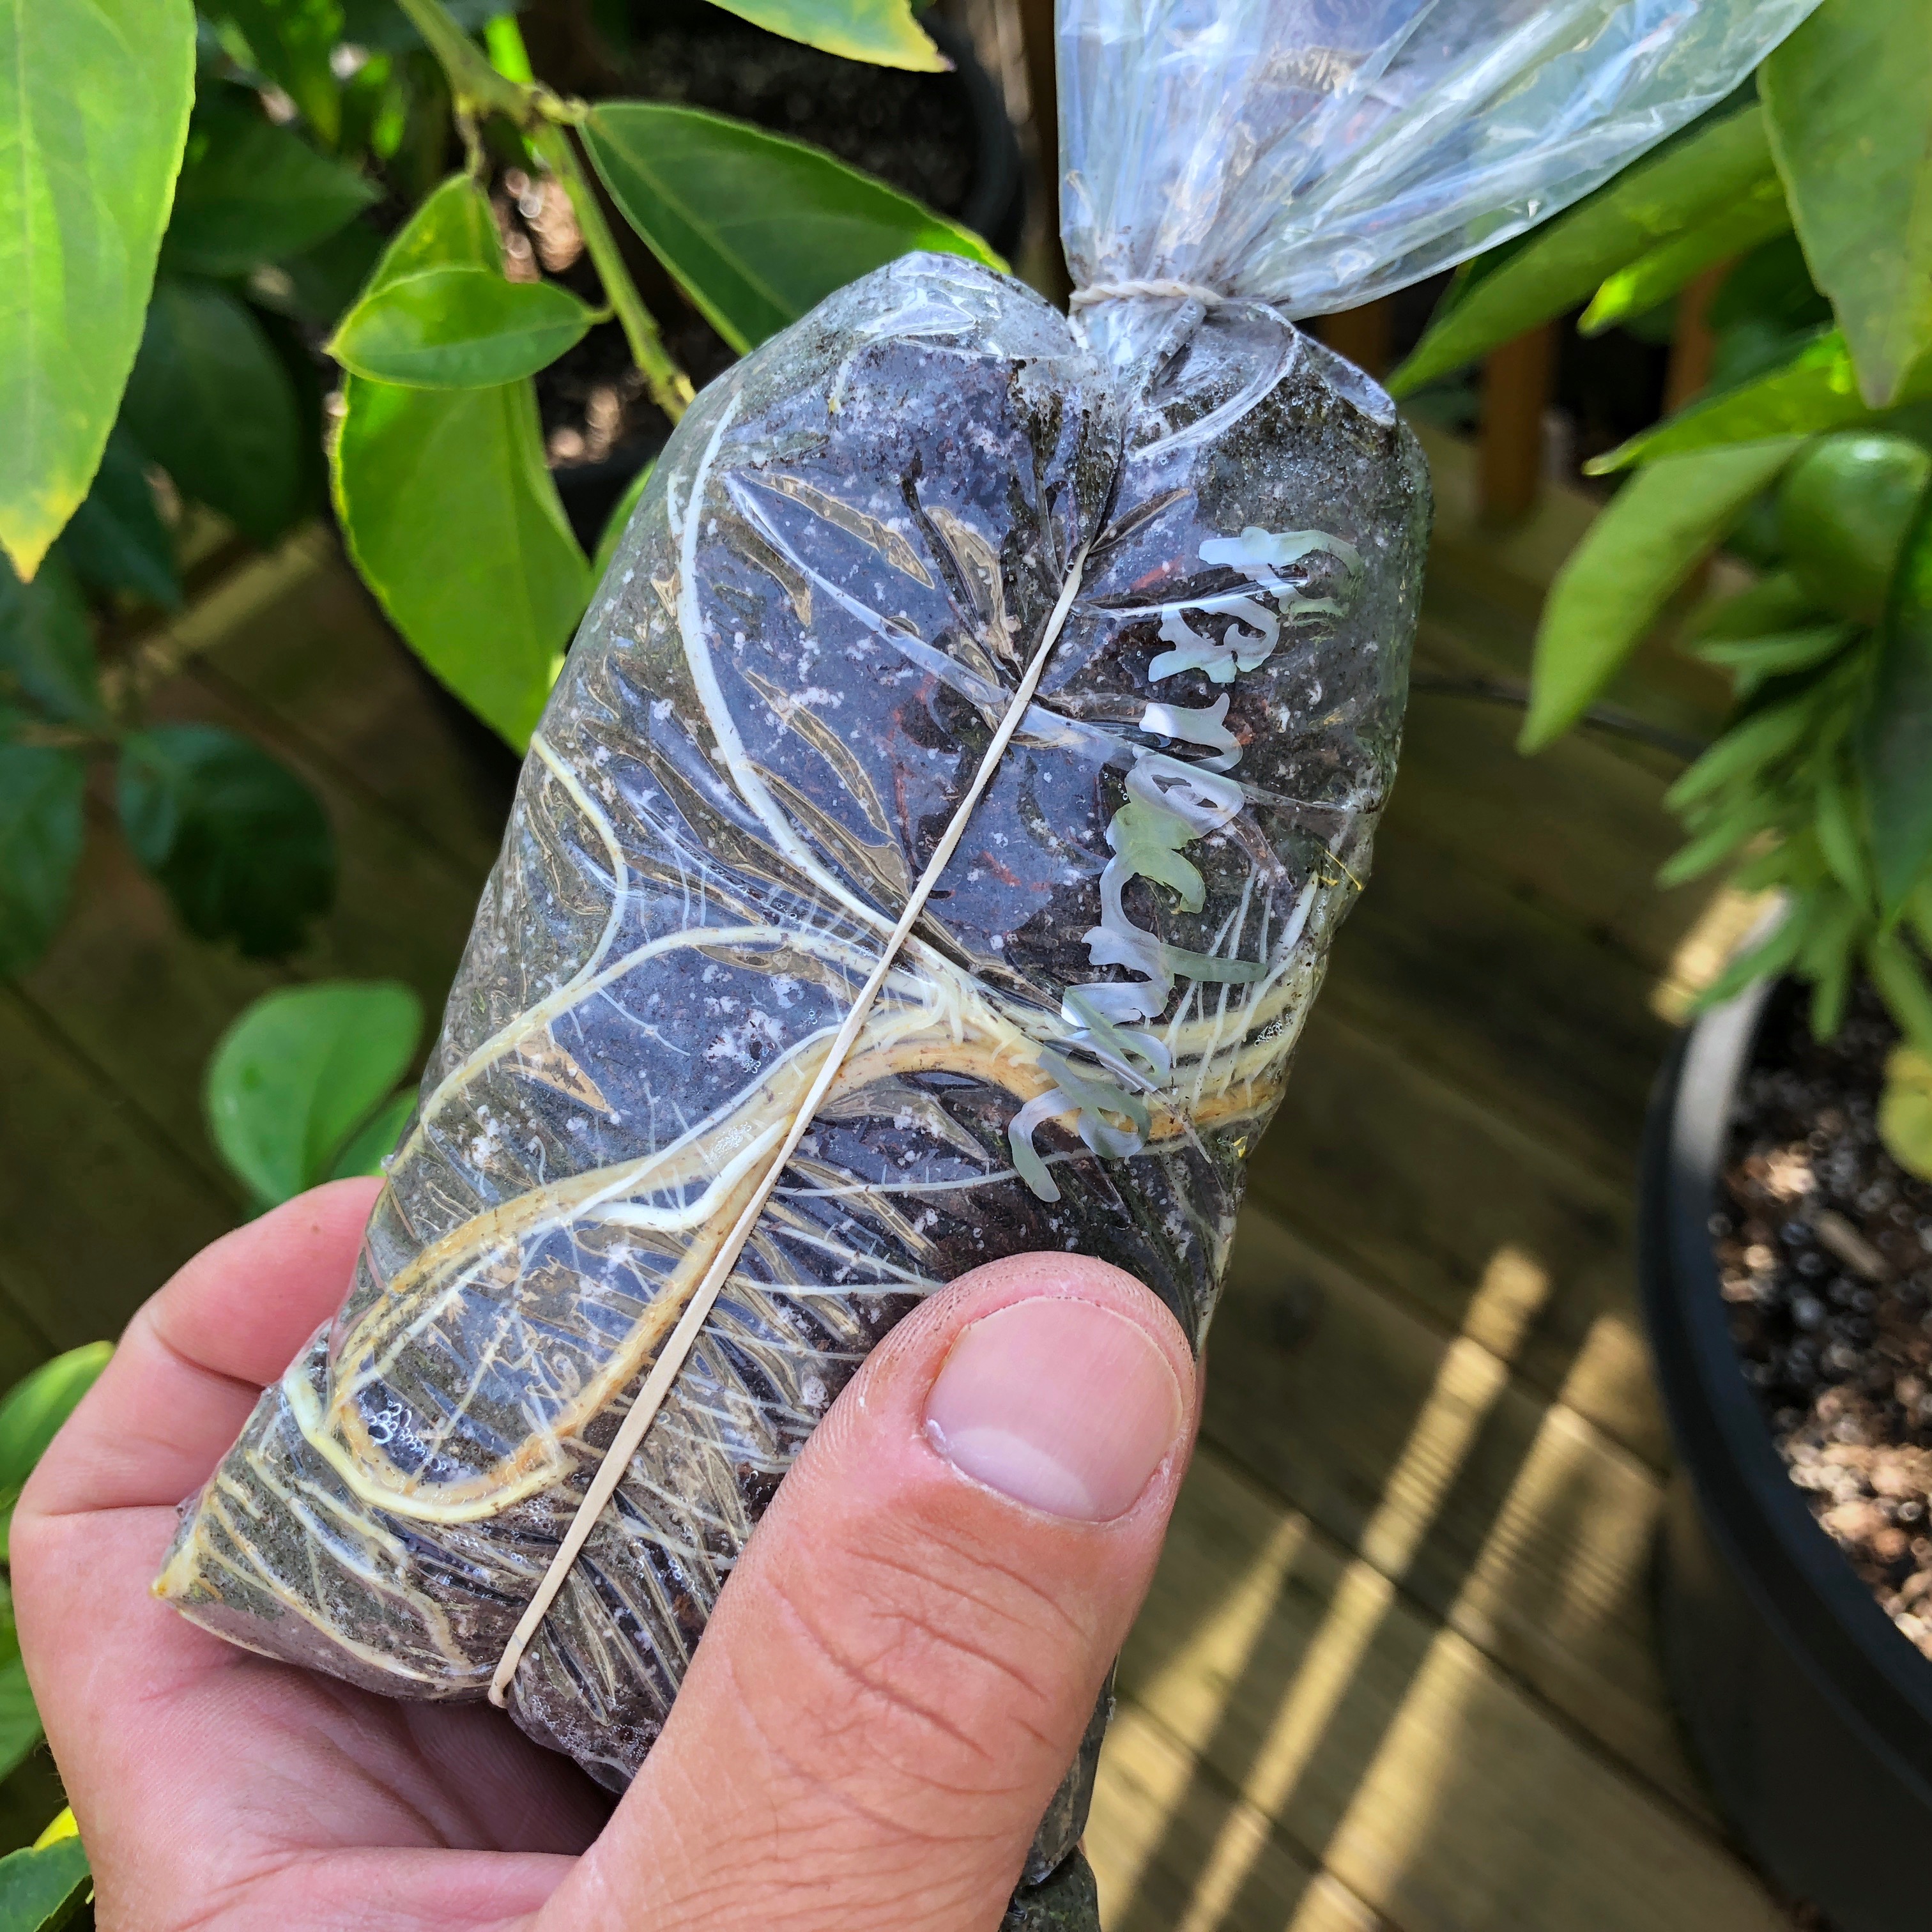
- Keep the cuttings in an area where the temperature remains steady at 72-75F. You can put them on a heat mat but use a thermostat set at 75F and check often for figPop’s that are drying out. When top growth begins, open the top of the figPop bag. Put the newly leafed cutting under artificial lighting or, temperatures permitting, a semi-shaded area outside, protected from rain. Remember to remove any figlets that form on your new rooted cuttings. They will not ripen and they’re only robbing precious energy from the newly rooted cutting.
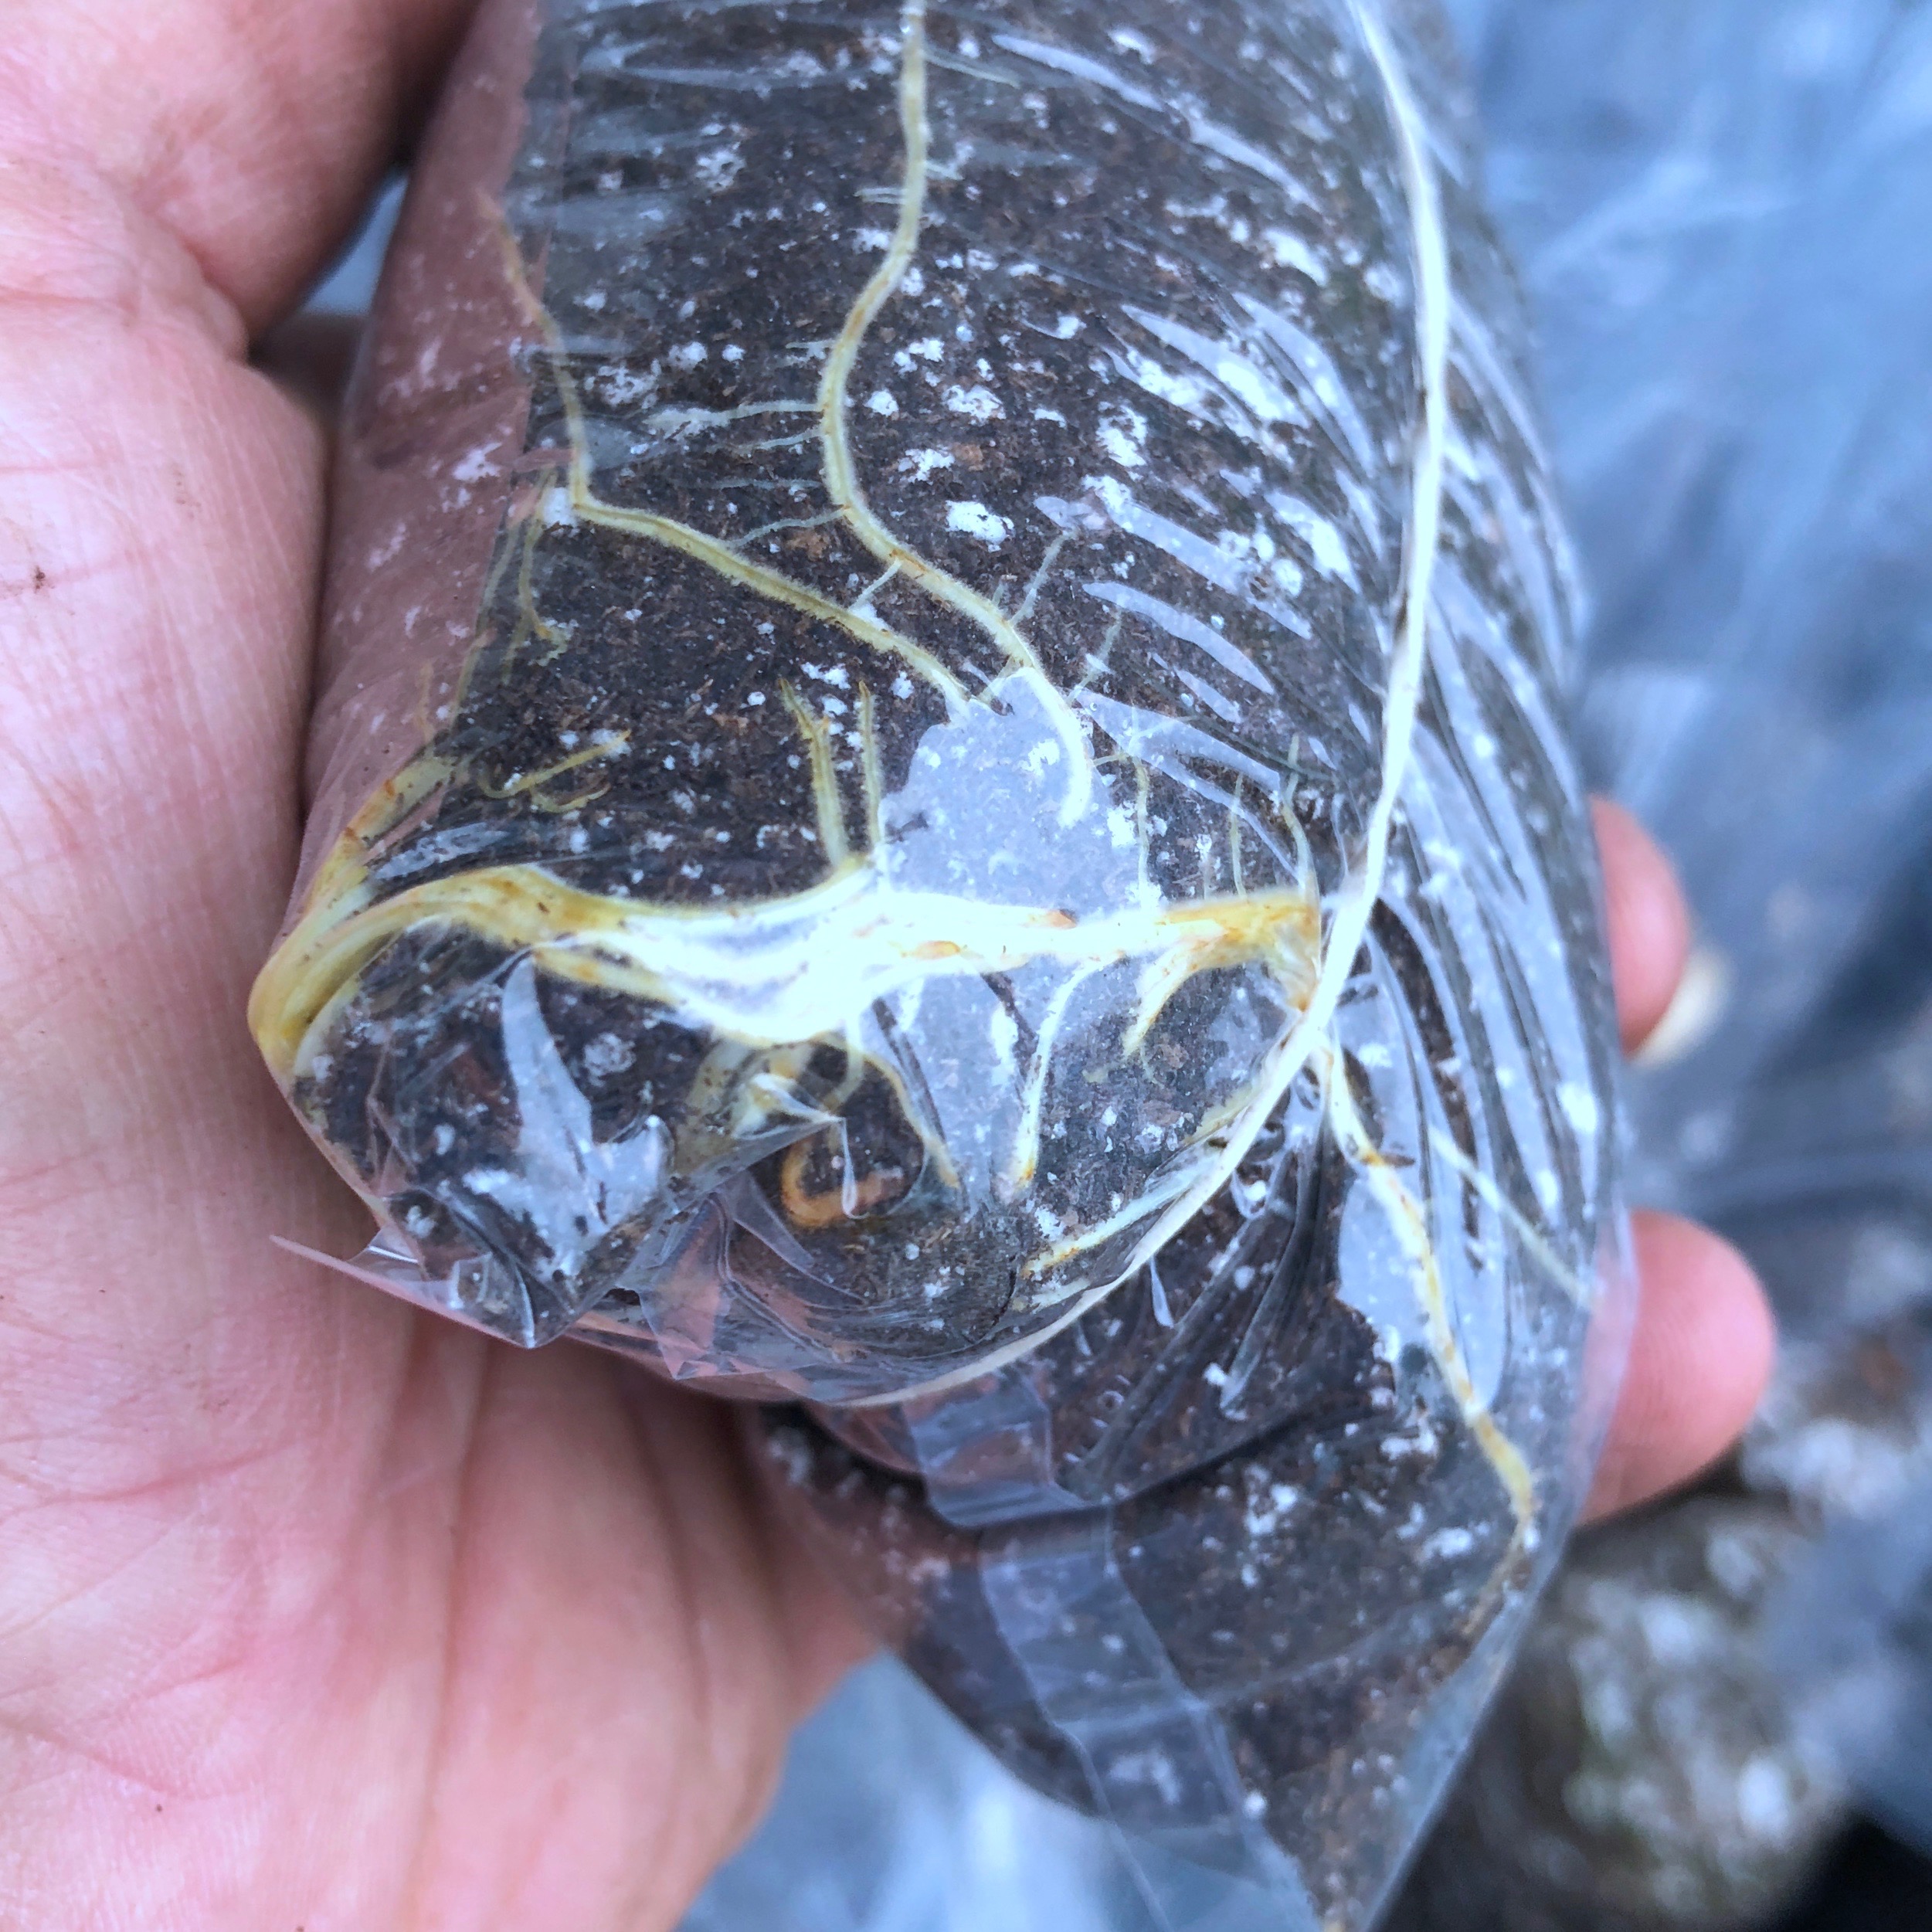
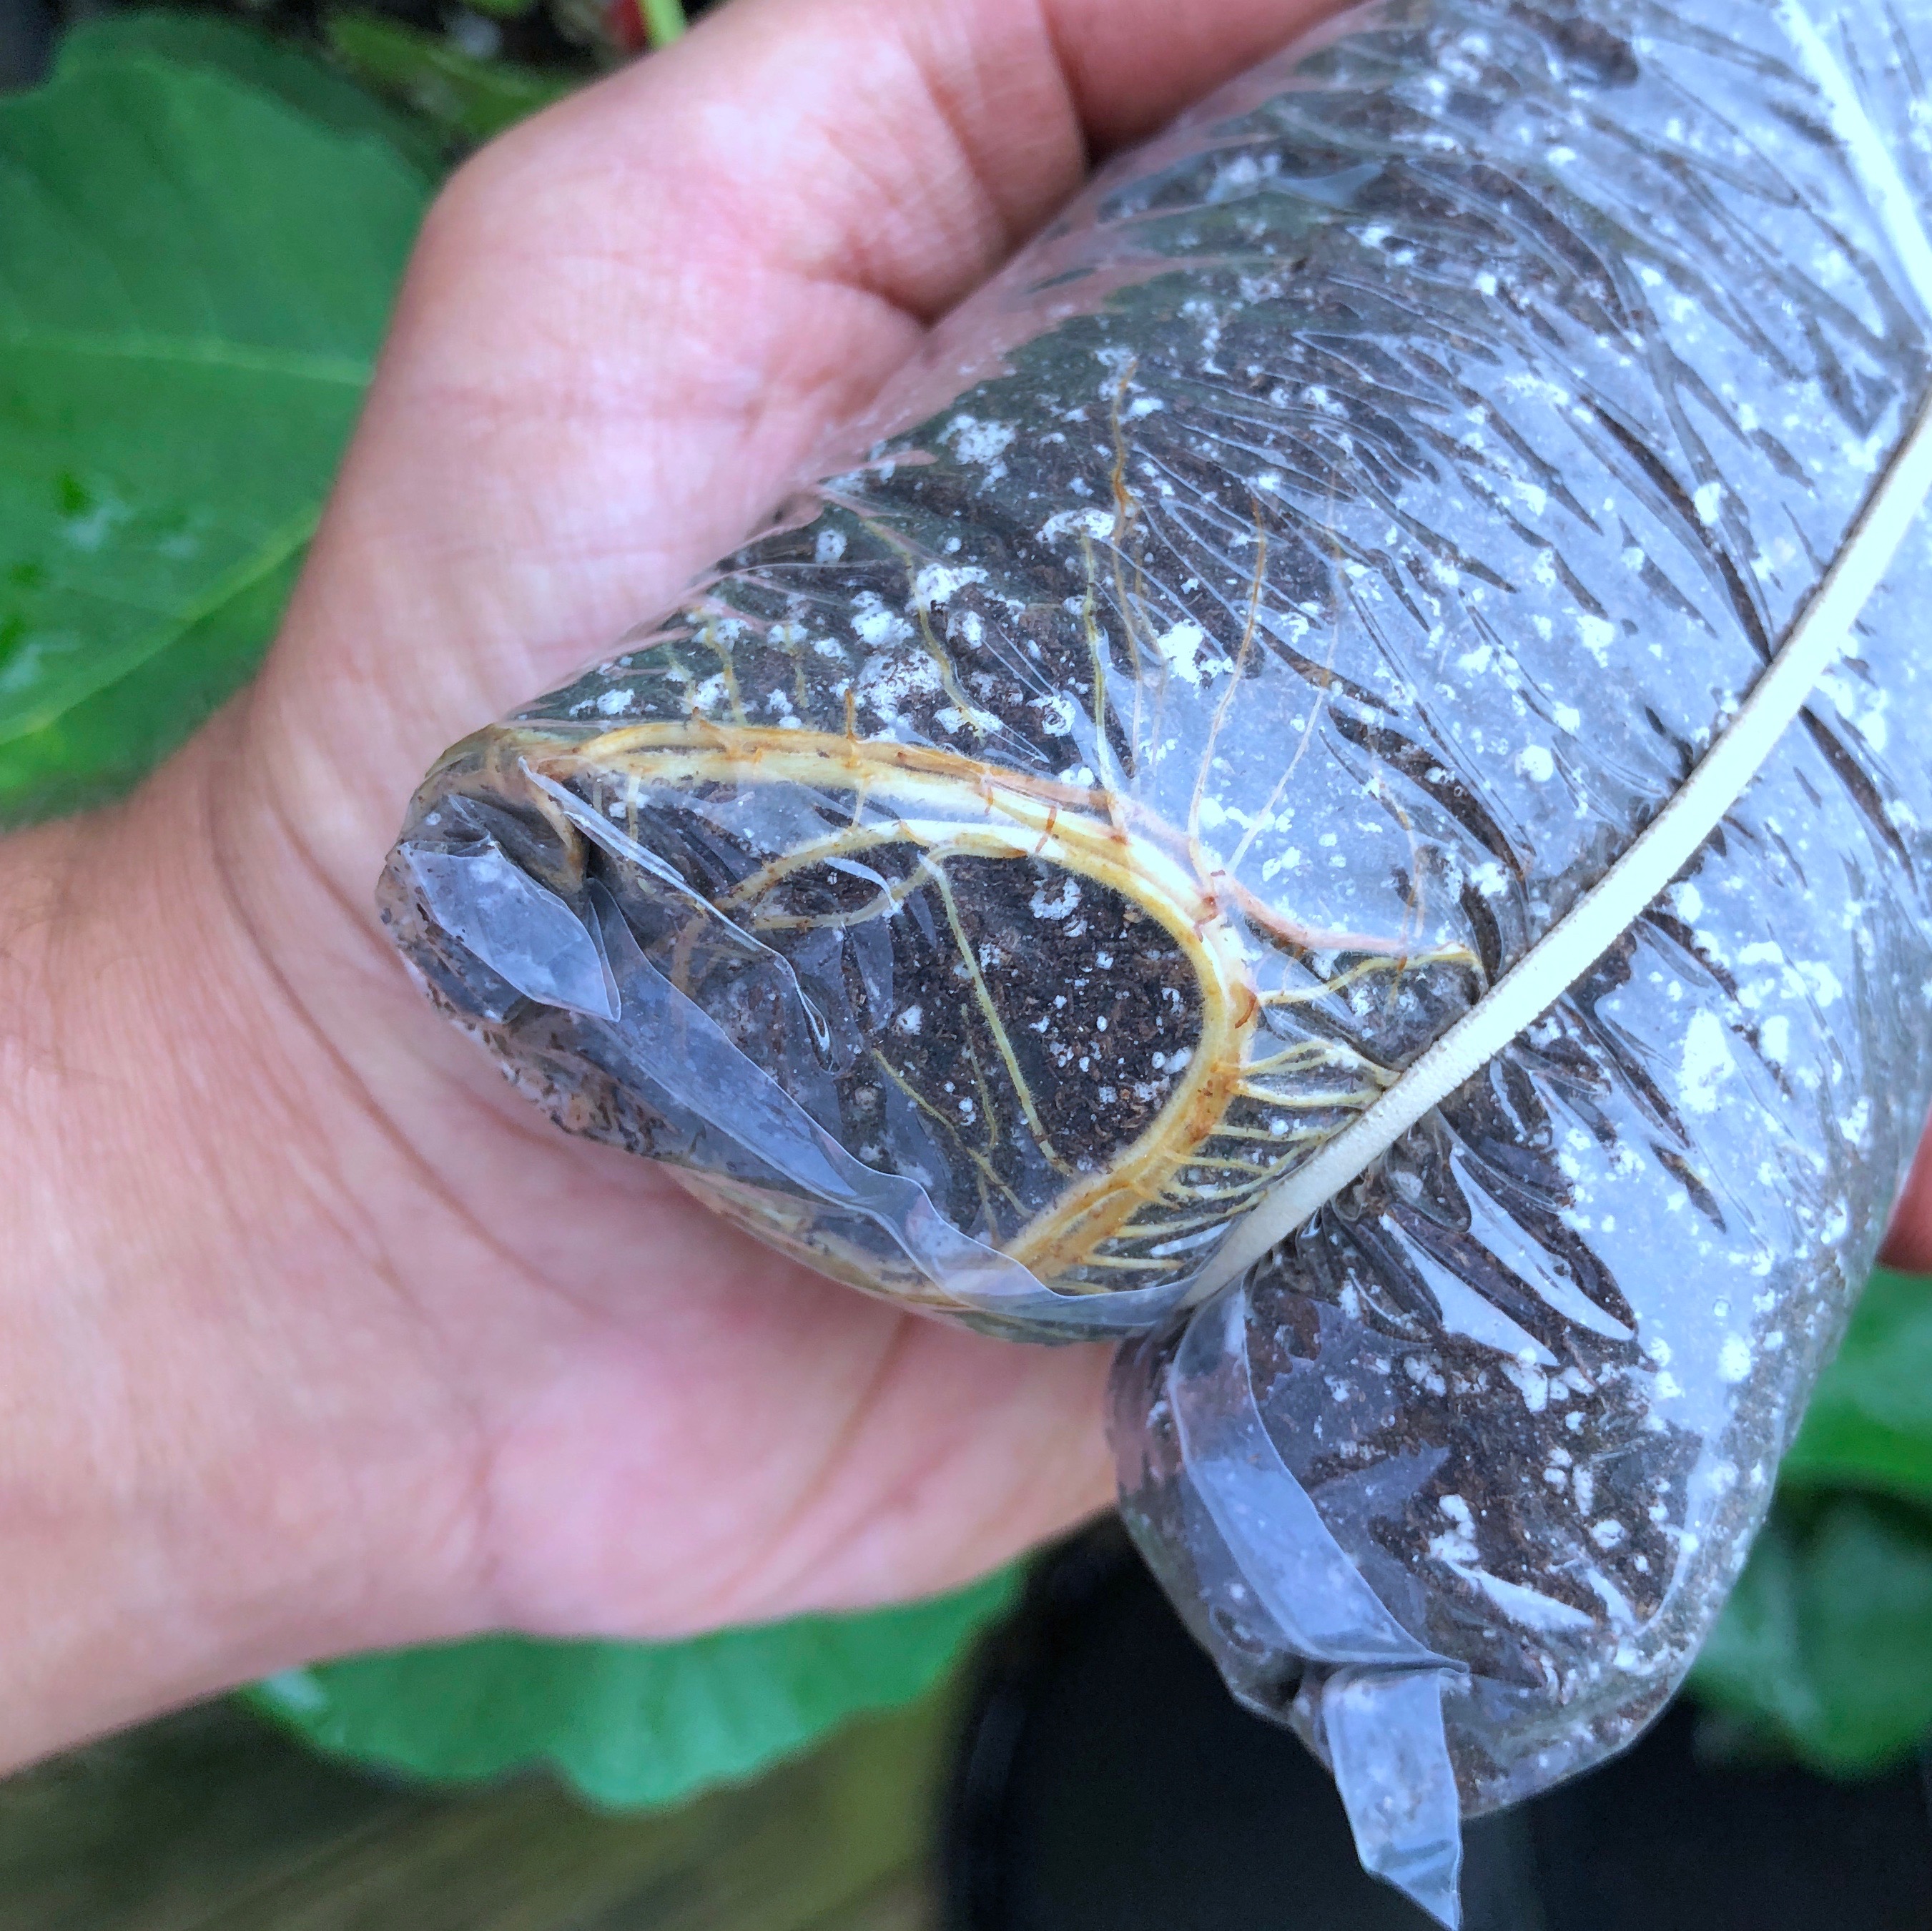
- When roots and top-growth have appeared, use your toothpick to poke several holes on each side of the figPop. If your media dries too quickly cover a few holes with a small piece of transparent tape and make fewer next time. If the media looks like it's too moist, poke more holes 2 at a time. You’re shooting for a little moisture on the inside and that’s all.
-
-
-